


31
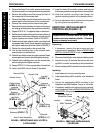
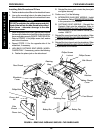
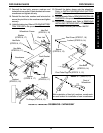
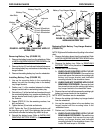
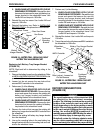
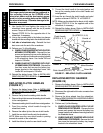
FIGURE 16 - REPLACING CROSSBRACES - CAPTAIN'S SEAT
Note orientation of hex bolt, washers, coved wash-
ers and locknut for installation of new crossbraces.
Front of
Wheelchair
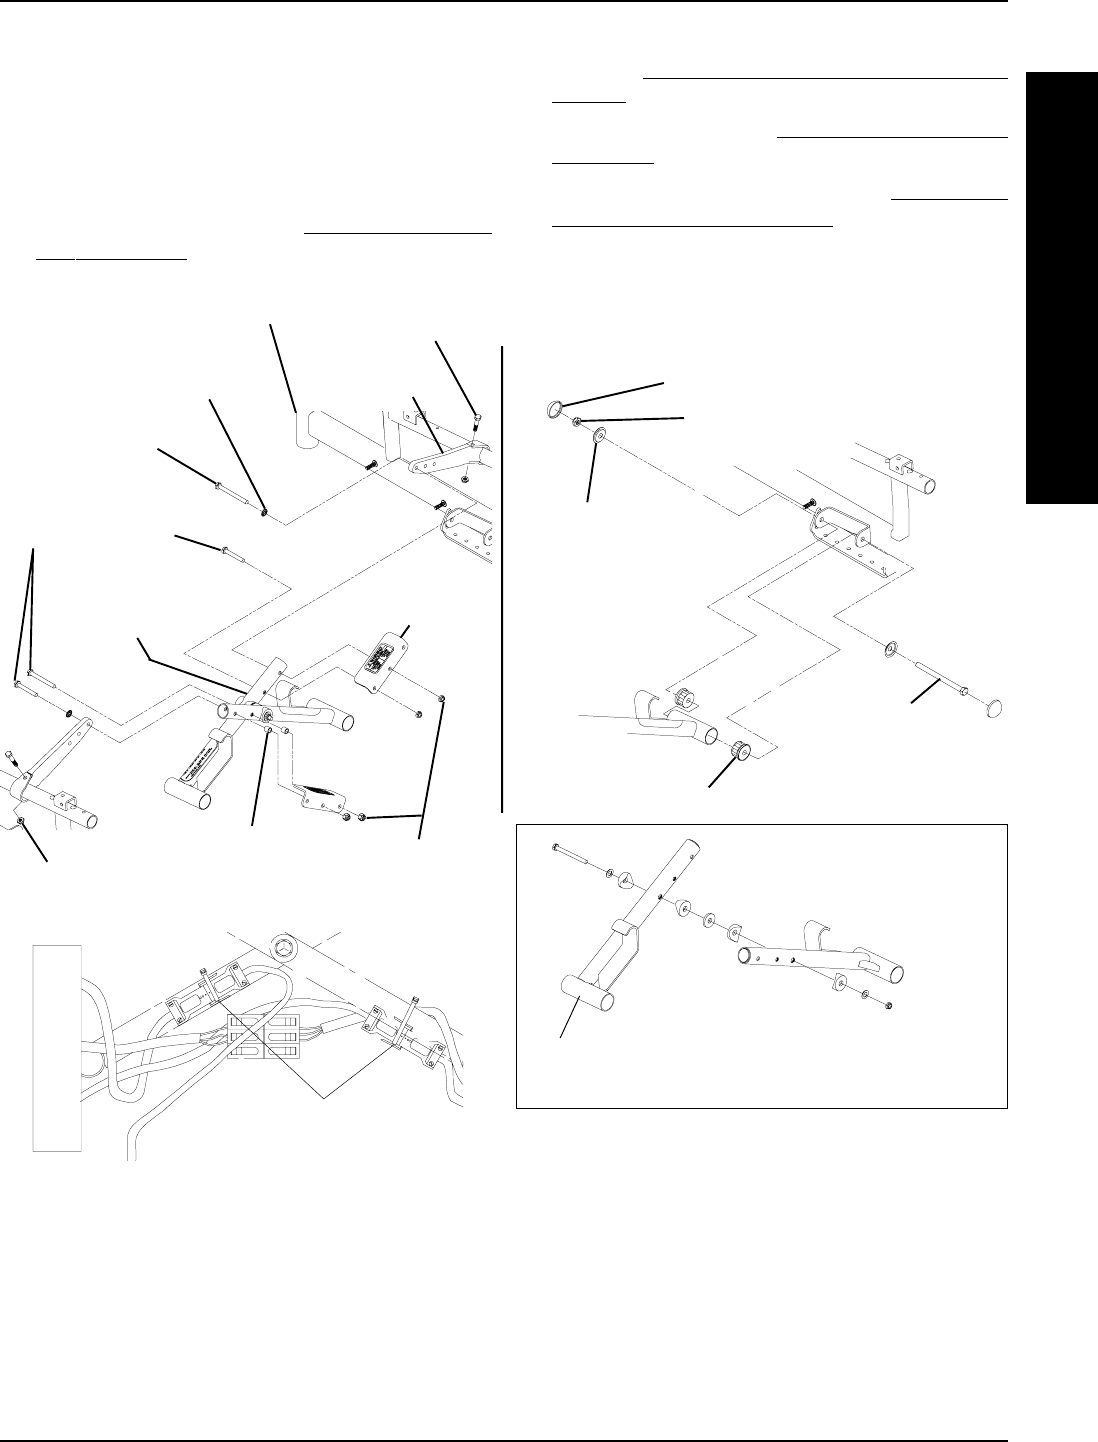
DETAIL "C" - (STEPS 10, 13)
Wheelchair Frame
Locknut
(STEPS 5, 18)
Hex Bolt
(STEPS 5, 18)
Hex Bolts
(STEPS 6, 17)
Locknut
(STEPS 8, 14)
Push Bracket
Crossbrace
Hex Bolts
(STEPS 6, 17)
Pivot Link
Spacer
(STEPS 9, 13)
Pivot Tube Plug Pin
(STEPS 11, 12)
Hex Bolts
(STEPS 9, 14)
Dust Cover
(STEPS 7, 16)
Locknut
(STEPS 6, 17)
Spacer
(STEPS 6, 17)
Washer
(STEPS 6, 17)
Tie Wraps
(STEPS 8, 15)
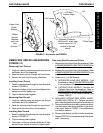
17. Reinstall the hex bolts, spacers, washers and
locknuts that secure the (2) push brackets to the new
crossbraces and tighten securely.
18. Reinstall the hex bolts, washers and locknuts that
secure the pivot links to the crossbraces and tighten
securely.
19. Unfold the battery tray. Refer to
FOLDING BATTERY
TRAY FOR USE in this procedure of the manual.
20. Reinstall the battery boxes onto the wheelchair.
Refer to
INSTALLING/REMOVING BATTERY
BOXES in this procedure of the manual.
21. Reinstall shrouds. Refer to
REMOVING/INSTALLING
SHROUDS in this procedure of the manual.
22. Reinstall the Captain's seat. Refer to
REMOVING/
INSTALLING CAPTAIN'S SEAT in PROCEDURE 9
of the owner's manual, part number 1080737.
PROCEDURE 8FWD WHEELCHAIRS
F
W
D
W
H
E
E
L
C
H
A
I
R
S