


22
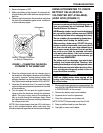
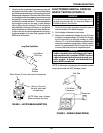
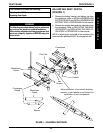
HEEL LOOP REPLACEMENT
(FIGURE 3)
1. Note the position of the hex bolt, coved washers and
locknut for reinstallation.
2. Remove the hex bolt, coved washers and locknut
that secure the lower footrest to the footrest support.
3. Remove the lower footrest.
4. Remove the phillips bolt, spacer and locknut that se-
cure the existing heel loop to the lower footrest.
5. Slide the existing heel loop off the lower footrest.
6. Replace heel loop.
7. Reverse STEPS 1-6 to reassemble.
NOTE: When securing the heel loop to the lower foot-
rest, tighten the phillips screw and locknut until the spacer
is secure.
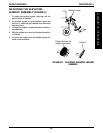
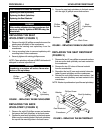
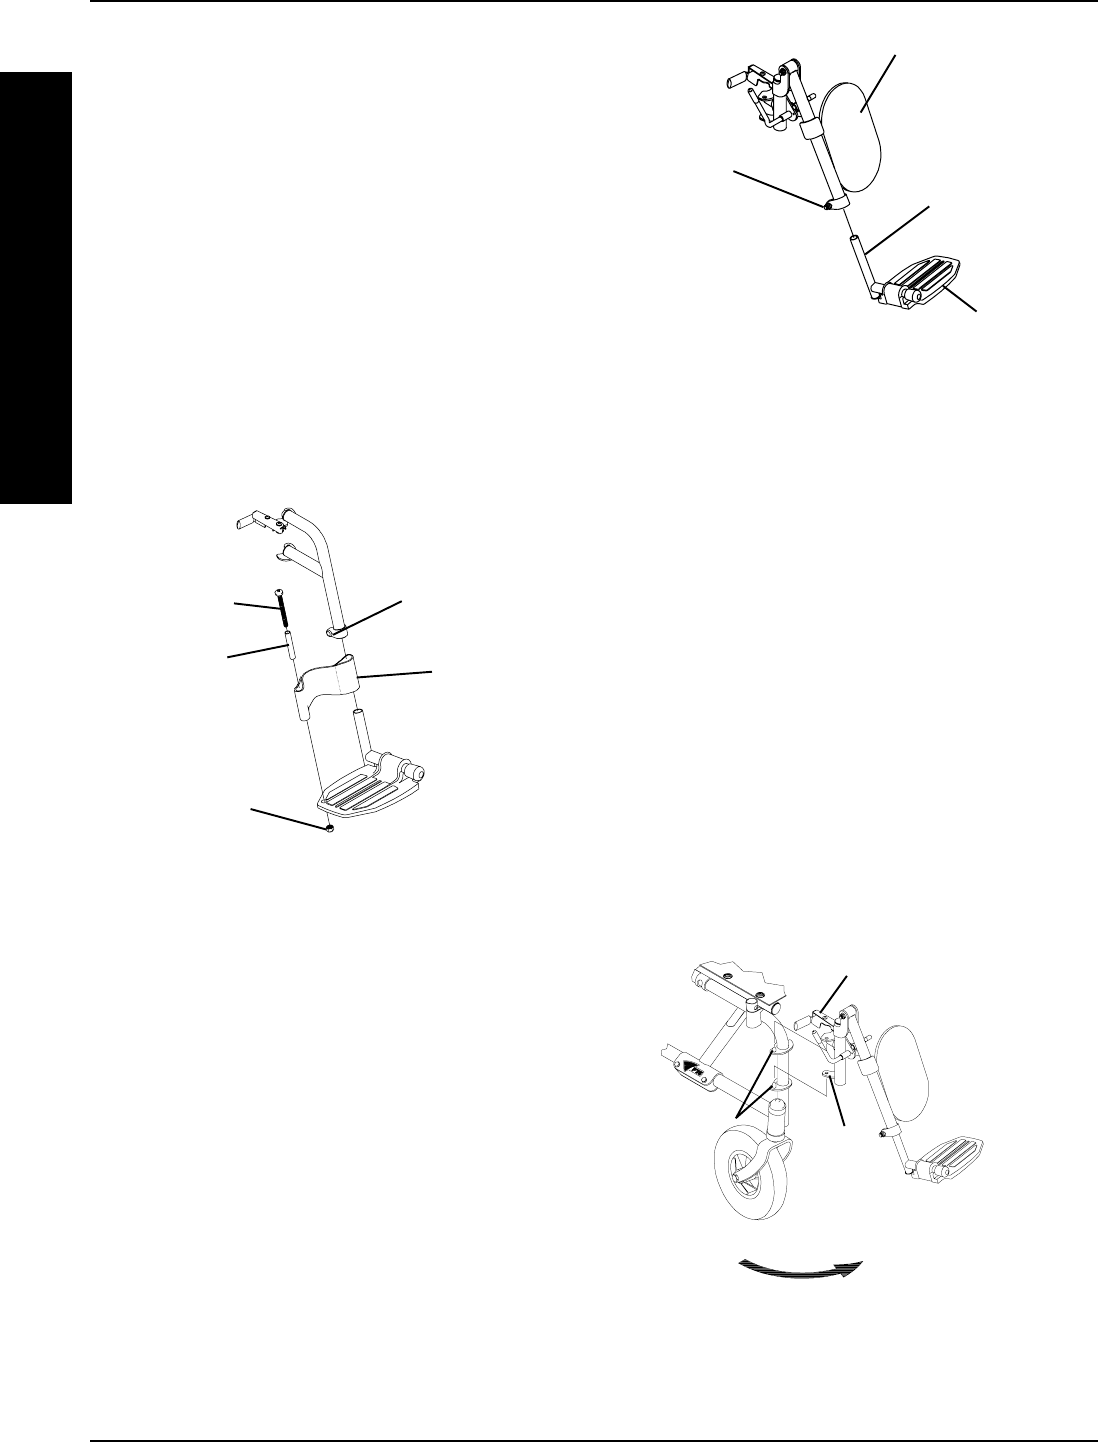
ELEVATING LEGREST ASSEMBLY
INSTALLATION (FIGURES 4 AND 5)
1. Insert the lower footrest assembly into the calfpad assem-
bly and secure it with the bolt and locknut (FIGURE 4).
Lower
Footrest
Assembly
Footplate
Calfpad Assembly
Bolt and
Locknut
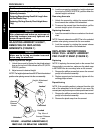
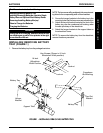
2. Place legrest assembly on the outside of the wheel-
chair and install the hinge plates onto the hinge pins
on the wheelchair frame (FIGURE 5).
3. Rotate legrest assembly toward the inside of the
wheelchair until it locks in place (FIGURE 5).
NOTE: The footplate will be on the inside of the wheel-
chair when locked in place.
4. Repeat this procedure for other legrest assembly.
5. After seated in wheelchair, adjust footrest to correct
height by loosening the nut and sliding the inner tube
up or down until desired height is achieved.
6. To release the legrest, push the legrest release handle
toward the inside of the wheelchair (facing the front
of the wheelchair) and swing the legrest assembly to
the outside of the wheelchair.
Hinge Pins
F
R
O
N
T
R
I
G
G
I
N
G
S
PROCEDURE 2 FRONT RIGGINGS
Legrest Release Handle
Phillips Screw
Spacer
Locknut
Bolt and Locknut
FIGURE 3 - HEEL LOOP REPLACEMENT
Heel Loop
FIGURE 4 - INSTALLING LOWER FOOTREST
ASSEMBLY
Hinge
Plates
FIGURE 5 - INSTALLING LEGREST ASSEMBLY
ONTO THE WHEELCHAIR