Part No. 1080556 Rev. I 61 Solara™
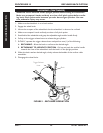
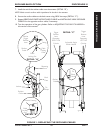
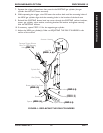
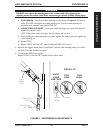
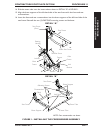
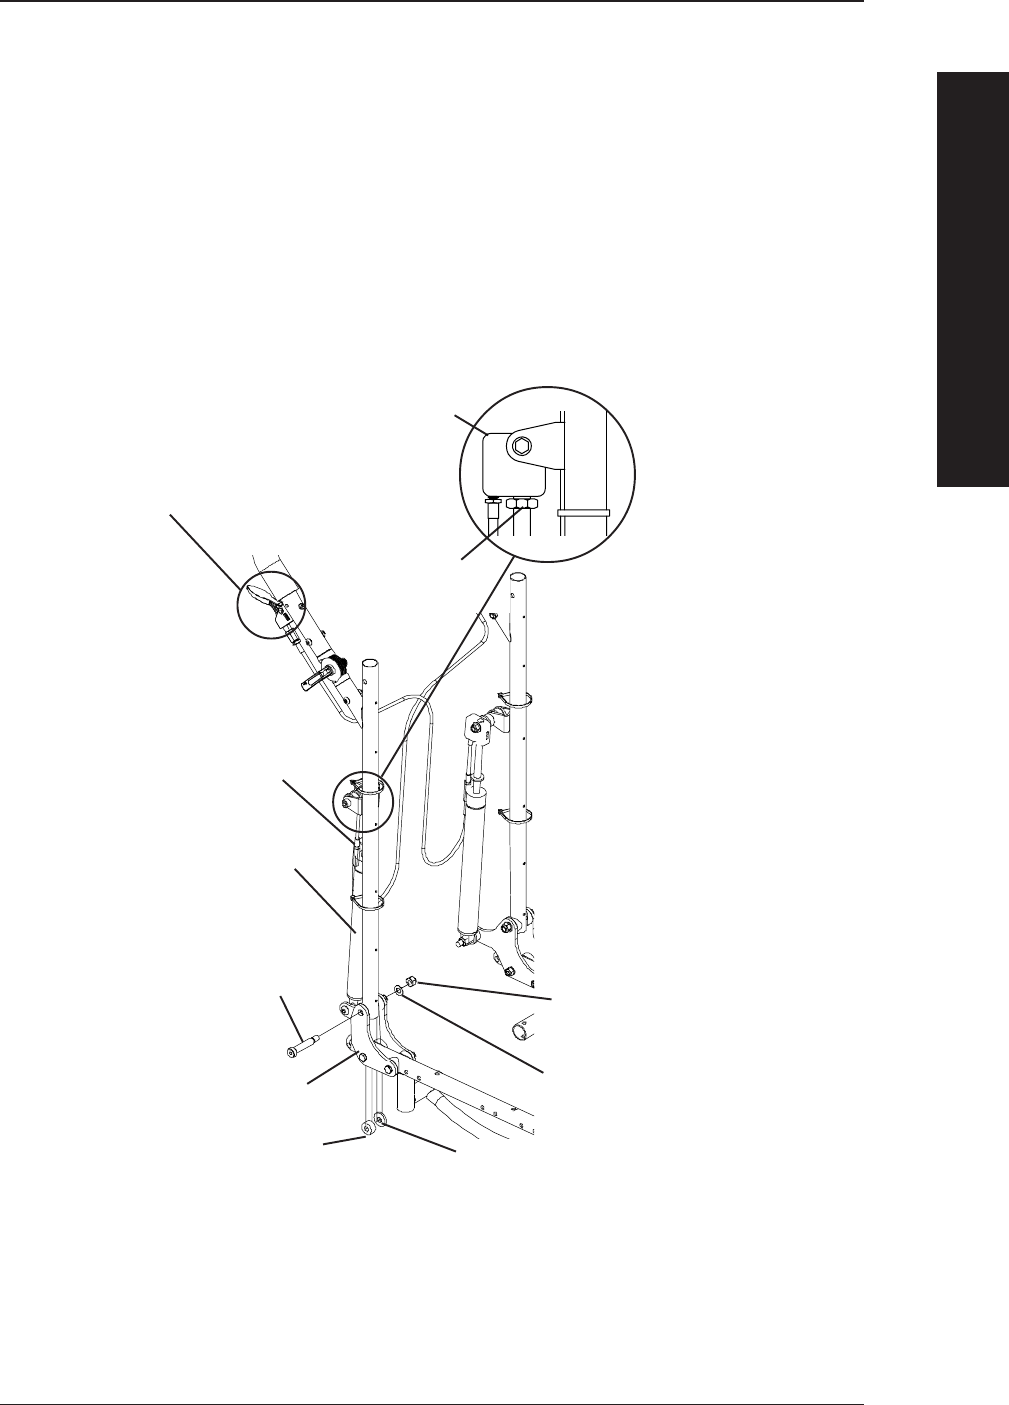
FIGURE 4 - REPLACING THE GAS CYLINDERS
RECLINER BACK OPTION
7. Squeeze the trigger release lever that controls the EXISTING gas cylinder (the gas
cylinder that has NOT been removed).
8. While squeezing the trigger, raise OR lower the recliner back until the mounting holes of
the NEW gas cylinder align with the mounting holes in the bracket of the back cane.
9. Reinstall the EXISTING button head cap screw through the EXISTING recliner brackets,
spacer, gas cylinder, nylon washer, mounting bracket and washer and tighten securely
with the EXISTING locknut.
10. If necessary, repeat STEPS 1-9 for the opposite gas cylinder.
11. Adjust the NEW gas cylinder(s). Refer to
ADJUSTING THE GAS CYLINDERS in this
section of the manual.
RECLINER BACK OPTION
Actuator Housing
Spacer
(STEPS 2, 9)(STEPS 2, 9)
(STEPS 2, 9)(STEPS 2, 9)
(STEPS 2, 9)
Bracket
Washer
(STEPS 2, 9)(STEPS 2, 9)
(STEPS 2, 9)(STEPS 2, 9)
(STEPS 2, 9)
Locknut
(STEPS 2, 9)(STEPS 2, 9)
(STEPS 2, 9)(STEPS 2, 9)
(STEPS 2, 9)
Jam Nut
(STEPS 1, 4, 6)(STEPS 1, 4, 6)
(STEPS 1, 4, 6)(STEPS 1, 4, 6)
(STEPS 1, 4, 6)
Cylinder Rod
Gas Cylinder
Button Head Cap Screw
(STEPS 2, 9)(STEPS 2, 9)
(STEPS 2, 9)(STEPS 2, 9)
(STEPS 2, 9)
Nylon Washer
(STEPS 2, 9)(STEPS 2, 9)
(STEPS 2, 9)(STEPS 2, 9)
(STEPS 2, 9)
Squeeze Trigger Release
Lever To Align Mounting
Holes
(STEP 7, 8)(STEP 7, 8)
(STEP 7, 8)(STEP 7, 8)
(STEP 7, 8)
PROCEDURE 10
RECLINER BACK OPTION


