


Part No. 1080556 Rev. I 47 Solara™
POSITIONING TILT LOCKING COLLARS
WARNING
Anterior (forward) tilt is a feature of this wheelchair designed for the USE OF
A HEALTHCARE PROFESSIONAL or ASSISTANT ONLY. Engagement of the
anterior (forward) tilt must NEVER be performed by the wheelchair user.
When anterior (forward) tilt is needed, it must ALWAYS be engaged by a
HEALTHCARE PROFESSIONAL or ASSISTANT.
The back height, seat depth, back angle, seating system, tilt angle, seat height, size/
position of the rear wheels, size/position of the front casters, as well as the user
condition directly relate to the stability of the wheelchair. Any change to one (1) or
any combination of the eleven (11) may cause the wheelchair to decrease in stabil-
ity. These adjustments MUST be performed by a qualified technician.
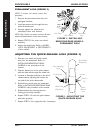
DO NOT operate the wheelchair when the seat frame is in the anterior (for-
ward) tilt position (frame stops in the lower position and approximately 10°
forward tilt). Serious bodily injury may occur to the patient and the assistant(s).
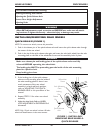
TO HEALTHCARE PROFESSIONALS/ASSISTANTS:
Make sure the occupant of the wheelchair is properly positioned.
Always engage both wheel locks.
After ANY adjustments, repair or service and BEFORE use, make sure all
attaching hardware is tightened securely and locking collars are positioned at
the same position on the tilt slide.
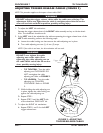
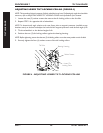
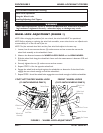
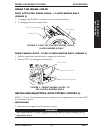
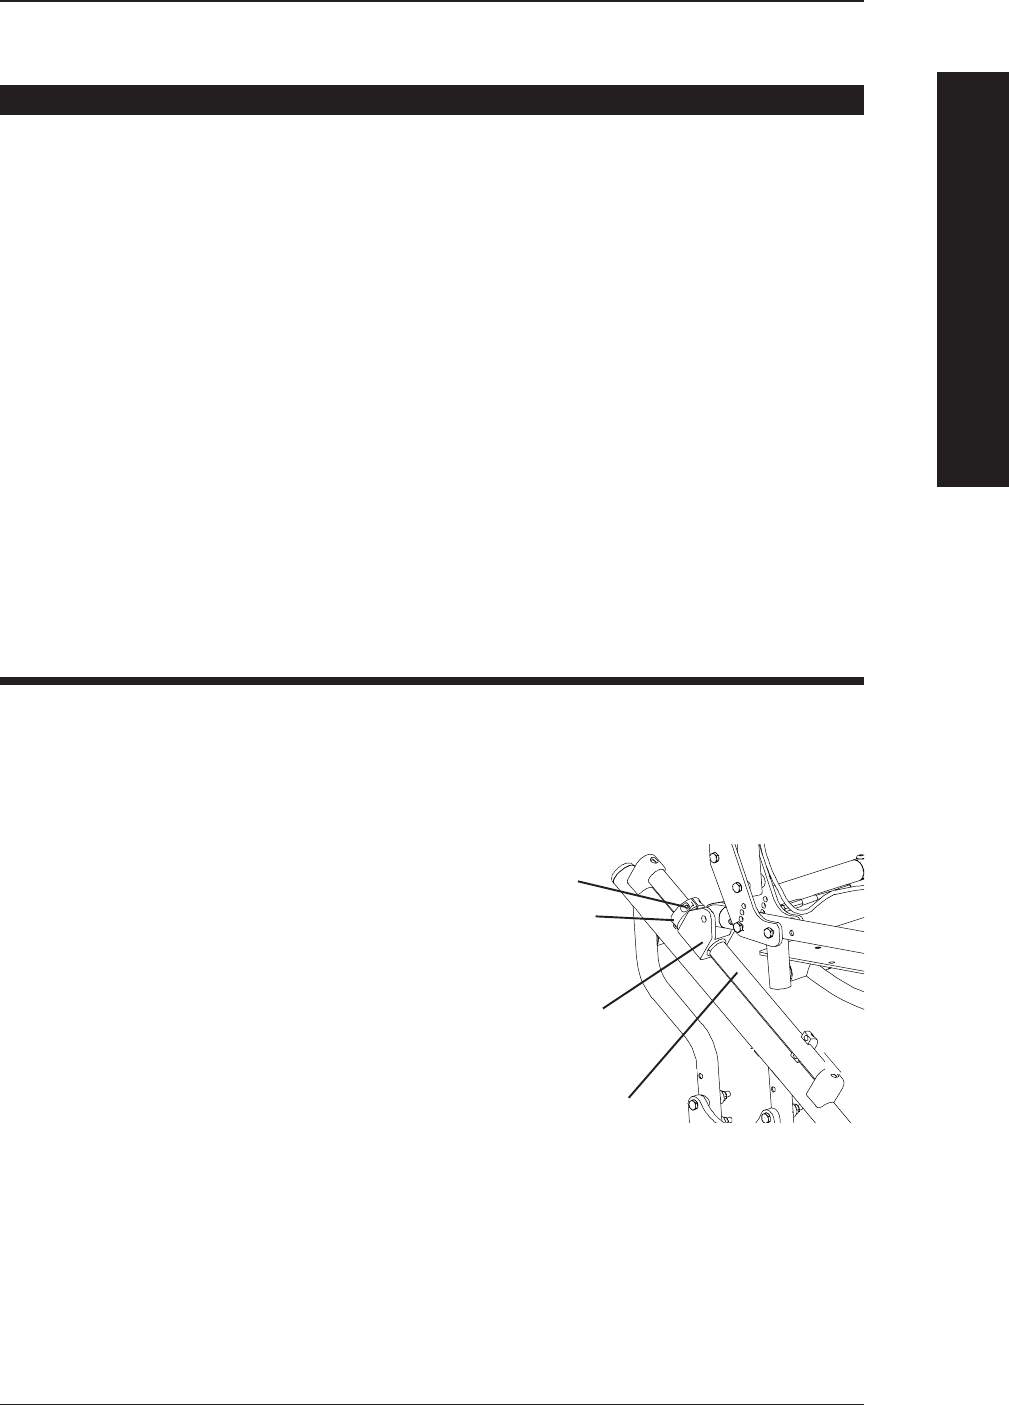
ADJUSTING UPPER TILT LOCKING COLLAR (FIGURE 3)
NOTE: This procedure adjusts the degree of tilt that the wheelchair returns to for normal operation. If the
amount of tilt MUST be limited, refer to ADJUSTING LOWER TILT LOCKING COLLAR in this procedure
of the manual.
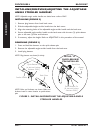
1. Loosen the two (2) socket screws that
secure the tilt locking collar to the tilt
slide.
2. Repeat STEP 1 for opposite side of
wheelchair.
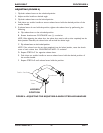
NOTE: To determine tilt angle relative to the seat
frame, place a magnetic protractor (available at any
hardware store) on the back and adjust the back
until the magnetic protractor reads desired angle of
tilt.
3. Tilt the wheelchair to the desired angle of
tilt.
NOTE: The Solara seat frame is at a 5° back angle relative to the ground.
4. Position the two (2) tilt locking collars against the bearing housing.
NOTE: Before tightening, ensure that the two (2) tilt locking collars are at the same position on the tilt slide.
5. Securely tighten the four (4) socket screws of the tilt locking collars.
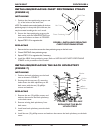
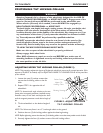
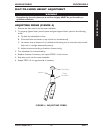
TILT-IN-SPACE
Socket Screw
Upper Tilt
Locking Collar
Tilt Slide
Bearing Housing
FIGURE 3 - ADJUSTING UPPER
TILT LOCKING COLLAR
TILT-IN-SPACE
PROCEDURE 7
TILT-IN-SPACE