


28 Functional verification Welch Allyn VSM 300 Series
Battery
1. With the monitor power off, disconnect the battery substitution-cable connector.
2. Install and connect the battery.
3. Connect the AC power adapter to the monitor.
4. Verify that the AC mains indicator is illuminated on the monitor front panel.
The indicator could be flashing or steady, depending on the state of the battery.
flashing indicates that the battery is charging; steady indicates that the
battery is charged to at least 90% capacity.
5. Charge the battery for a minimum of 12 hours (until stops flashing).
6. Disconnect the AC power adapter.
7. Turn the monitor on and set it up as follows:
8. Note the time and let the monitor run until low battery ( flashing) is indicated.
(Run time for a new, fully charged battery is at least 12 hours.)
9. Charge the battery for a minimum of 12 hours (until stops flashing).
10. Disconnect the ac power adapter.
11. Start the monitor in Service Mode.
12. Press repeatedly until “Battery: X.XXV appears in the message window.
13. Verify that the voltage is
6.10 V.
Patient isolation test
Patient isolation test - overview
To verify proper patient isolation, it is important to run this test following any procedure in
which the monitor is opened.
Note
This test is to be performed only as part of a complete functional verification
procedure.
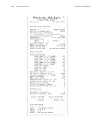
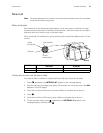
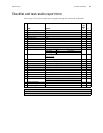
NIBP Auto Interval OFF
Printer, if present OFF (not printing)
SpO
2
sensor
(if SpO
2
option is present)
Disconnected
Temperature probe
(if temperature option is present)
Either connected or disconnected
Note
This test is to be performed only as part of a complete functional verification
procedure.
WARNING Failure to run the dielectric test when indicated could cause serious
injury to patients, and could lead to damage to the monitor.