0611 RM500SL User’s Guide Version 2.8 Page 29
6.6 Network printer setup
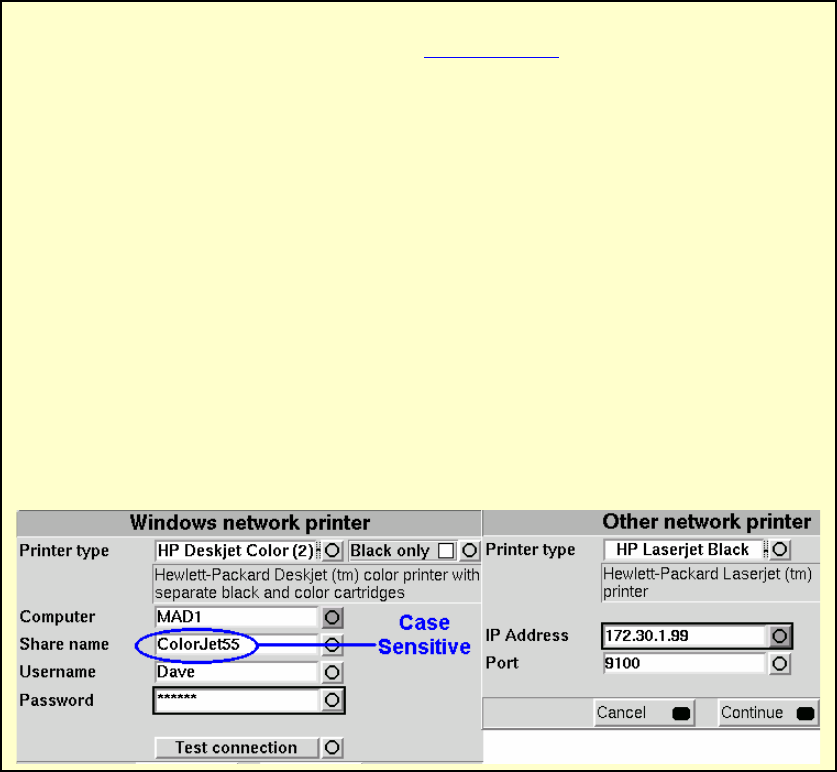
FastFacts 6.6: Network printer setup
To print to a network printer or to a Windows-shared printer on the network, you
must first enable networking. See section 5: Networking. To print to a printer on a
Windows PC connected to a network, you must also share the printer on the PC by
selecting Start, Settings and Printers. Then right click on the printer you wish to
share and select Sharing. Only PCL 3, PCL 5 or PostScript compatible printers
are supported. In Windows2003 Server you must add permission to allow
Anonymous Logon to print to the shared printer.
1) Press <Setup>, then highlight and <PICK> [Printing].
2) Highlight & <PICK> [Other network printer] or [Windows shared printer].
3) Highlight & <PICK> [Printer details] (automatic if printer type is set to None).
4) Highlight & <PICK> [Printer type], then select from Deskjet Color(1) (single ink
cartridge), Deskjet Color(2) (both color and black ink cartridges), Laserjet Black
or PostScript. Check [Black only] for black printouts on a color printer.
5) Connect a computer keyboard to the USB port and fill in the boxes with the
requested information. Highlight and <PICK> each box to open it for data entry
and again to close it (or use the Enter key on the keyboard’s numeric keypad).
Obtain needed information from your network administrator.


