


20
For more information, see NTP Configuration Notes, page 10.
Step 12 A message appears asking whether to reboot your system now. Reboot your system before you
start Step 13.
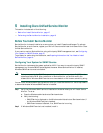
Step 13 After the installation completes, verify that Service Monitor was installed correctly by starting
Service Monitor. See Starting Cisco Unified Service Monitor, page 26.
After You Install Service Monitor
You should exclude the NMSROOT\databases directory from virus scanning. Problems can arise if
database files are locked because of virus scanning.
Note NMSROOT is the directory where Service Monitor is installed on your system. If you selected
the default directory during installation, it is C:\Program Files\CSCOpx.
6 Upgrading to Cisco Unified Service Monitor 2.0
This section includes the following:
• Before You Upgrade to Service Monitor 2.0, page 20
• Performing the Upgrade to Service Monitor 2.0, page 21
• Performing Post-Upgrade Configuration, page 24
Before You Upgrade to Service Monitor 2.0
It is recommended that you delete existing sensor configuration and binary image files from your
existing TFTP servers before you perform the upgrade. Delete the following files:
• Sensor configuration files: One QOVDefault.CNF file and a QoVMACAddress.CNF file for each
sensor.
• Binary image file: SvcMonAA2_24.img.
You must perform post-upgrade configuration immediately after you upgrade to the Service Monitor
2.0 software, or the sensors will be unable to register to Service Monitor; for more information, see
Performing Post-Upgrade Configuration, page 24.
If you plan to add Cisco Unified CallManagers to Service Monitor, configure the server to use NTP
before you upgrade. For more information, see NTP Configuration Notes, page 10.