17
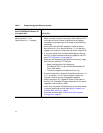
• An Advanced Server with terminal services enabled in application server mode.
• A system with Internet Information Services (IIS) enabled.
• A system that does not have name lookup.
• A system with 2 network interface cards (NICs).
We recommend that you:
• Install Service Monitor on a system that has a static IP address.
• Disable the virus scan software on your system. You can restart it after installation is complete.
Before You Begin
Make sure your system meets the prerequisites:
• Required (or desired) operating system upgrades have been performed.
• Required Windows service packs are installed.
• Required minimum amount (or more) of RAM is available.
Close all open or active programs. Do not run other programs during the installation process.
Installing Service Monitor
Step 1 As the local administrator, log in to the machine on which you will install the Service Monitor
software, and insert the Service Monitor CD-ROM into the CD-ROM drive. The Cisco
Unified Service Monitor 2.0 Setup Program window opens.
If the CD-ROM is already in the CD-ROM drive and you stopped the installation process to
close programs or if Autostart is disabled, click Setup.exe to restart the process.
Step 2 Click Install. The Welcome window appears.
Step 3 Click Next. The Software License Agreement window appears.
Step 4 Click Accept. The Licensing Information window appears.
Step 5 Select one of the following, and then click Next:
• License File Location—Browse to enter the location. For instructions on obtaining a
license file, see Licensing, page 4.
• Evaluation Only—You can complete the upgrade and then register the license file later;
see Adding Licenses to an Installed Service Monitor, page 6.
Note For instructions on obtaining a license file, see Licensing, page 4.


