19
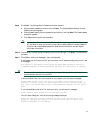
Step 9 Click Next. The Change Admin Password window appears:
a. Enter an admin password, confirm, and click Next. The Change System Identity Account
Password window appears
b. Enter a System Identity Account password (and confirm), and click Next. The Create casuser
dialog box appears.
c. Click Yes to continue with the installation.
Note If you selected the Custom installation mode, during this part of the installation you
will be asked to enter the following information: guest password, causer password,
Common Services database password, Web server information, and self-signed
certificate information.
Step 10 The Summary window appears, displaying the current settings. Click Next. The installation
proceeds.
Step 11 Click OK on additional messages if they are displayed:
If the system has more than one NIC and more than one IP address configured, you will see
this message:
This machine is multihomed. Please update the MULTI-HOME properties section in
C:\PROGRA~2\CSCOpx\lib\vbroker\gatekeeper.cfg after the installation is complete.
Caution Do not run Service Monitor on this system; uninstall Service Monitor and install it on
another system that has only one NIC.
If Windows SNMP service is not installed on your system, you will see this message:
Windows SNMP service is not installed on your system. This installation will
continue. To install support for system application and host resources MIBs, you
must install the Windows SNMP service, using Add/Remove Programs from the Control
Panel.
If you installed Service Monitor for evaluation only, you will see this message:
Please obtain a valid license key from CCO within 90 days.
You will see a dialog box with the following message displayed:
Before you reboot this system, configure automatic time synchronization on it
using NTP. Configure this system to use the time server that is used by Cisco
Unified CallManagers in your network.


