


76
© Copyright 1970-2008 Kirby Morgan Dive Systems, Inc. All rights reserved. Document # 080508001
Kirby Morgan 37 & 57
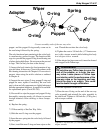
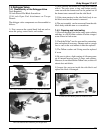
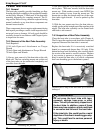
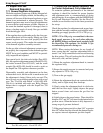
Installing the packing nut on the valve stem.
5) To remove the emergency valve body from the
side block the one way valve assembly must first be
removed.
6) If the emergency valve body was removed, clean
and inspect the pipe thread and inspect for damaged
threads, cracking or distortion. Replace the emer-
gency valve if any damage is present.
Re-tape threads with Teflon tape, 11/2 wraps starting
two threads back, tighten using good engineering
practice. To reinstall the emergency valve body onto
the side block, the one-way valve assembly must be
removed first.
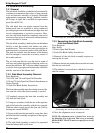
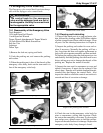
7.5.3 Reassembly of Emergency Valve
1) Lightly lubricate the stem threads in the body as
well as the bonnet threads.
2) Replace the washer and packing on the stem , then
lightly lubricate the stem shaft and threads.
NOTE: There are two different packing (s) and
washers supplied in the kit (525-311), for rebuild-
ing both the older style and the newer high flow
emergency gas valve. Match the removed packing
and washers to the new ones supplied and discard
the others.
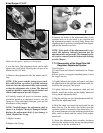
3) Holding these components in place on the stem,
screw the stem into the emergency gas valve body.
4) Rotate the stem until it is seated all the way in then,
back it out -1/2 turn.
5) T
hread the packing nut onto the emergency valve
body. Run the nut in and tighten slightly with a
wrench.
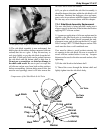
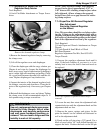
6) Inspect the emergency gas valve knob for wear and
damage. Ensure the flats that engage the valve stem
shaft are not rounded, cracked or damaged. The valve
knob should not have rotational play greater than 1/8th
of a turn.
NOTE: This knob is not interchangeable with the
defogger valve knob.
7) Place the emergency gas valve knob onto the stem
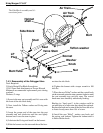
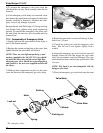
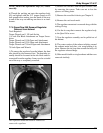
The emergency valve
Valve Body
Valve Stem
Packing nut
Knob
Spring
Lock nut
Packing
Washer