


81
Kirby Morgan 37 & 57
© Copyright 1970-2008 Kirby Morgan Dive Systems, Inc. All rights reserved. Document # 080508001
7.7.3 Inspection of SuperFlow 350
Regulator Body Interior
Tools Required:
1/4 inch Flat Blade Attachment on Torque Screw-
driver
Remove the demand regulator clamp.
Use only replacement diaphragms manu-
factured by Kirby Morgan. Use of other
diaphragms may degrade performance
and may cause increased breathing re-
sistance. This can lead to fatigue and the
inability to work at full capacity.
WARNING
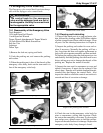
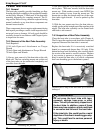
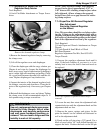
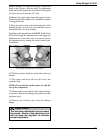
1) Remove the demand regulator clamp by removing
the clamp screw.
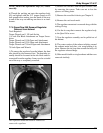
2) Lift off the regulator cover and diaphragm.
3) Clean the diaphragm with the soapy solution, per
Chapter 6 and wipe dry. Inspect the diaphragm for
holes, tears or any signs of deterioration by holding it
up to a white light and stretching and pulling. Check
for a good bond between the metal disc and the sili-
cone. Replace diaphragm if any doubt exists.
4) Inspect the interior of the demand regulator body
for damage, corrosion and cleanliness. Clean the in-
terior of the regulator body if necessary per Chapter
6.
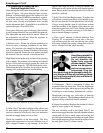
6) Reinstall the diaphragm, cover, and clamp. Tighten
the clamp screw to the recommended torque to 12
inch pounds using a torque screwdriver.
NOTE: Older regulator clamps, when properly
torqued, had a gap of approximately 1/32” to
1/16” between the retaining clamp surfaces when
fully tightened. All new clamps when properly
torqued, have little or no gap between the retain-
ing clamp surfaces.
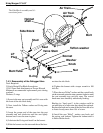
7.7.4 SuperFlow 350 Demand Regulator
Bias Adjustment
Servicing, Demand Regulator
on the Helmet
Note: This procedure should be used when replac-
ing the O-ring on the adjustment shaft and or
cleaning and lubricating the shaft threads during
field repairs of the demand regulator on the helmet.
Start at the adjustment knob end of the regulator:
Tools Required:
3/4 inch Open-end Wrench Attachment on Torque
Wrench
3/32 inch Punch & Small Block of Wood
Ball-Peen Hammer
Regulator Adjustment Tool Kit, Part #525-620
Torque Wrench
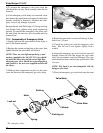
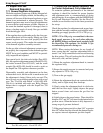
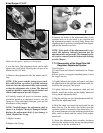
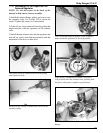
1) Unscrew the regulator adjustment knob until it
stops. If the knob wobbles as you turn it, or is ex-
tremely hard to turn, the shaft is bent and needs to
be replaced.
Screw the regulator adjustment knob out for
removal.
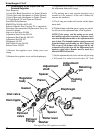
2) Loosen the nut, then rotate the adjustment knob
counterclockwise until the adjustment knob and the
adjustment shaft are free.
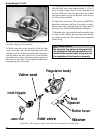
3) Remove the spacer, springs, and piston. At this
point the threads can be cleaned and lubricated as
well as the adjustment shaft.
4) Punch out the roll pin using a 3/32 punch. Use a
block of wood with a 1/4” hole drilled through it to
support the knob. Position the knob so the roll pin