68
© Copyright 1970-2008 Kirby Morgan Dive Systems, Inc. All rights reserved. Document # 080508001
Kirby Morgan 37 & 57
Chapter 7.0
Breathing System Maintenance and Repairs
7.1 Introduction
This chapter covers the maintenance and repair of all
components of the breathing system. The breathing
system includes the one way valve, the emergency
valve, the side block, the bent tube assembly, the
demand regulator, and the oral/nasal mask.
The breathing systems on all Kirby Morgan helmets
and masks are simple and highly reliable. The fact that
they can continue to operate when the components are
not in a well-maintained condition can cause divers
to become complacent about maintenance.
Your life depends on the correct function of this
equipment!
While Kirby Morgan helmets and masks are simple
to maintain, like any type of life support equipment,
they do require regular periodic maintenance to func-
tion properly.
All parts disassembled should be thoroughly cleaned
using the methods described in the Appendix in the
rear of this manual. Components that require the use
of lubricants, sealing and thread locking compounds
should also be maintained.
Most fasteners have a torque value, it is imperative that
all fasteners which have a torque value be tightened
to the torque specifications as outlined by the proce-
dure, or as listed in appendix 1. If in doubt as to the
proper torque setting, contact your local authorized
repair facility or KMDSI.
7.2 One Way Valve
NOTE: The one-way valve assembly should be disas-
sembled, cleaned and the three O-rings should be
replaced at least annually. Damaged and/or corroded
parts should be replaced. A repair kit is available for
replacement parts (525-330).
7.2.1 Disassembly Of The One Way Valve
Tools Required:
Soft Jaw Vice
1 inch Open End Wrench Attachment on Torque
Wrench
(If no vise is available use a backup 1 inch open end
wrench)
To disassemble and inspect the one way valve as-
sembly:
1) The one way valve assembly must be removed
from the side block. Use the open end wrench to
remove it.
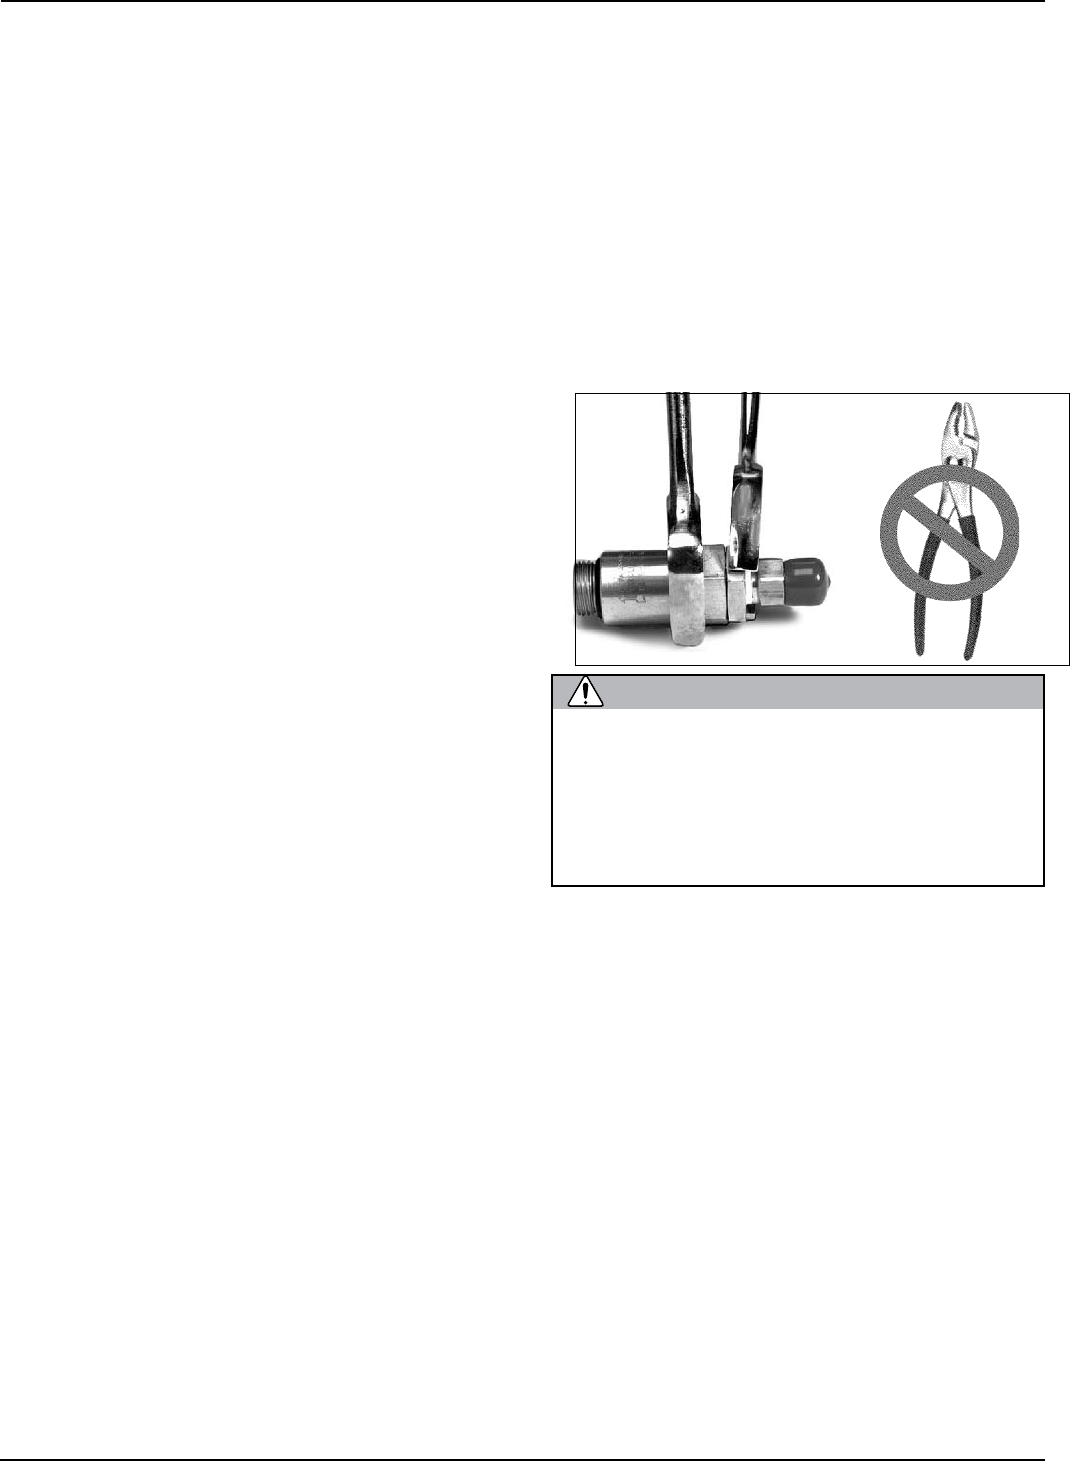
2) After the one way valve has been removed, use two
wrenches or hold the hex part of the body in a soft jaw
vise while removing the seat with a wrench.
As the seat is removed, the wiper and the O-ring
will slide out in place in a groove on the seat. The
Use two wrenches or hold the hex part
of the body in a vise while removing or
turning the seat with a wrench. Do not
use pliers on the main body of the one-
way valve. You may damage the valve if
pliers are used.
