


24
S
E
A
T
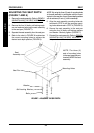
SEATPROCEDURE 5
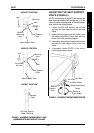
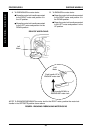
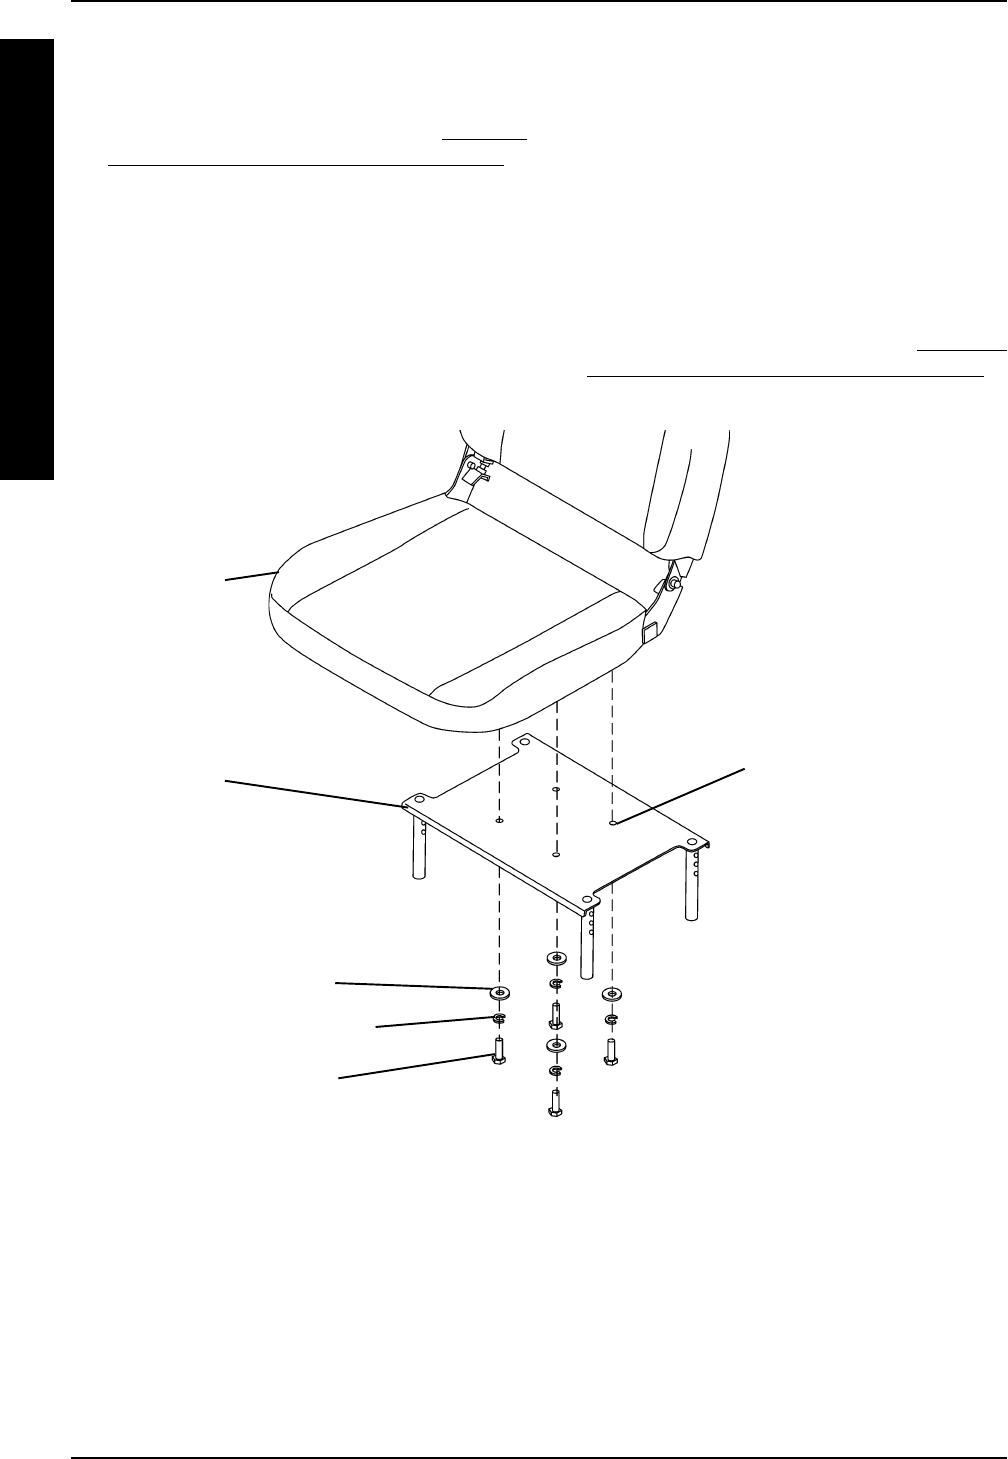
ADJUSTING THE SEAT DEPTH
(FIGURE 7 AND 8)
1. Remove the seat assembly. Refer to REMOV-
ING/INSTALLING THE SEAT ASSEMBLY in
this procedure of the manual.
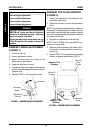
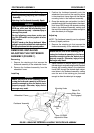
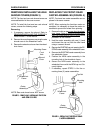
2. Remove the four (4) bolts, self-locking wash-
ers and washers securing the seat assembly
to the seat pan (FIGURE 7).
3. Separate the seat assembly from the seat pan.
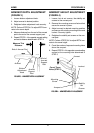
4. Refer to the chart in FIGURE 8 to determine
the correct mounting holes to achieve the
desired seat depth position (FIGURE 8).
NOTE: By using the three (3) sets of mounting holes
in the seat assembly in combination with the mount-
ing hole in the seat pan, three (3) seat depth positions
can be achieved (in one (1) inch increments).
5. Align the seat assembly mounting holes de-
termined in STEP 4 with the seat pan mount-
ing holes determined in STEP 4 (FIGURE 8).
6. Secure the seat assembly to the seat pan
using the four (4) bolts, self-locking washers
and washer. Securely tighten (FIGURE 7).
7. Reinstall the seat assembly. Refer to
REMOV-
ING/INSTALLING THE SEAT ASSEMBLY in
this procedure of the manual.
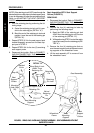
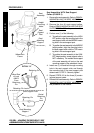
FIGURE 7 - ADJUSTING THE SEAT DEPTH
Seat
Assembly
Seat Pan
Bolts
Self-Locking Washer
Washer
Mounting Holes
NOTE: The three (3)
sets of mounting holes
in the seat assembly are
located UNDER the seat
assembly.