


SECTION 8—SEAT
Formula™ Powered Seating 58 Part No 1122170
SECTION 8—SEAT
ƽ WARNING
After ANY adjustments, repair or service and before use, make sure that all
attaching hardware is tightened securely - otherwise injury or damage may result.
ALWAYS wear your seat positioning strap. The seat positioning strap is a
positioning belt only. It is not designed for use as a safety device withstanding high
stress loads such as auto or aircraft safety belts. If signs of wear appear, belt MUST
be replaced immediately.
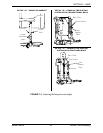
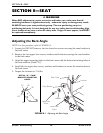
Adjusting the Back Angle
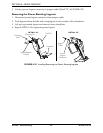
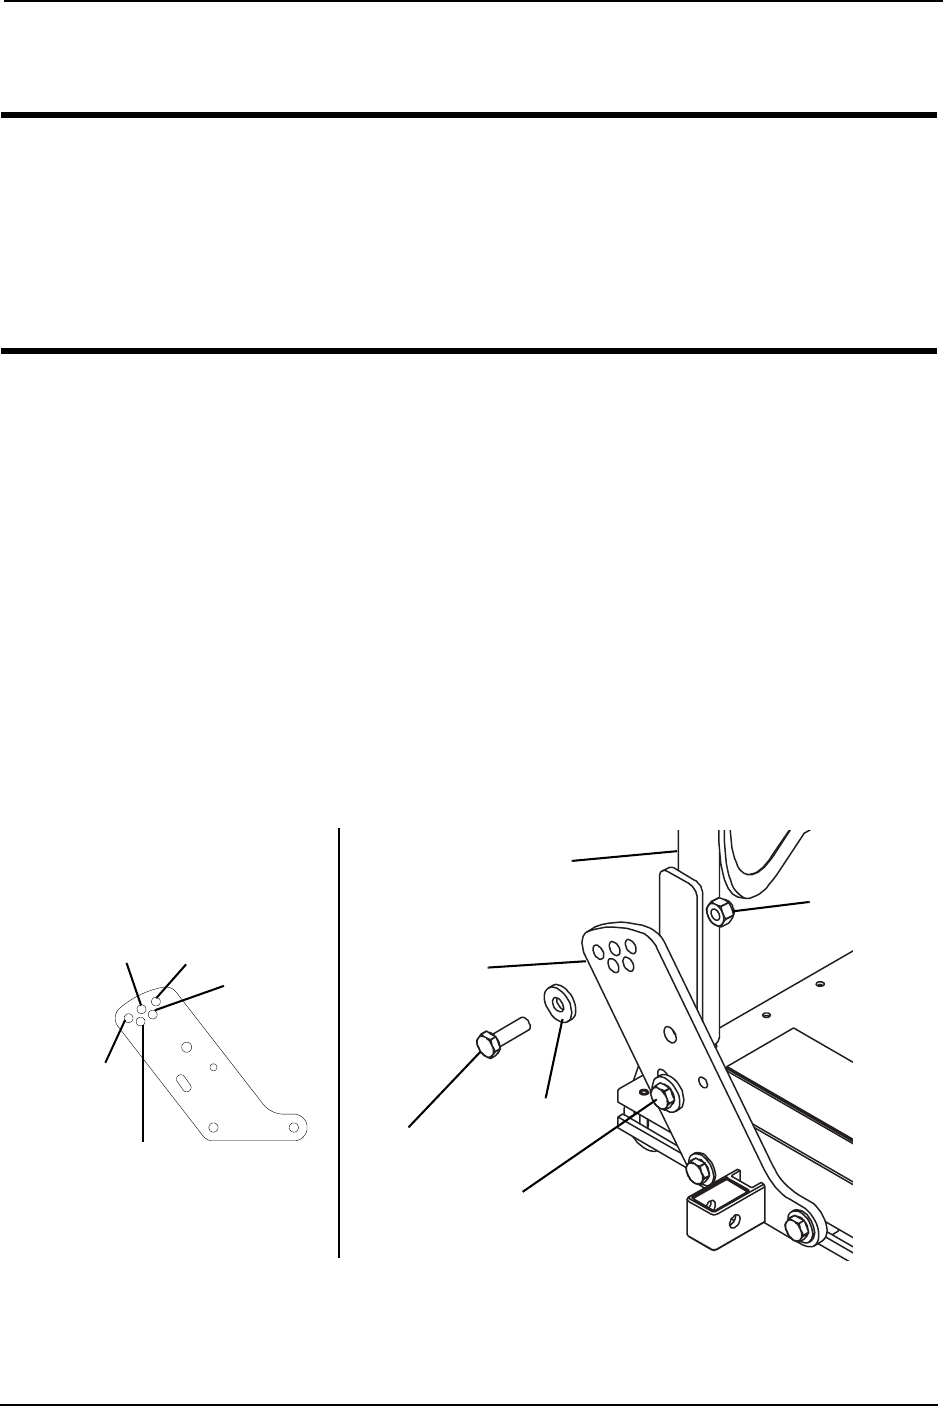
NOTE: For this procedure, refer to FIGURE 8.1.
1. Loosen, but DO NOT remove, the two lower hex screws securing the cane brackets to
the back canes.
2. Remove the two upper hex screws, washers and locknuts securing the cane brackets
to the back canes.
3. Align the upper mounting holes in the back canes with the desired mounting holes in
the cane brackets (Detail “A”).
4. Install the two upper hex screws, washers and locknuts to secure the cane brackets to
the back canes.
5. Torque the locknuts to 13 ft-lbs.
FIGURE 8.1 Adjusting the Back Angle
Cane Bracket
Back Cane
Upper Hex
Screw
Lower Hex
Screw
Washer
Locknut
105°
100°
90°
95°
DETAIL “A” - CANE
BRACKET MOUNTING
HOLES
85°