Solara jr. 32 Part No. 1106628
PROCEDURE 5 ARMS/POSITIONING STRAPS
ARMS/POSITIONING STRAPS
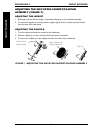
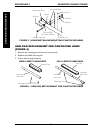
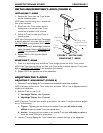
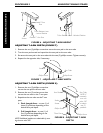
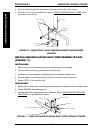
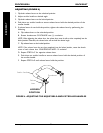
Socket
Screws
Bottom Clamp
Transfer
Assist
Side Guard
T-Arm
FIGURE 10 - ADJUSTING T-ARM TRANSFER ASSISTS AND/OR SIDE
GUARDS
4. Re-secure the side guard to the bottom clamp with the two (2) socket screws.
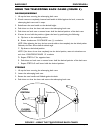
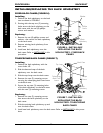
5. Install the T-arm onto the wheelchair. Refer to
INSTALLING/REMOVING T-ARMS in this
procedure of the manual.
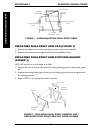
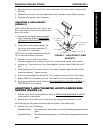
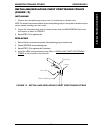
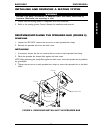
FIGURE 11 - INSTALLING/REPLACING SEAT POSITIONING STRAPS
Seat Positioning Strap
Hex Screw
Locknut
Back Plate
Back Cane
Coved Spacers
INSTALLING/REPLACING SEAT POSITIONING STRAPS
(FIGURE 11)
INSTALLING
1. Remove the hex screw and locknut that secures the back cane to the back plate.
2. Position the seat positioning strap against the back plate.
3. Install the hex screw through the seat positioning strap, coved spacers and back cane.
4. Securely tighten the seat positioning strap to the wheelchair with the locknut.
5. Repeat STEPS 1-4 for opposite side.
REPLACING
1. Remove the hex screw, locknut and seat positioning strap from the back plate of the wheelchair frame.
2. Discard EXISTING seat positioning strap.
3. Install the NEW seat positioning strap to the wheelchair. Refer to
INSTALLING SEAT POSITION-
ING STRAPS in this procedure of the manual.


