


Page 18 AD-4405 Weighing Indicator
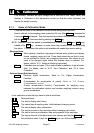
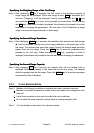
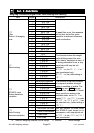
5.3.1. Setting the Division and Range
Consider the following rules to design the weighing range.
Rule 1 Select the division and range of each weighing range so as to fit the following inequality.
The first range < the second range
The division of the next weighing range is automatically set larger than the division
of the lower weighing range. And the division can change.
Rule 2 When setting the dual range, the upper limit value of the second range becomes
the maximum capacity.
Rule 3 Select a resolution smaller than 40000. The resolution is a value that divides the
maximum capacity by the minimum division of the first range.
5.4.
5.4.5.4.
5.4.
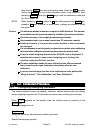
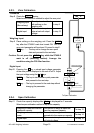
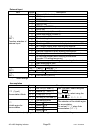
Digital Linearization Function
Digital Linearization FunctionDigital Linearization Function
Digital Linearization Function
Even if the zero and span calibration have been completed, there may still remain a
linearity deviation caused by the performance of the weighing unit. The digital
linearization function can rectify or reduce the linearity deviation using weighing points
during the zero and capacity setting. Up to three weighing points can be specified.
Caution This function does not improve repeatability or hysteresis.
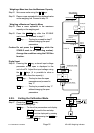
Use the mass on the condition that lnr 1
lnr 1lnr 1
lnr 1 < lnr 2
lnr 2lnr 2
lnr 2 < lnr 3
lnr 3lnr 3
lnr 3.
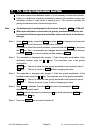
Do not press the ENTER key while the STABLE mark is off.
Step 1 Check the Cal 0 display. Press the MODE key to display lnr 0 .
Step 2 Enter the zero point. Refer to “5.2.3. Zero Calibration”.
Step 3 The value of the middle point is displayed after indicating lnr x. x is 1, 2 or 3.
The triangle
mark of the same number(x) is displayed along with the value.
Step 4 Select a middle point.
If you want to cancel the current procedure, press the ESC key to finish this
function. Proceed to step 7 and other points are cleared (canceled).
Select a middle point value using the 0 - 9 keys. Proceed to step 5.
Step 5 Place a mass equivalent to the displayed value on the weighing unit. Press the
ENTER key after the STABLE mark has turned on. Proceed to step 6.
Step 6 If you include a 2nd and 3rd middle point, repeat steps 3, 4, 5 for each.
If you finish this function, proceed to step 7.
Step 7 Perform step 11 of "5.2.4. Span Calibration" immediately.
5.4. Digital Linearization Function