


Page 9
5-2.INSPECT LOWER BLOCK.
a. Check lubrication of all parts. If the thrust bearing is not
equipped with a grease fitting, lubricate with SAE No. 50 oil.
Also lubricate the shank of the hook which passes through
the lower block body.
b. Check each sheave to ensure rope groove is smooth and
free from burrs, or other surface defects.
c. Check each sheave for freedom of rotation; replace
bearings if defective.
d. Make certain that dowel pin, holding the hook nut to the
hook, is securely in position.
e. If hook is equipped with a safety latch or rotational lock,
check to determine that they are in good operating condition.
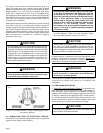
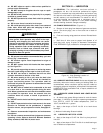
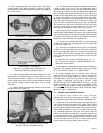
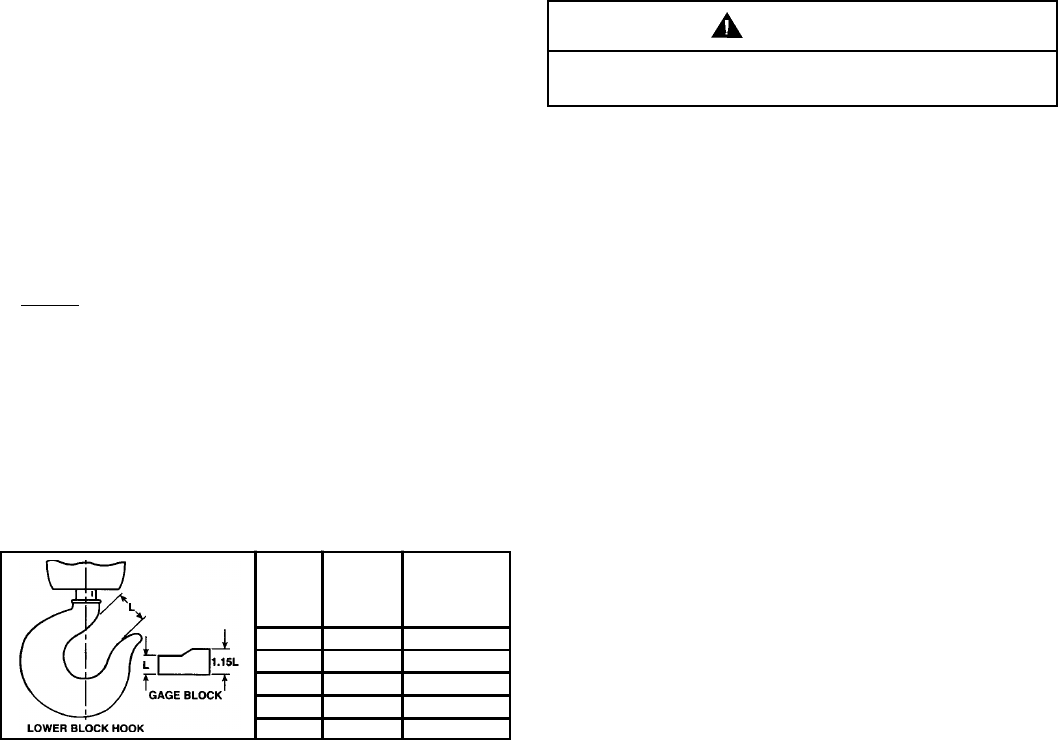
f. Check throat opening of hook. (Refer to Figure 5-1.) It is
recommended that upon receipt of the hoist a measurement
be made and recorded of the hook throat opening. OSHA
Standards require that the hook be replaced if the throat
opening exceeds 15 percent of the original opening, or if the
hook is twisted more than 10 degrees from the unbent plane.
A gage block, properly identified to the hoist, similar to the
one shown in Figure 5-1, is suggested to be made for each
hook for use in these measurements.
NOTE: Hooks and hook openings shown are based on
hooks normally furnished with standard hoists. For
dimensions of hooks having a special size, shape or
material, consult the Muskegon, Michigan factory. For
hooks with certain kinds of safety latches it may be
necessary to remove latch to measure hook opening.
g. Hooks showing signs of cracks must be replaced. Hooks
should be inspected at least once per year using dye
penetrants, magnetic particle or other suitable crack detecting
methods.
Figure 5-1. Proper Hook Opening.
(Shown with latch removed for clarity.)
h. Check wear of the hook, especially at the saddle and
replace if badly worn.
5-3. INSPECT UPPER BLOCK AND HOIST SUSPENSION.
a. Check upper block sheaves (when hoist is so equipped)
for wear, damage and freedom of rotation. If sheaves do not
rotate freely, disassemble block and inspect bearings. Replace
worn or damaged bearings, washers, pins or sheaves.
b. Make certain that all sheaves, bearings and hanger pins
are free of foreign material and properly lubricated. Bearings
without grease fittings are lubricated for the life of the bearing
and require no further lubrication. After inspection, lubricate
all upper block lubrication fittings.
c. Make certain that rope guide pins are not bent, loose or
otherwise distorted; guide pins must have close clearance to
sheave flange to keep rope in sheave grooves.
d. Check hoist suspension bolts on lug suspended hoists;
make certain that bolts are secure, properly tightened and
free from damage.
e. Inspect suspension lug at top of hoist frame for damage,
cracks, hole elongation or other signs of wear. On all hoists,
the suspension lug is integral with hoist frame and the entire
frame must be replaced when suspension lug is damaged
and requires replacement.
f. Reinstall all parts following procedure in reverse of
disassembly.
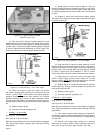
5-4. INSPECT ELECTRICAL CONTROLS. Arrangement of
electrical control equipment varies with the type of control,
physical space and the optional control features ordered with
the hoist.
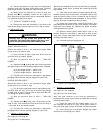
a. Disconnect electrical power to hoist, remove electrical
compartment cover (Figure 9-1, Ref. No. 29) and inspect
wiring and terminals. Terminals should be securely crimped
to wires and electrical insulation should be sound. Terminal
screws should be tight.
b. Check condition of contactor assembly, transformer, and
limit stop and reverse switches.
Do not operate a hoist having worn or damages
suspension bolts.
WARNING
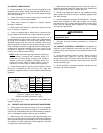
HOIST
RATED
LOAD
(IN TONS)
HOOK
SIZE
(STANDARD)
CORRECT "L"
DIMENSION
(NEW HOOK)
1/2 G 1-1/8"
1 G 1-1/8"
2 H 1-1/4"
3 I 1-1/2"
5 J 1-3/4"
11202A