


Page 17
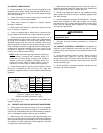
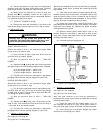
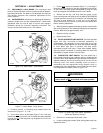
Figure 5-16. Upper Sheave Installed (Typical).
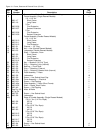
(3) Place sheave with rope into upper sheave pocket
and slide pin partially thru sheave. Install remaining washer
and push pin thru side plates. Install snap ring on each end
of pin to secure pin in place.
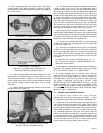
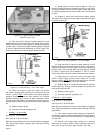
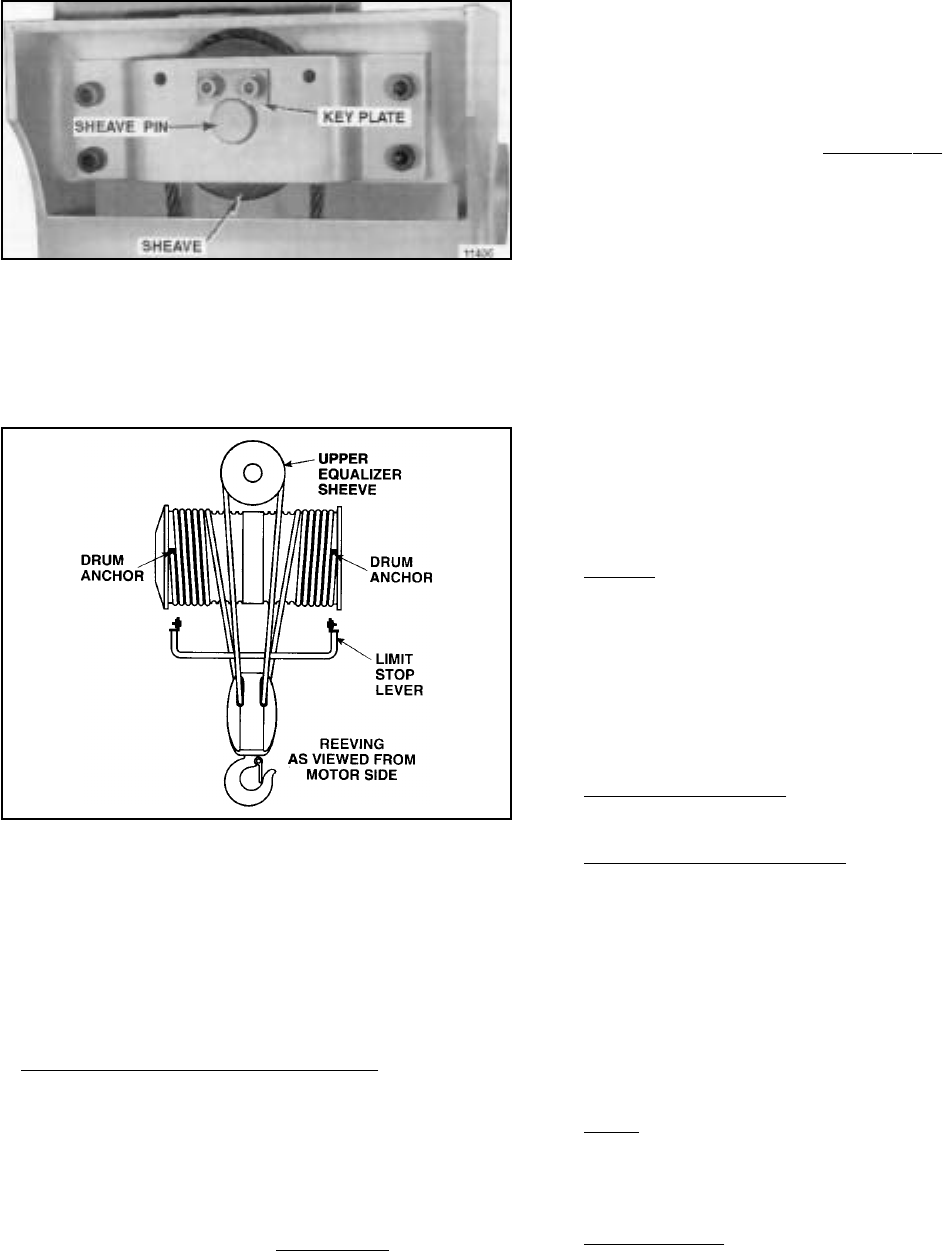
Figure 5-17. Hoist Reeving — Two Part Double.
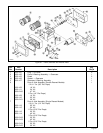
(4) Insert lower sheave pin into bottom block removing
pipe as sheave pin is inserted. Be certain washers are
replaced as shown on parts illustration. With sheave pin
installed, replace key plates and bolts to secure sheave pin.
(5) Replace sheave guard.
(6) Lubricate rope per paragraph 4-3.
h. Checking for and removal of rope twisting.
Although rereeving of hoist may have been done carefully,
sometimes after new rope has been installed twisting may
occur. With new rope installed, the hoist block should be
raised and lowered several times with gradually increasing
loads, through full lift. If the block still rotates excessively at
no load, the rope may have twists which should be removed.
(1) To remove rope twist in single reeved hoists.
(a) Observe direction block tends to rotate.
(b) Lower the block to a low position and turn off
power.
(c) Rotate rope near the anchor end several turns in
a direction tending to correct block rotation. This
rotates rope end fitting in the anchor.
(d)Turn on power; raise and lower the block
several times to feed the correcting twist in the rope
through the reeving.
(e)If block still tends to twist, repeat the above
procedure until block rotation is corrected.
(2) To remove rope twist in
double reeved hoists.
(a) Observe direction block tends to rotate.
(b) Lower the bottom block unspooling rope from rope
drum until only one quarter (1/4) turn remains to
rope end anchors in drum.
(c) Rotate rope near ends entering drum in a direction
tending to correct block rotation. This rotates rope
end fittings in the drum.
(d) Turn on power; raise and lower the block several
times to feed the correcting twist in the rope through
the reeving.
(e)If block still tends to twist, repeat the above
procedure until block rotation is corrected.
5-10. TESTING HOIST AND OVERLOAD CLUTCH
(Optional).
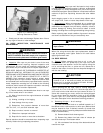
a. General. Before placing hoist in service or after disas-
sembly and reassembly, hoist should be tested. To test sus-
pend hoist from an overhead supporting member of sufficient
strength to support the weight of the hoist and the rated load.
Hoists having overload clutches, require an overhead sup-
porting structure capable of supporting with appropriate safety
factor, a load equal to 200 percent rated load and the weight
of the hoist. Connect hoist to power supply as shown on hoist
nameplate and perform the checks listed in b and c below.
b. Check hoist as outlined in PRE-OPERATION CHECKS,
Section II, paragraph 2-4.
c.
Check hoist with capacity load.
(1) Attach rated load to lower hook.
(2) Depress
áá
áá
á push button and raise load. When push
button is released, hoist should immediately stop and hold
load at that level.
(3) Depress
ââ
ââ
â push button, lower load a short distance
and release button. Hoist should stop immediately and hold
load at that level.
NOTE: If load drifts downward slowly in step 2 or
3 above, motor brake requires adjustment — see
MOTOR BRAKE ADJUSTMENT — Section Vll —
paragraph 7-2.
d.
Overload Clutch. The overload clutch (optional) must
be tested for proper operation before placing hoist in service
or after disassembly and reassembly of hoist. For test
procedure follow instructions listed below.
12206A