3-2
1
2
3
4
5
Cover/Table of
Contents
Downloading Images
from the Camera,
and Camera Settings
Working with
Images in the
ZoomBrowser EX
Remote Shooting in
the EOS Capture
Troubleshooting
and Uninstalling
the Software
Index
Setting the EOS 5D
and EOS-1D Series
Cameras
Introduction
Remote Shooting
You can take shots by remote controlling your camera from a computer.
1
Connect the camera to the computer (p.1-2).
¿ The [CameraWindow] appears.
O When the ZoomBrowser EX is running, select [Acquire & Camera Settings] X
[Remote shooting] to start [CameraWindow].
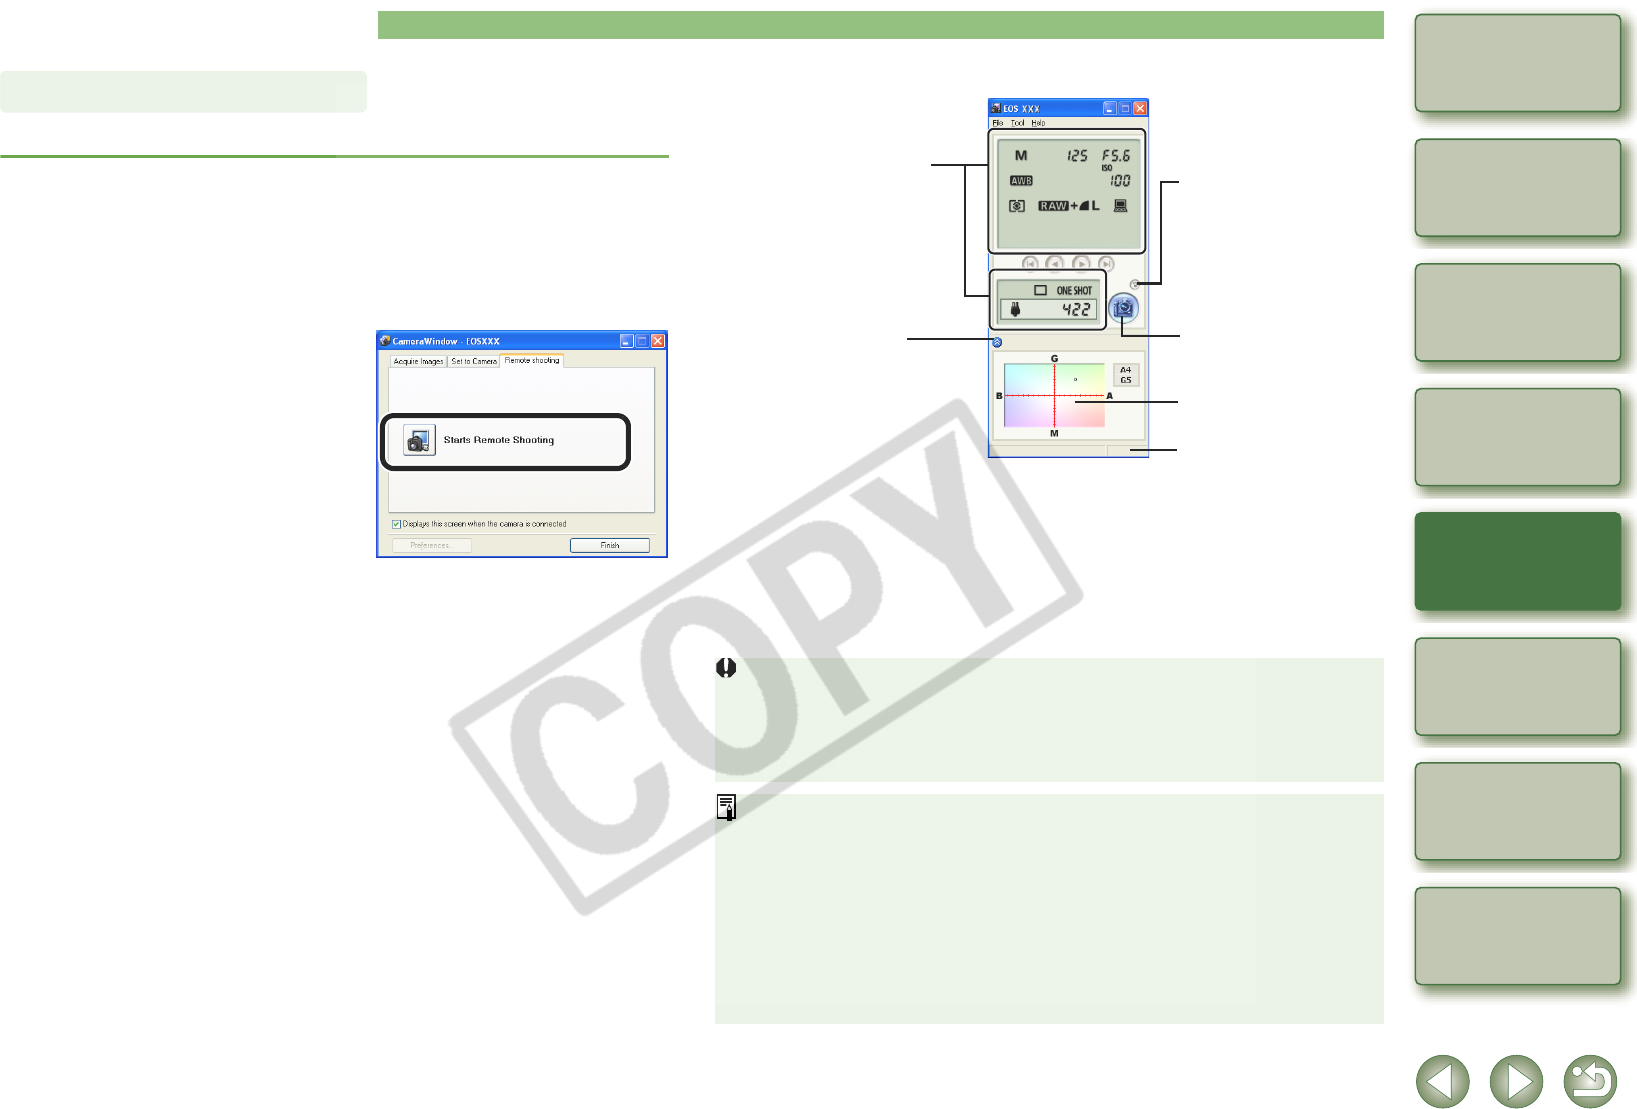
2
Select the [Remote shooting] tab and click the [Starts Remote
Shooting] button.
¿ The [Select Folder] dialog box
appears.
3
Select the destination folder to which images will be saved and
click the [OK] button.
¿ The ZoomBrowser EX and EOS Capture start and the EOS Capture main window
appears.
Single-frame Shooting
4
Specify desired settings.
O The above window shows information displayable when the EOS 5D is connected.
The displayed information varies depending on the camera model connected.
5
Click the [Shoot] button.
¿ The shot image is saved in the specified folder and is displayed in the ZoomBrowser
EX.
O Alternatively, you can press the camera’s shutter button to take the shot.
O To exit the EOS Capture, select the [File] menu X [Exit].
O If the camera is not ready for shooting (the lens is not attached, etc.), you cannot
perform the operation as explained.
O When you are using auto focus, you cannot take shots if the camera cannot focus. In
this case, focus manually.
O Bulb exposure is not available.
O Alternatively, you can press the space bar to shoot.
O The number of available shots changes depending on the available capacity on your
computer’s hard disk (p.3-3).
O The time to transfer a RAW image shot with EOS Capture to your computer is
approximately 4 to 7 seconds.
• The above time is only an estimate. Transfer times vary widely depending on the
camera model used, the type of computer, and the subject of the photo.
• Transfer times are based on Canon testing standards.
(When using the following: OS: Windows XP, CPU: 2.2 GHz Pentium 4; RAM: 512MB)
• The times for images shot in JPEG will be shorter than those shown above.
Allows you to specify and
check the camera settings
(p.3-3).
You can rotate and download
the shot images regardless of
the camera position. Each time
you click the button, the image
rotates 90°.
* When using the rotate
function, enable the rotate
function in the [Save
settings] dialog box (p.3-4).
Click to show/hide the
white balance
adjustment dialog box.
[Shoot] button
Click the [Shoot] button to take
a shot.
You can adjust the white
balance (p.3-4).
Displays the status.


