


2-11
1
2
3
4
5
Cover/Table of
Contents
Downloading Images
from the Camera,
and Camera Settings
Working with
Images in the
ZoomBrowser EX
Remote Shooting in
the EOS Capture
Troubleshooting
and Uninstalling
the Software
Index
Setting the EOS 5D
and EOS-1D Series
Cameras
Introduction
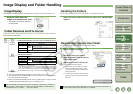
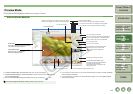
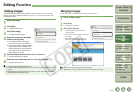
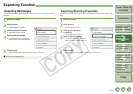
Editing Function
You can edit your images with red-eye correction, brightness/color correction, sharpness,
trimming, text insertion, automatic correction, etc. Also, you can transfer an image to other
image editing software.
1
Select one image.
2
Click [Edit].
¿ The [Edit] menu appears.
3
Click [Edit Image].
¿ The settings window appears.
4
Select the contents to be edited
and then click [Finish].
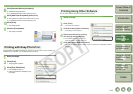
O For detailed information, click the [?]
button and refer to the Help displayed.
O To transfer and edit your image in different
image editing software, select [Edit with
external image editor], click the [Manage
List] button and then select the image
editing software to be used.
5
Edit the image and then click the [Save As] button.
¿ The [Save As] dialog box appears.
6
Select the save destination and click the [Save] button.
¿ The edited image is saved.
O You cannot select multiple images and edit.
O You cannot edit RAW images here. You can edit RAW images with RAW Image Task
(p.2-12).
O Edited images cannot be reverted to their original condition. We recommend saving
edited images under a different name.
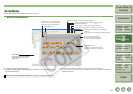
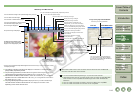
Editing Images
You can merge up to 4 JPEG images to create a panorama image.
1
Select multiple images.
2
Click [Edit].
¿ The [Edit] menu appears.
3
Click [Stitch Photos].
¿ The PhotoStitch starts and the main
window appears.
O Follow the instructions displayed to merge
the images.
O For detailed information, click the [?]
button and refer to the Help displayed.
O You cannot merge RAW images in the PhotoStitch.
O Merging may not be successful when more than 4 images are merged.
Merging Images