


preliminary
Operation
26
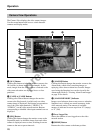
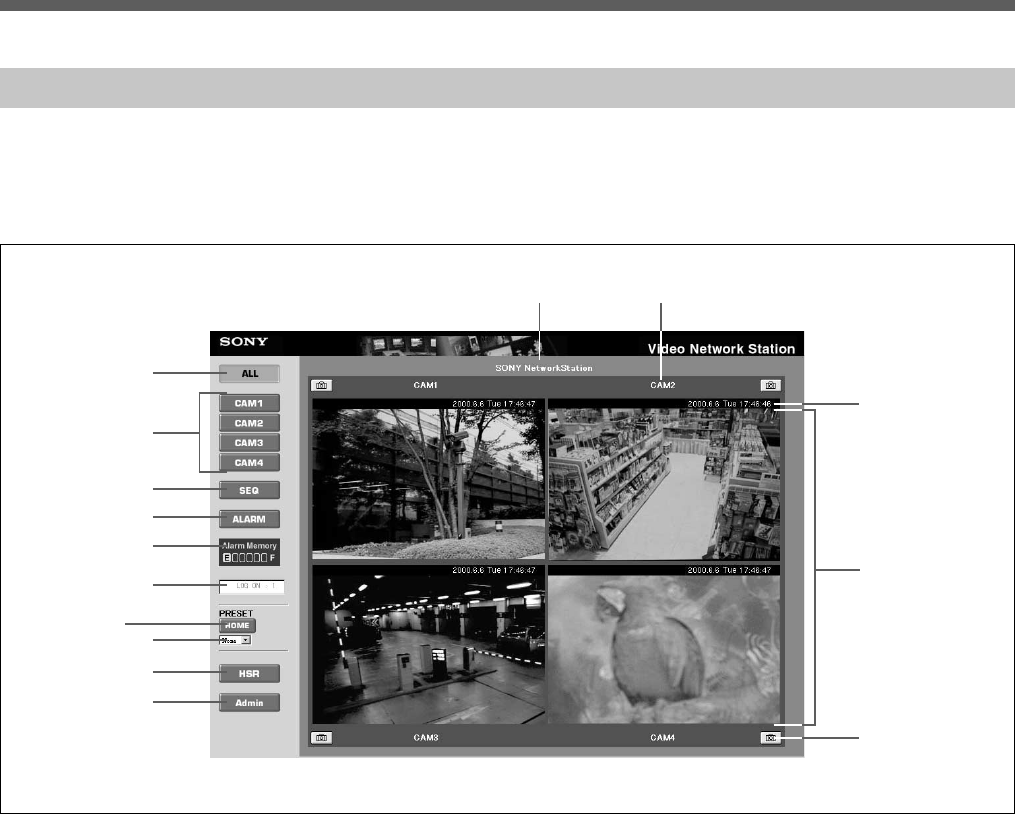
Camera View Operations
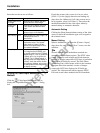
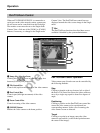
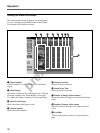
4 [ALARM] Button
Clicking this button changes the monitor screen to the
Alarm mode, which allows searching images or
replaying video when an alarm has occurred. Images
saved using the Snapshot icon can be viewed in the
Alarm mode. Refer to “Viewing Alarm Event Images”
on page 29 for details.
5 [ALARM MEMORY] Indicator
Images saved when an alarm event occurs or when the
Snapshot icon is clicked are stored in memory in the
video network station. The amount of available
memory is indicated in seven steps from “E” (empty)
to “F” (full).
6 Users Logged On
Shows the number of users logged on to the video
network station.
7 [HOME] Button
Returns the video camera to the home position.
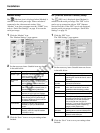
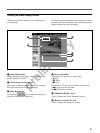
The Camera View displays the video camera images.
Use the screen buttons and icons to switch between
cameras and display modes.
1 [ALL] Button
Clicking this button switches the monitor screen to the
ALL mode (as shown in the above example). In this
mode, images from the video cameras connected to the
video network station are displayed in two or four
partitions.
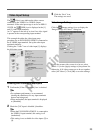
2 [CAM1] to [CAM4] Buttons
Clicking one of these buttons changes the monitor
screen to the Single mode, in which only one video
camera image is displayed. Each button corresponds to
one of the video input terminals (“VIDEO 1” to
“VIDEO 4”) on the video network station. Buttons
corresponding to disabled video input terminals are not
displayed.
3 [SEQ] Button
Clicking this button changes the monitor screen to the
Sequential mode, in which the image from each video
camera is displayed one at a time, switching from one
camera to the next at preset intervals.
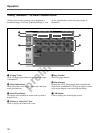
1
3
4
5
6
7
8
9
0
qa qs
2
qd
qf
qg