19
Pan/Tilt Driver and Video Camera ID Setup
The (Pan Tilt) icon is displayed when a Pan/Tilt
device is selected for the serial port usage. If the “Pan
Tilt” icon is not displayed next to the icon of the
applicable serial port, refer to “Serial Port Settings” on
page 18 to reset the serial port usage.
Up to seven VISCA-compliant video cameras can be
connected by daisy chaining to the two serial ports on
the video network station, with pan/tilt/zoom
controlled by the ID number of each video camera.
The “Pan Tilt” icon is used to set the driver, video
camera ID number and video camera preset position
for each connected device.
The following example describes connection of an
EVI-D30/D31/G20/G21.
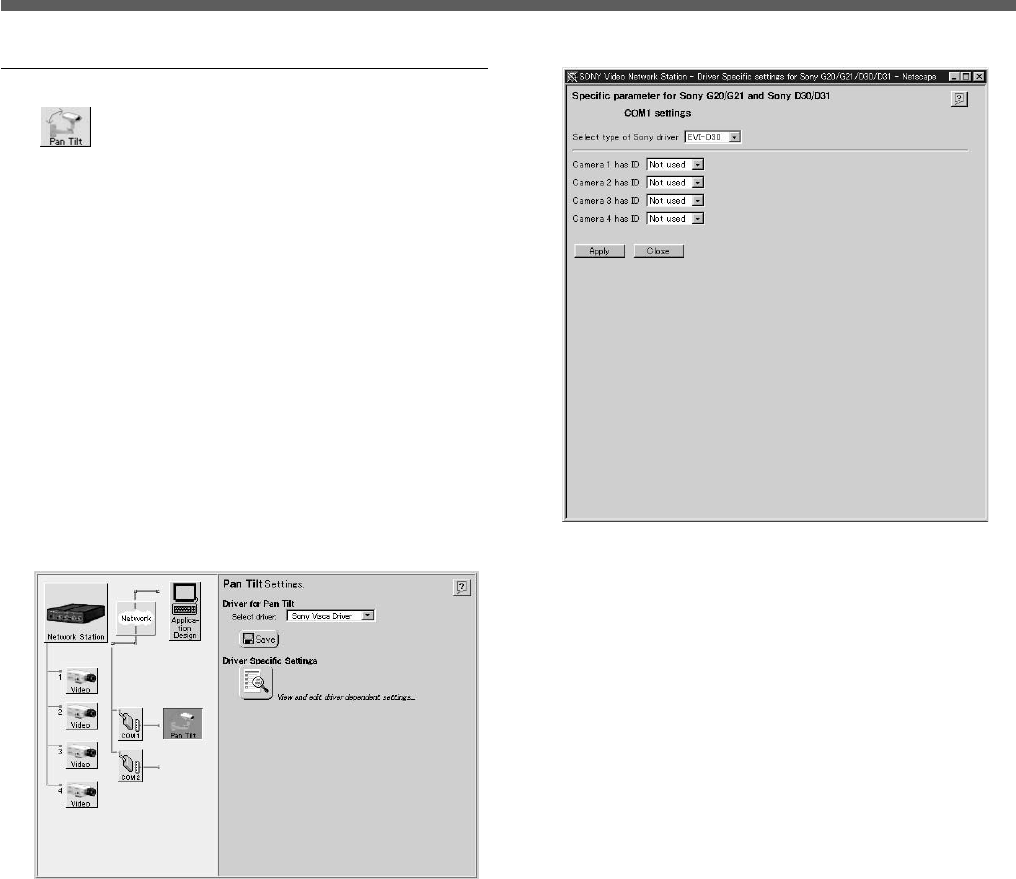
1 Click the “Pan Tilt” icon in the Items area.
The “Pan Tilt Settings” screen appears.
2 Verify that [Sony Visca Driver] is selected in the
[Select Driver] drop-down list.
3 Click the Driver Specific Settings icon to change
the ID number of the video camera.
The “Specific parameters for Sony G20/G21 and
Sony D30/D31” page appears.
4 Select the connected video camera from the [Select
type of Sony driver] drop-down list.
5 Select an ID number in one of the [Camera 1] to
[Camera 4] drop-down lists.
z Hint
• The ID number must be unique from other
devices.
• Set the number according to the daisy-chain
connection sequence.
• When an HSR-1/1P/2/2P is connected to the
COM1 terminal, an ID number can be set for
each camera connected to the HSR-1/1P/2/2P.
6 Click the [Apply] button.
Settings are applied, and a “Preset Positions” icon
is added to the video camera for which the ID
number was set.
7 If setting video camera preset positions, go to
“Setting Pan/Tilt Camera Preset Position” below.
Otherwise, click the [Close] button to finish with
settings.


