25
5. Assembly
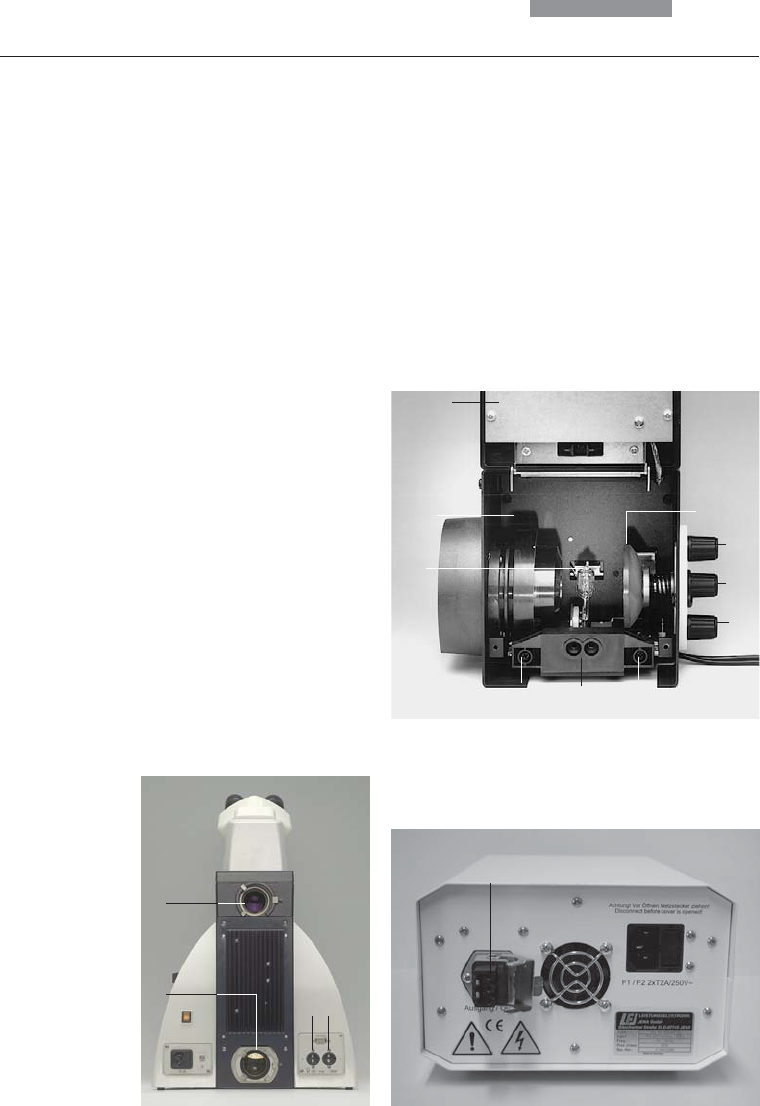
Fig. 22 Rear side of the ebq 100 supply unit
1 Lamp connection
• Insert the lamp mount, with the burner in-
stalled, into the lamp housing and tighten it
with the screws (20.8).
• Put the lid down again. Plug in the contact
plug as far as it goes and retighten the
screws.
• Place the lamp housing in the incident light
lamp housing receptacle (21.1) and fasten it
with the clamping screw on the side.
• Connect the lamp housing to the power supply
(22.1).
1
Fig. 20 106 z lamp housing (on the side, open)
1 Cover raised
2 Collector
3 12 V 100 W lamp or
gas discharge lamp in mount
4 Reflector (mirror)
5, 6, 7 Adjusting screw for x-y reflector
8 Fastening screw for lamp mount
9 Socket for contact plug
1
2
34
1
2
3
898
4
5
6
7
Fig. 21 Rear side of stand
1 Incident light lamp housing receptacle
2 Transmitted light lamp housing receptacle
3 12 V 100 W connection for transmitted light (symbol: )
4 12 V 100 W connection for incident light (symbol: )


