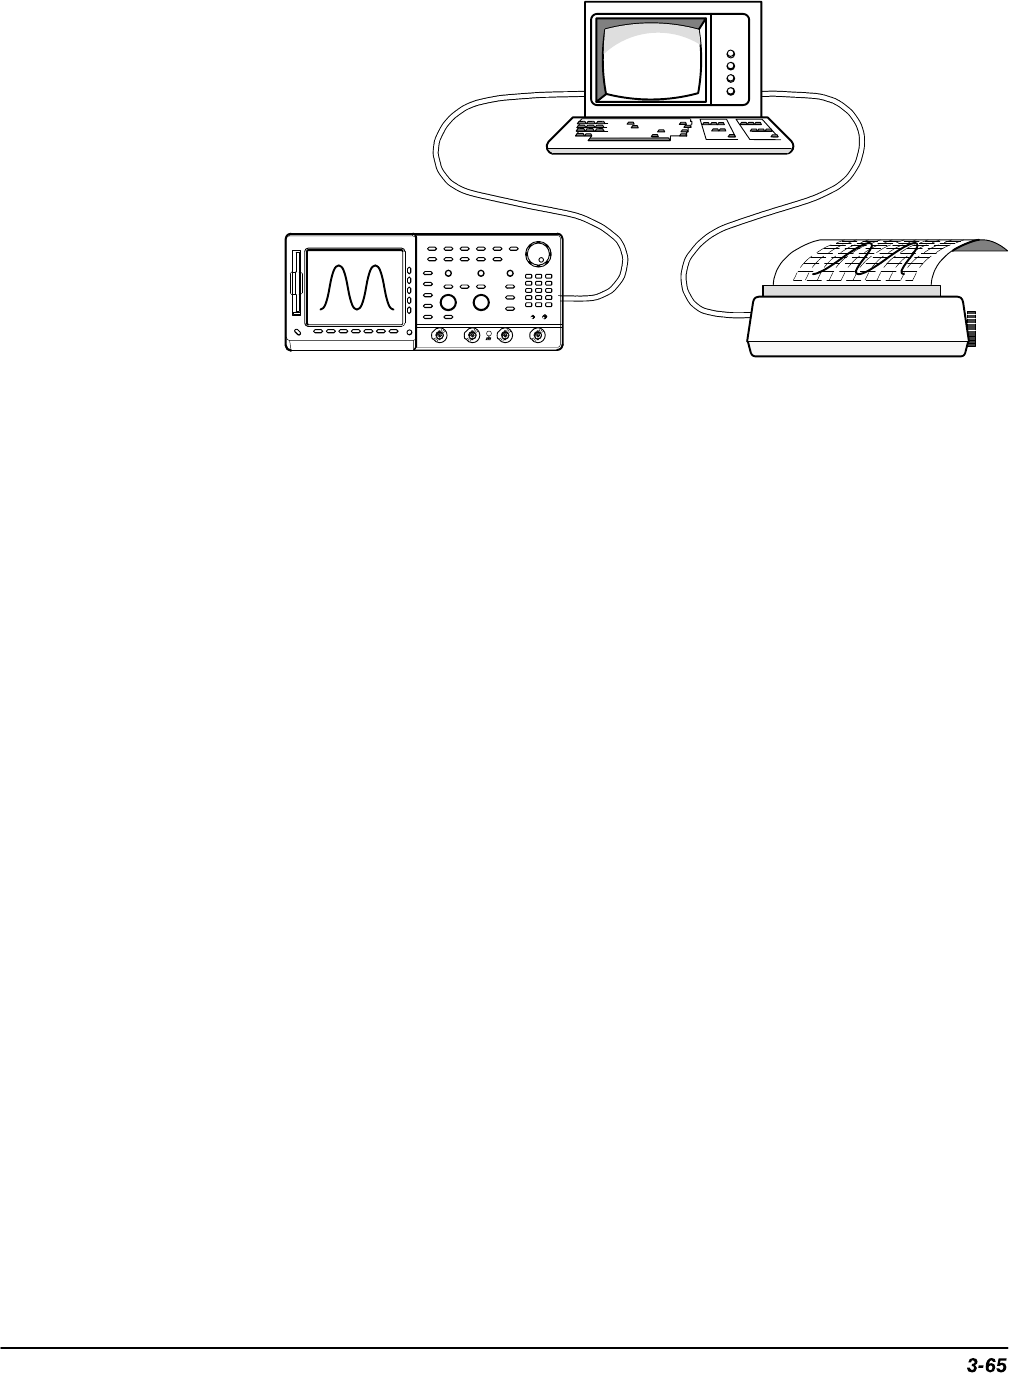
Hardcopy
TDS 520A, 524A, 540A, & 544A User Manual
GPIB Cable
Digitizing
Oscilloscope
PC Compatible
Centronics or
RS-232 Cable
Hardcopy Device
Figure 3-35: Connecting the Digitizing Oscilloscope and Hardcopy
Device Via a PC
If your controller is PC-compatible and it uses the Tektronix GURU or
S3FG210 (National Instruments GPIB-PCII/IIA) GPIB package, you can
operate this setup as follows:
1. Use the MS-DOS
cd
command to move to the directory that holds the
software that came with your GPIB board. For example, if you installed
the software in the GPIB-PC directory, type: cd GPIB-PC
2. Run the IBIC program that came with your GPIB board. Type: IBIC
3. Type: IBFIND DEV1 where “DEV1” is the name for the digitizing oscillo-
scope you defined using the IBCONF.EXE program that came with the
GPIB board.
NOTE
If you defined another name then, of course, use it instead of
“DEV1”. Also, remember that the device address of the digitizing
oscilloscope as set with the IBCONF.EXE program should match
the address set in the digitizing oscilloscope Utility menu (typically,
use “1”).
4. Type: IBWRT “HARDCOPY START” Be sure the digitizing oscilloscope
Utility menu is set to Talk/Listen and not Hardcopy (Talk Only) or you
will get an error message at this step. Setting the digitizing oscilloscope
Utility menu was described in the start of this Hardcopy section under the
heading
Setting Communication Parameters
. Be sure to set the controller
time-out longer than the time required to transfer the hardcopy.


