


page 14
COMMERCIAL PRODUCTS DIVISION
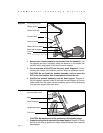
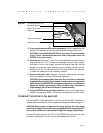
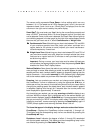
Diagram 5
Secure the handrail
assembly to the base.
Ribbon cable connection
Handrail covers
Screw and curved washer
11. Secure the handrail assembly to the base handrail support. Diagram 5.
While your assistant holds the handrails, guide the ribbon cable into the base
support. If you feel any resistance, do not force the handrails into position.
Slowly, remove the handrails from the base supports and start over again.
12. Two mounting hole locations on each base support provide for height
adjustments. Diagram 5. Determine which height is best suited to meet
your needs (lower holes are usually used for those 5’6” or shorter) before
securing the handrails to the base handrail supports.
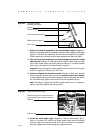
Important: Once the upper console assembly is secured, use a hex torque
wrench to tighten all 4 screws to 140 in-lbs.
13. Install and tighten the handrail screws. Diagram 5. Align the handrails
with the mounting holes. Be sure that the concave side of each washer
is placed against the handrail base supports. Insert the screws with wash-
ers and alternately tighten each screw using the supplied hex key.
Note: Periodically, inspect the handrail-to-base screws and , if necessary,
tighten each bolt using the hex key provided.
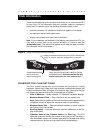
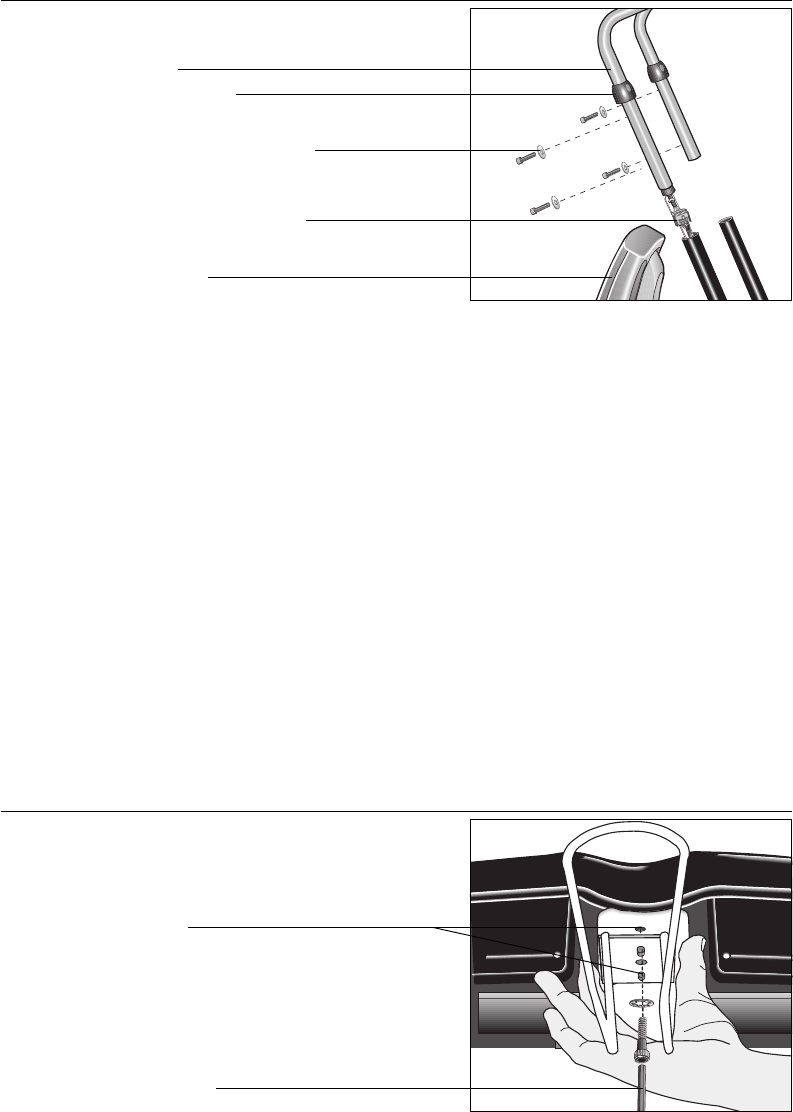
Handrail
Front casing
Diagram 6
Install the water bottle cage.
Position the cage and insert the screws
and lock washers in to the two mounting
locations.
5/32” hex key
14. Install the water bottle cage. Diagram 6. Place a lock washer (B) on
each of 2 screws (A). Position the water bottle cage under the display
console. Align the mounting holes and insert the screws and washers.
Securely tighten each screw using the supplied hex key.