


27
En
Preparation
05
English
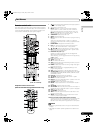
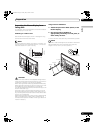
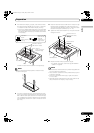
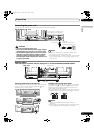
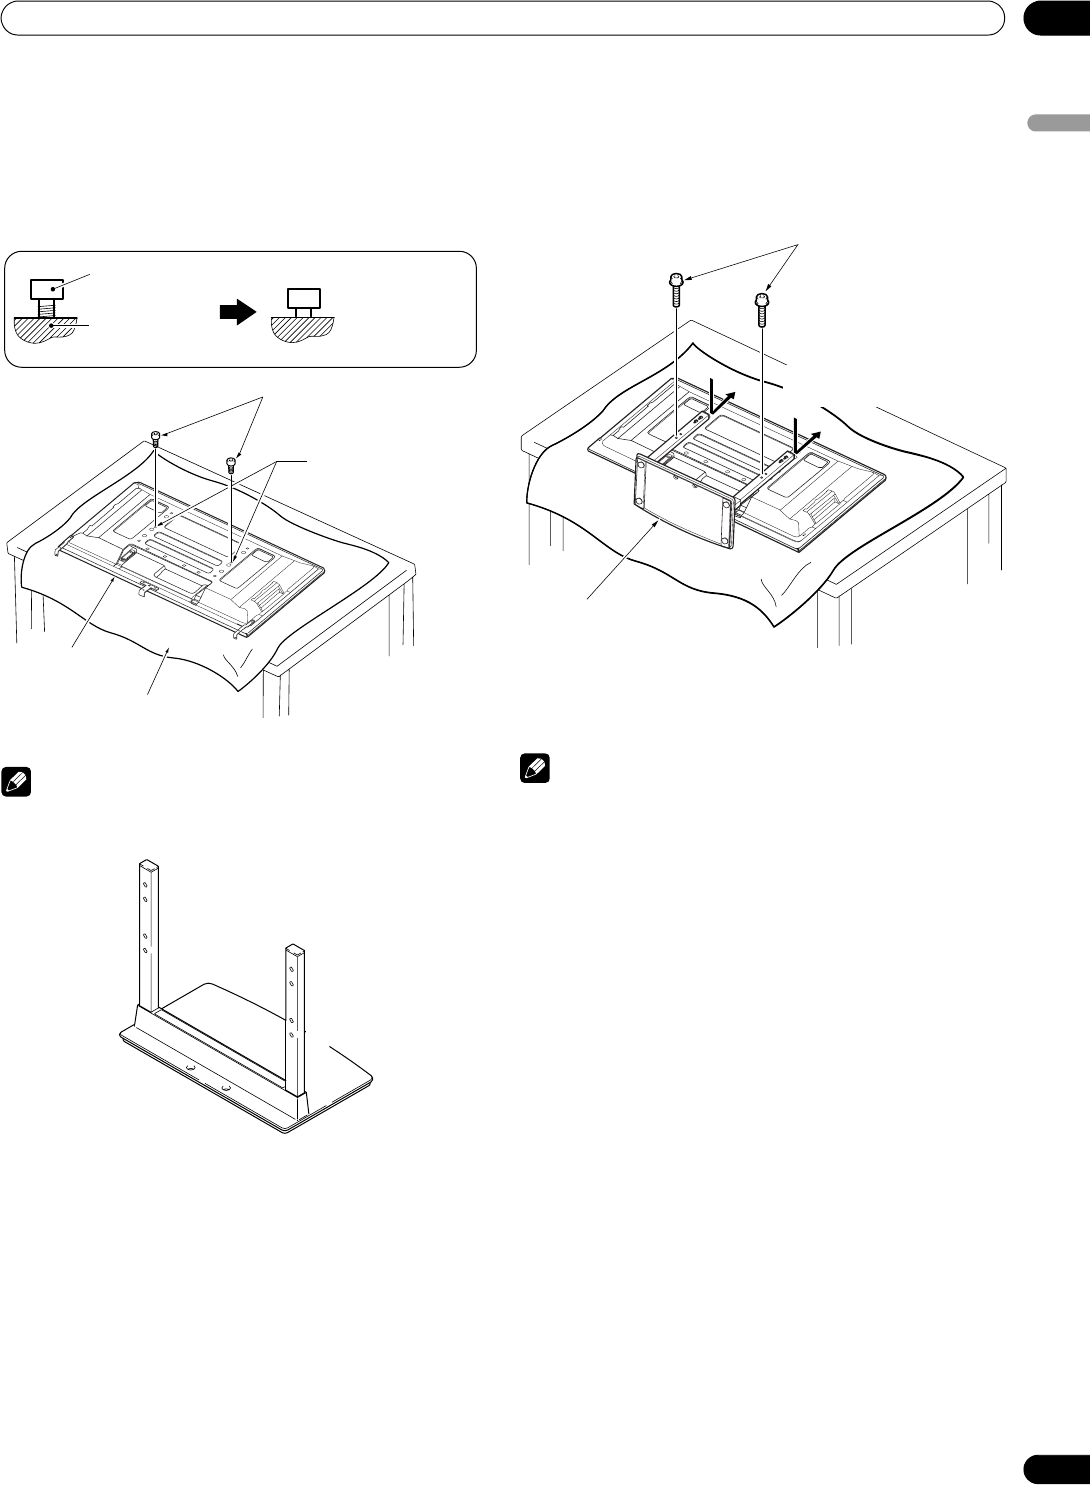
2 With the Plasma Display lying flat, insert and secure the
two installation bolts ➁ (M8 x 20 mm: black) in the holes
“a” located in center of the Plasma Display housing.
• At this point, tighten these bolts ➁ only until the threads
are no longer visible when viewed from the side (you will
be unable to attach the display if the bolts are screwed
in completely).
• Make sure to remove the speaker mounting fittings.
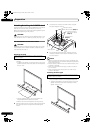
NOTE
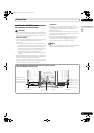
• When lying the Plasma Display down, be careful not to
scratch or damage it.
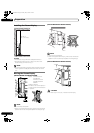
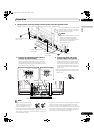
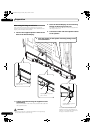
3 As shown in the above figure, hook the stand pipe holes
(pipe “B”) onto the screw heads of the installation bolts ➁,
then slide the stand upwards to the main Plasma Display
until it engages the installation bolts ➁ (once put together
with the display, the stand will slide no more than 19 mm
(3/4 inch)).
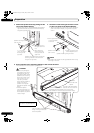
4 Pass the installation bolts ➀ (M8 x 40 mm: black) through
the stand pipes and tighten the installation bolts firmly
using the enclosed hexagonal wrench. (The holes should
be used in the proper combinations, “B” - “B”).
5 Tighten the installation bolts ➁ firmly using the enclosed
hexagonal wrench.
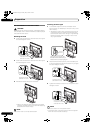
6 Replace the Plasma Display to stand upright.
• For speaker installation, see “Installing the PIONEER
speaker” on page 20.
NOTE
• Insert the bolts in the holes vertically and do not tighten them
with more force than necessary.
• Place a sheet or protective cover to protect the display from
scratches or damage.
• Work only with the Plasma Display lying flat on a table or
similar surface.
• Move the stand so that the stand screw holes and the nuts
that connect the main display line up correctly.
Installation
bolt
➁
Plasma Display
housing
Stop screwing
down the bolt
when the
threads are no
longer visible.
Installation bolts
➁
(M8 x 20 mm: black)
Holes “a”
(holes in center of
Plasma Display)
Plasma Display
Sheet
B
A
B´
A´
B
A
B´
A´
Installation bolts
➀
(M8 x 40 mm: black)
(Step 4)
Table top stand
Slide the stand
(Step 3)
PDP6070HD.book Page 27 Friday, May 19, 2006 5:01 PM