


50
Instruction manual V 1.4 – 02/2007
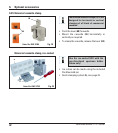
6. Optional accessories
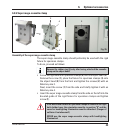
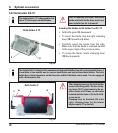
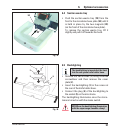
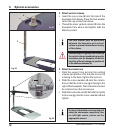
Inserting the knife
• Rotate the knurled nuts (48) on the right and left of the knife holder
forward in opposite directions, lowering the knife support bar to the
lowest possible position, thus ensuring that the knife edge will not be
damaged when inserting the knife.
• Unscrew the clamping screws (49) as far out as possible (rotate
counterclockwise).
• Hold the knife (47) at the knife back and carefully insert it in the holder
from the side as shown with the cutting edge facing upward.
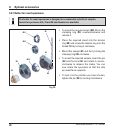
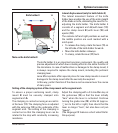
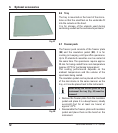
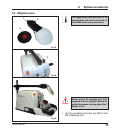
Knife height adjustment
When adjusting the clearance angle, the knife edge should be positioned
as exactly as possible in the actual center of rotation of the knife holder.
The lay-on edge (39) of the rear clamping chucks serves as a reference
position for correct knife height adjustment. The knife edge should be
parallel with the locating edges.
• Rotate the knurled nuts (48) uniformly and backwards until the knife
blade is parallel to the lay-on edge (39) (see detailed illustration) of the
rear clamping chucks.
• To clamp the knife (47) evenly screw the two knife clamping screws
(49) inward (rotate clockwise).
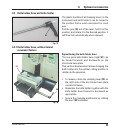
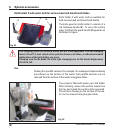
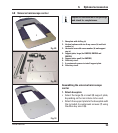
Lateral repositioning of the knife
• Push knife guard (8) to the center.
• Loosen the clamping screws (49) by turning them counterclockwise.
• Push the knife (47) to the left or right as required.
• To clamp the knife (47), always tighten the clamping screw (49) first
which is located on the side to which the knife has been repositioned
by turning it clockwise.