


28
PROCEDURE 10 HEADREST
H
E
A
D
R
E
S
T
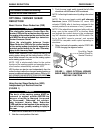
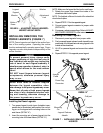
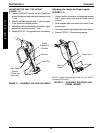
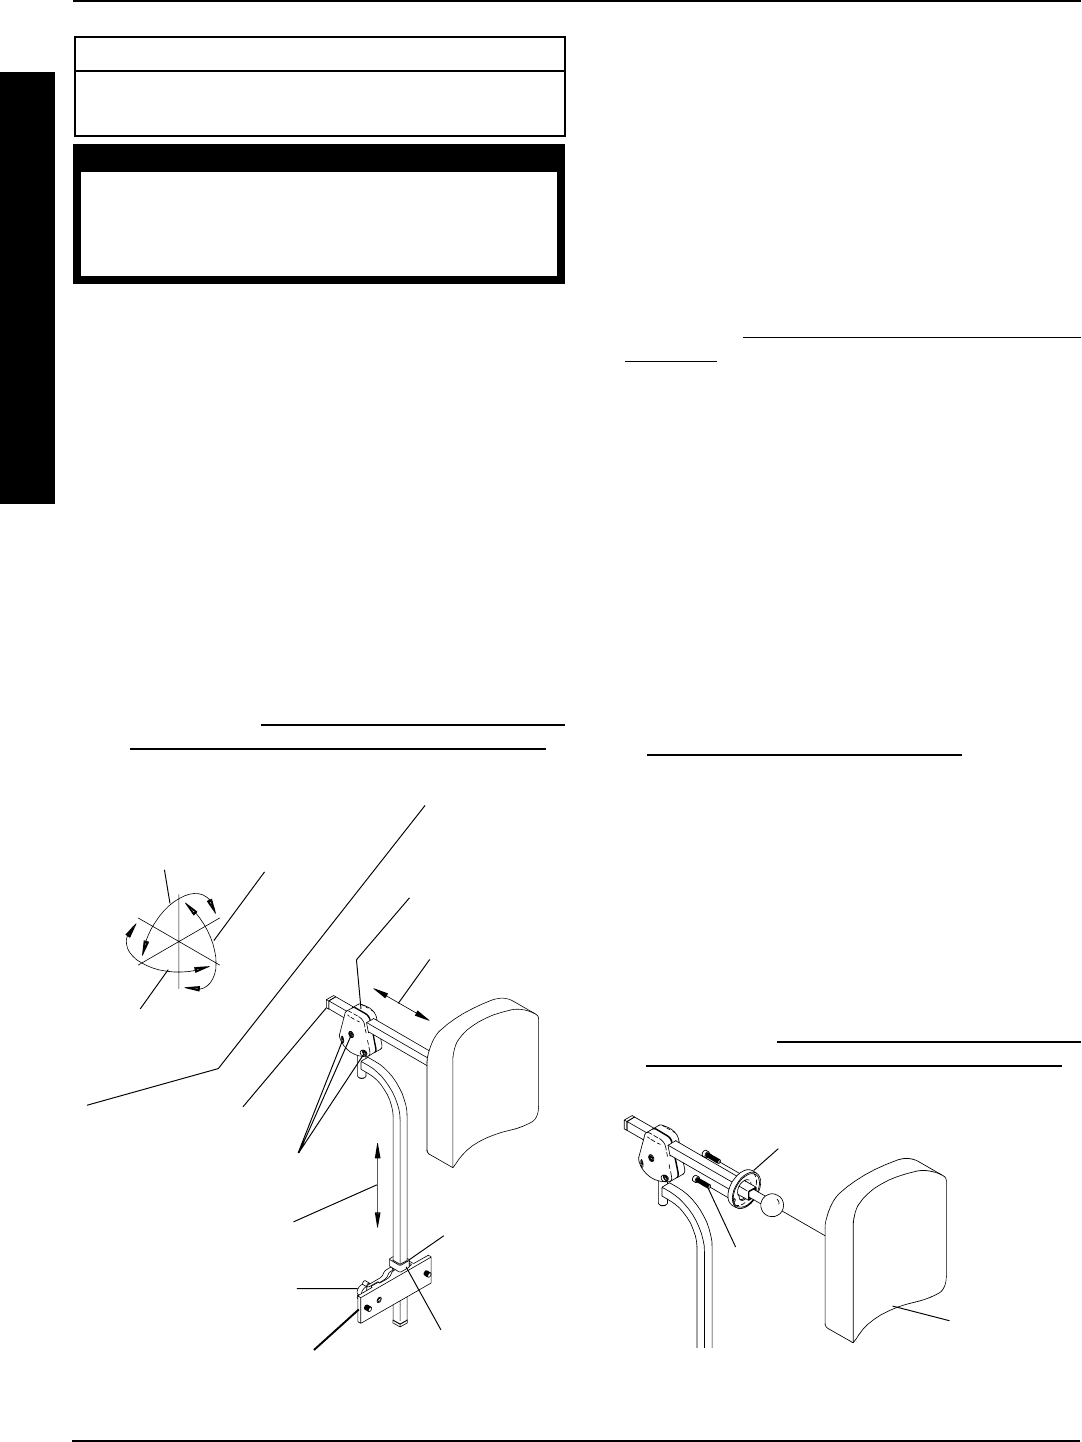
Depth
Adjustment
Height Adjustment
Thumb Screw
Socket Screws
FIGURE 1 - REMOVING/INSTALLING/
ADJUSTING HEADREST
Adjusting Headrest Height
1. Loosen the set screw on the headrest stop.
2. Loosen, but do not remove, the thumb screw that se-
cures the headrest to the headrest mounting bracket.
3. Position the headrest to the desired height.
4. Tighten the thumb screw that secures the headrest
to the headrest mounting bracket.
5. Tighten the set screw on the headrest stop.
6. If necessary, adjust the depth or direction of the head-
rest . Refer to
ADJUSTING HEADREST DEPTH/DI-
RECTION in this procedure of the manual.
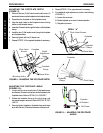
Adjusting Headrest Depth/Direction
1. Loosen, but do not remove, the three (3) socket screws
that secure the offset fixture to the slide tube.
2. If necessary, reposition the headrest to the desired
depth by sliding the headrest towards the front of the
wheelchair or towards the rear of the wheelchair.
3. If necessary, reposition the headrest to the desired
position (headrest will move in any direction). Refer to
DETAIL "A".
4. While holding the headrest in the desired position, se-
curely tighten the three (3) socket screws.
5. If necessary, adjust the height of the headrest . Refer
to
ADJUSTING HEADREST HEIGHT in this proce-
dure of the manual.
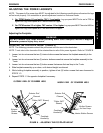
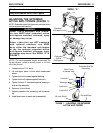
REPLACING HEADREST (FIGURE 2)
1. Remove the three (3) socket screws that secure the
headrest to the headrest mounting bracket.
2. Position the new headrest on the headrest mounting
bracket and secure with the existing three (3) socket
screws.
3. If necessary, adjust the height, depth or direction of the
headrest. Refer to
ADJUSTING HEADREST HEIGHT
or
ADJUSTING HEADREST DEPTH/DIRECTION in
this procedure of the manual.
Headrest Stop
Set Screw
REMOVING/INSTALLING/
ADJUSTING HEADREST (FIGURE 1)
Removing
1. Loosen, but do not remove, the thumb screw that se-
cures the headrest to the headrest mounting bracket.
2. Remove the headrest from the headrest mounting
bracket.
Installing
1. Make sure thumb screw is loose.
2. Install the headrest until the headrest stop sits on the
headrest mounting bracket.
3. If necessary, adjust the height, depth or direction of the
headrest. Refer to
ADJUSTING HEADREST HEIGHT
or
ADJUSTING HEADREST DEPTH/DIRECTION in
this procedure of the manual.
This Procedure Includes the Following:
Removing/Installing/Adjusting Headrest
Replacing Headrest
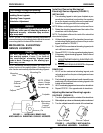
Offset Fixture
Socket
Screws
Headrest Mounting Bracket
Headrest
NOTE: One (1) style of headrest shown for clarity.
Both styles of headrest attach the same way.
FIGURE 2 - REPLACING HEADREST
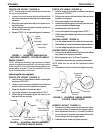
Left to Right
Adjustment
Side to Side
Adjustment
Up and Down
Adjustment
Slide Tube
DETAIL "A"
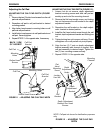
WARNING
After ANY adjustments, repair or service
and BEFORE use, make sure all attaching
hardware is tightened securely - other-
wise injury or damage may result.
Headrest Mounting Bracket