


27
PROCEDURE 9ARMRESTS
A
R
M
R
E
S
T
S
This Procedure Includes the Following:
Reclining Armrests
WARNING
After ANY adjustments, repair or service and BE-
FORE use, make sure all attaching hardware is
tightened securely - otherwise injury or dam-
age may result.
Make sure armrests are locked securely
in place BEFORE using the wheelchair.
Pinch points exist on the armrests.
NOTE: For complete operating information on Non-Re-
clining Armrests, refer to the owner's manual supplied for
the base of the wheelchair.
RECLINING ARMRESTS
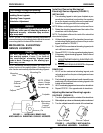
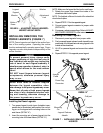
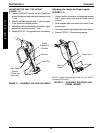
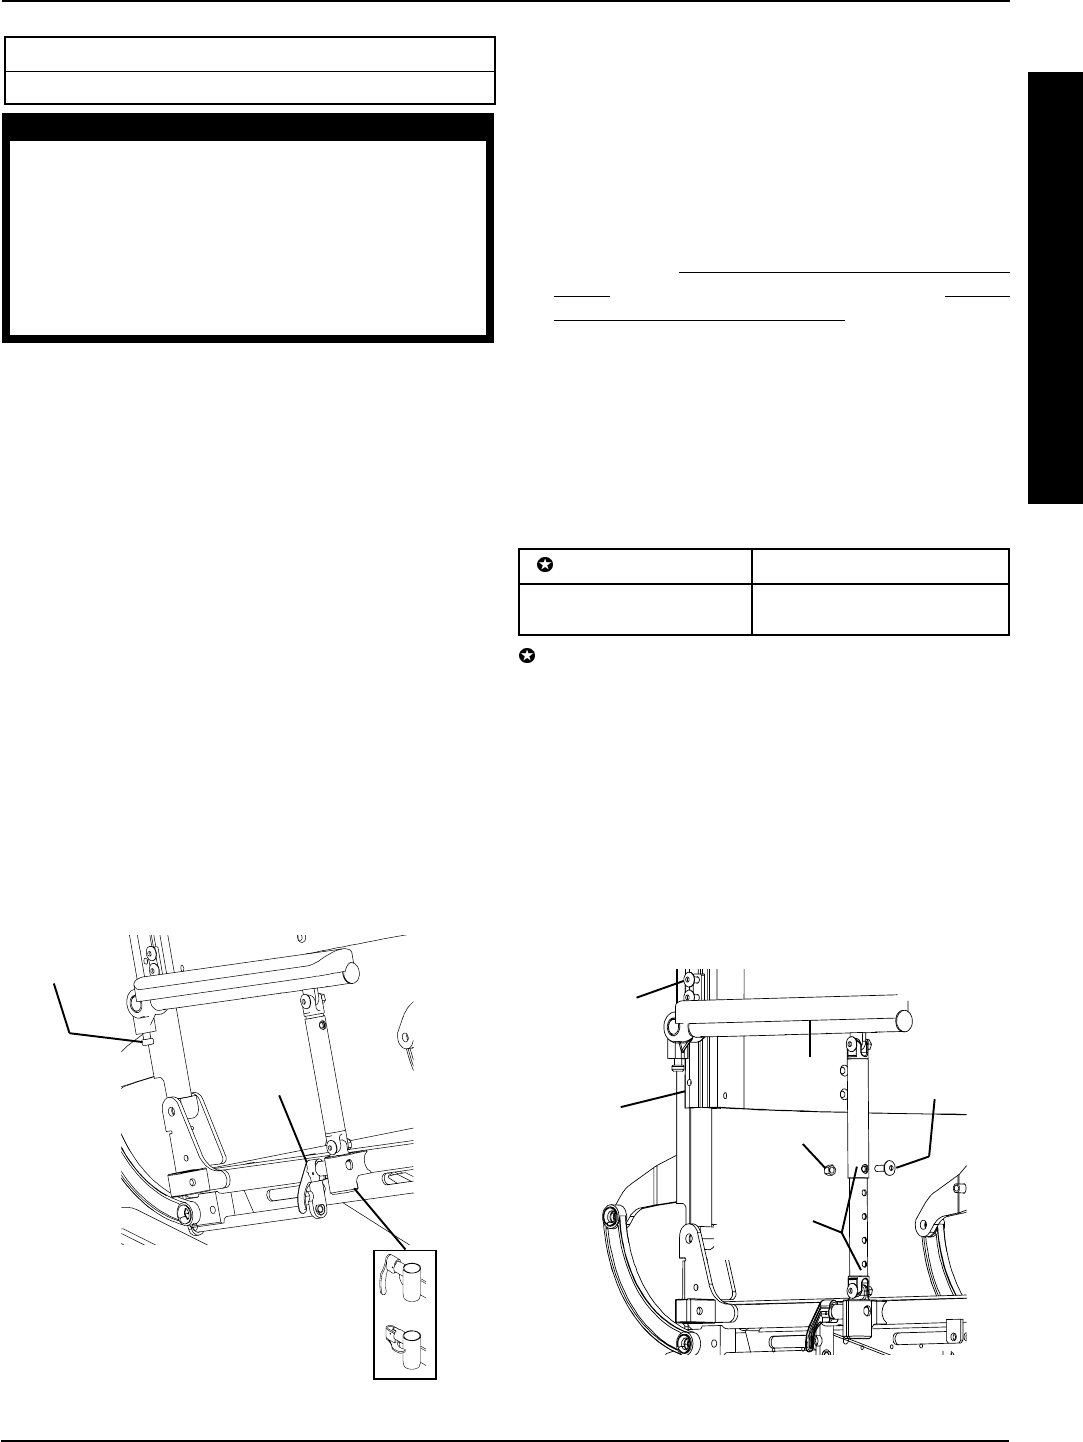
Removing Armrests (FIGURE 1)
1. Lift the armrest release lever at the front of the wheel-
chair to the unlocked (horizontal) position.
2. Lift UP on the armrest and remove from the front arm
socket.
3. Press the release button at the rear of the armrest IN.
4. While holding the release button IN, remove the arm-
rest from the seat frame.
Installing Armrests (FIGURE 1)
1. Position the armrest on the seat frame as shown in
FIGURE 1.
2. Press the release button at the rear of the armrest IN.
3. While holding the release button IN, slide the armrest
onto the seat frame.
4. Make sure the armrest release lever is in the unlocked
(horizontal) position.
5. Install the armrest into the front socket.
6. Push the armrest release lever down into the locked
(vertical) position.
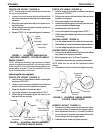
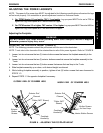
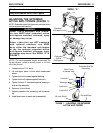
Adjusting Armrest Height (FIGURE 2)
1. Make sure the seating system is in the full upright posi-
tion. Refer to
OPERATING RECLINE ONLY SYS-
TEMS in PROCEDURE 4 of this manual or OPER-
ATING TILT/RECLINE SYSTEMS in PROCEDURE 5
of this manual.
2. Remove the socket bolt and locknut that secure the
front of the upper armrest to the lower armrest.
3. Loosen, but do not remove the two (2) socket screws
and T-nuts that secure the rear of the recliner armrest
to the back cane.
4. Refer to the chart below and adjust the armrest to the
desired height for the user.
HOLE #: 1 2 3 4 5 6
Armrest Height
(in inches) 11 12 13 14 15 16
Front armrest mounting holes are numbered from bot-
tom to top for reference only. (There are no numbers on the
armrests.)
NOTE: The armrests can be at different heights to accom-
modate the user.
5. Reinstall the socket bolt through the mounting hole
determined in STEP 4.
6. Reinstall the locknut and tighten securely.
7. While holding the armrest level, tighten the two (2)
socket screws and T-nuts securely.
8. Repeat STEPS 2-7 for the opposite side if necessary.
FIGURE 2 - ADJUSTING ARMREST HEIGHT
FIGURE 1 - REMOVING/INSTALLING
ARMRESTS
LOCKED (DOWN - VERTICAL)
UNLOCKED (UP-
HORIZONTAL)
Armrest
Release
Lever
Release
Button
Armrest
Locknut
Socket
Bolt
Socket
Screws/
T-Nuts
Height
Adjustment
Holes
Back
Cane