76
Ⅲ
From the Home screen, touch
Applications
➔
Camera
.
Important!
Do not take photos of people without their permission.
Do not take photos in places where cameras are not
allowed.
Do not take photos in places where you may interfere
with another person’s privacy.
Taking Pictures
1. From the Home screen, touch
Applications
➔
Camera
.
2. Using the display as a viewfinder, compose your picture by
aiming the lens at the subject.
•
Touch the screen to focus on the area you touched.
•
To zoom the in and out on the current subject, press the Volume
key Up or Down, or touch the viewfinder image with two fingers,
then sweep them apart to zoom in or pinch them together to zoom
out.
•
To configure settings, see
“Camera Settings”
on page 77.
3. To take the picture, touch the
Take
button.
4. After taking a picture, touch
Image Viewer
to view the
picture. While viewing the picture, use these options:
•
Touch
Delete
to erase the picture.
•
Touch
Share
to send the picture via
AllShare
,
Bluetooth
,
Email
,
Gmail
,
Google+
,
Messaging
,
Photo editor
,
Picasa
,
Social Hub
,
or
Wi-Fi
.
•
Touch
More
➔
Set as
to assign the picture as a contact icon, or as
wallpaper.
•
Touch
More
➔
Rename
to the file name automatically assigned to
the picture.
•
Touch
Back
to return to the Camera to take more pictures.
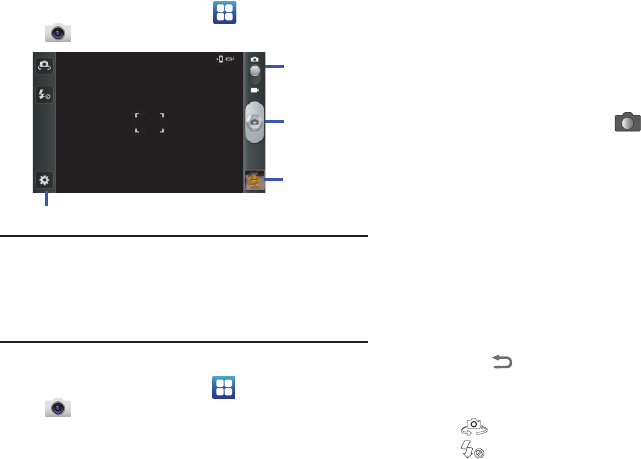
5. Touch the icons on the Shortcuts Bar to adjust camera
settings:
• Swap Camera
: Toggle between the front and rear cameras.
• Flash
: Choose
Off
(never flash),
On
(always flash), or
Auto
flash
(flash only when the light is low).
Mode Button
Take Button
Image Viewer
Shortcuts Bar


