


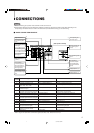

10
You can adjust the screen size and screen position.
This function can be set when an INPUT A component (COMPO.)
signal or INPUT B (VIDEO) signal is input with the underscan size
(UNDER) selected or when an INPUT A RGB signal or INPUT C PC
(RGB) signal is input.
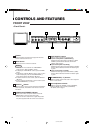
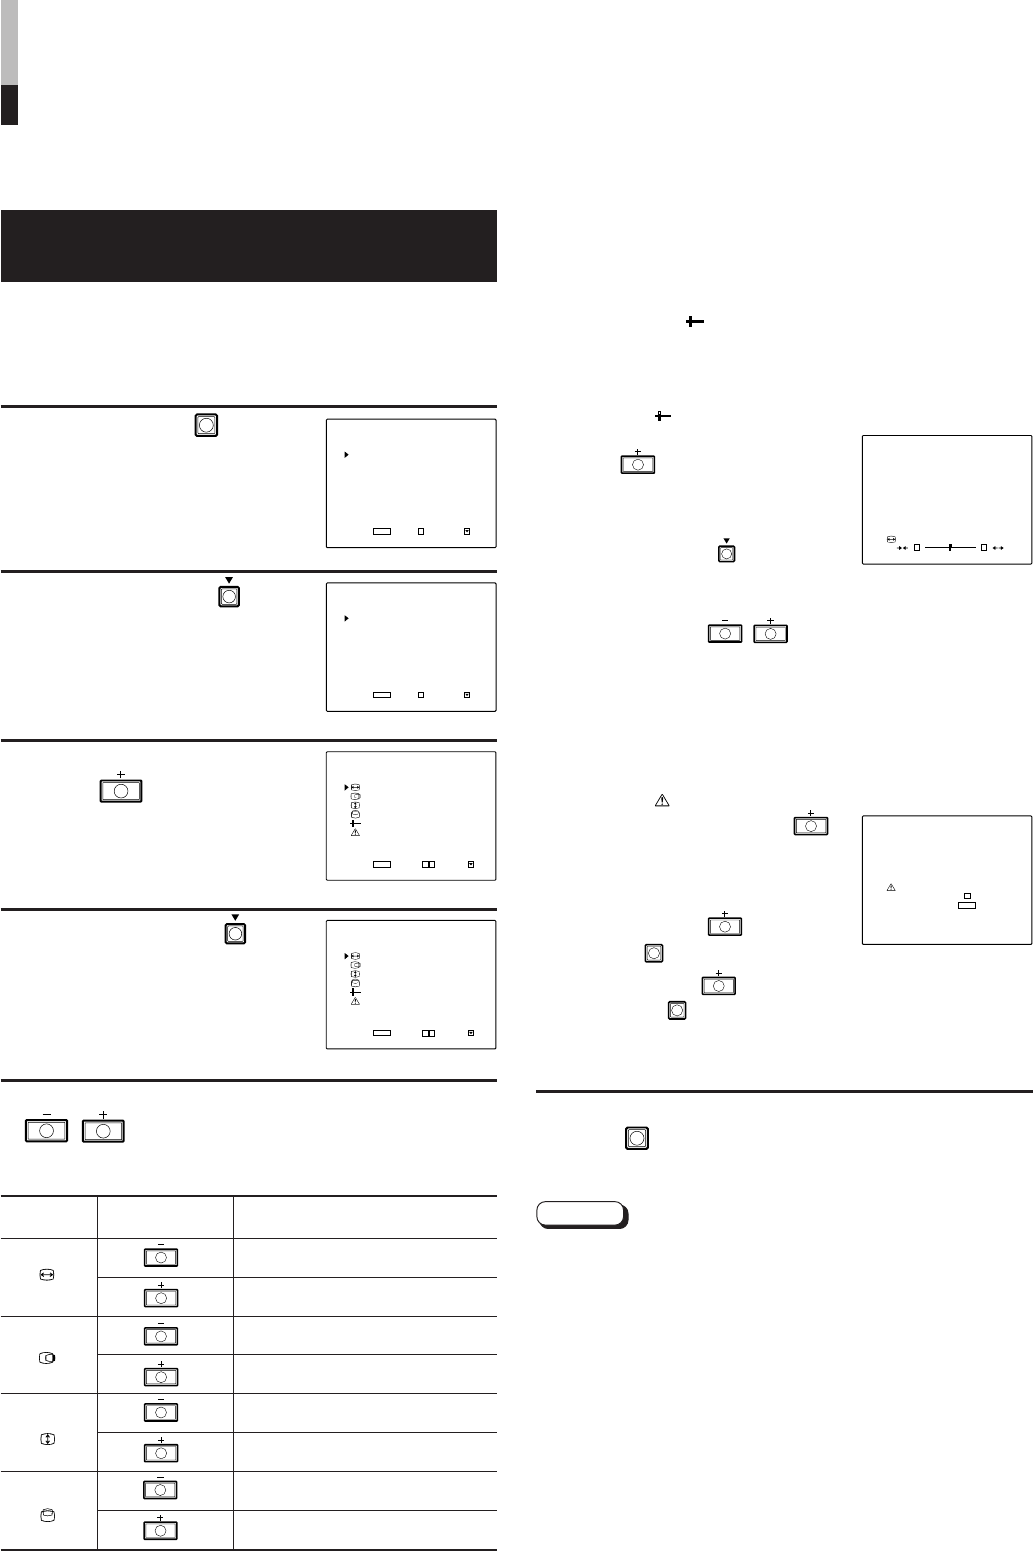
1 Press the MENU
MENU
button.
The <MAIN MENU> screen
appears.
2 Press the SELECT
SELECT
button to select the [SIZE/
POSITION ADJ.] item.
The selection mark (
4
) moves to
the [SIZE/POSITION ADJ.] item.
3 Press the VOLUME/
ENTER
button.
The <SIZE/POSITION ADJ.>
screen appears.
4 Press the SELECT
SELECT
button to select the
desired adjustment item.
The selection mark (
4
) moves to
the selected adjustment item.
5 Perform adjustment with the VOLUME/ENTER
/ buttons.
*
Adjustable range: –80 — +80
*1
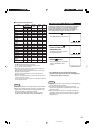
ADJUSTMENT OF SCREEN SIZE
AND SCREEN POSITION
Items VOLUME/ENTER Contents
buttons
H SIZE Reduces the screen size horizontally
(–80 p +80)
*
1
Expands the screen size horizontally
(–80 [ +80)
*
1
H POSITION Shifts the screen to the left
(–80 p +80)
Shifts the screen to the right
(–80 [ +80)
V SIZE Reduces the screen size vertically
(–80 p +80)
Expands the screen size vertically
(–80 [ +80)
V POSITION Shifts the screen down
(–80 p +80)
Shifts the screen up
(–80 [ +80)
Ⅵ SELECTING [ sub menu] IN PROCEDURE 4
You can also adjust items in procedure 5 with only the
selected item displayed. Use this if the full menu screen
makes it difficult to observe the monitor image.
1Select the [ sub menu] item in procedure 4.
2Press the VOLUME/
ENTER button.
The <sub menu> screen appears.
(A single item is displayed at a
time.)
3Press the SELECT
SELECT
button to
select the desired item.
4Perform adjustment with the
VOLUME/ENTER
/
buttons.
Ⅵ RESETTING ITEMS TO THEIR FACTORY-SET (INITIAL)
VALUES
You can reset <SIZE/POSITION ADJ.> items to their
factory-set (initial) values.
1Select the [ reset] item in procedure 4.
2Press the VOLUME/ENTER
button.
The <reset> screen appears.
3Perform adjustment with the
VOLUME/ENTER button or
the MENU
MENU
button.
VOLUME/ENTER button… Values are reset.
MENU button
MENU
… Reset is aborted
(values are unchanged).
* The screen from procedure 4 reappears.
6 After adjustment is complete, press the
MENU
MENU
button twice to exit the menu
screen.
Notes:
● The [SIZE/POSITION ADJ.] item may not be displayed
depending on which input mode (INPUT SELECT) is
selected. In this case, adjusting the screen size and screen
position may be impossible.
● The menu screen automatically disappears when no
operation is performed after about 30 seconds.
● When a prompt appears in the menu screen, it does not
disappear until the operation requested is performed.
● Up to 12 different RGB signals input to INPUT A or INPUT C
are automatically stored in memory (User Memory).
When the 13th signal is input, the signal first stored in
memory is replaced with the new one.
(Refer to “User Memory for RGB Input” on page 14.)
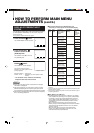
<MAIN MENU> screen
HOW TO PERFORM MAIN MENU
ADJUSTMENTS
<MAIN MENU> screen
<SIZE/POSITION ADJ.> screen
<SIZE/POSITION ADJ.> screen
(
)
(
)
(
)
(
)
• H SIZE: adjusts the horizontal screen size
• H POSITION: adjusts the horizontal screen position
• V SIZE: adjusts the vertical screen size
• V POSITION: adjusts the vertical screen position
<sub menu> screen
<reset> screen
*1: When INPUT A component (COMPO.) or INPUT B (VIDEO) is selected as
the input mode and the [FUNCTION SELECT] item SCAN SIZE is set to
“underscan (UNDER)”, the H SIZE adjustable range is 00 — +80.
00.12.20, 0:39 PM10