SECTION 11—OPTIONS
Tracer® EX2 38 Part No. 1110546
SECTION 11—OPTIONS
ƽ WARNING
After any adjustments, repair or service and before use, make sure all attaching hardware is
tightened securely. Otherwise injury or damage may occur.
Installing Amputee Bracket
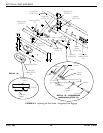
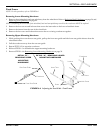
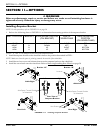
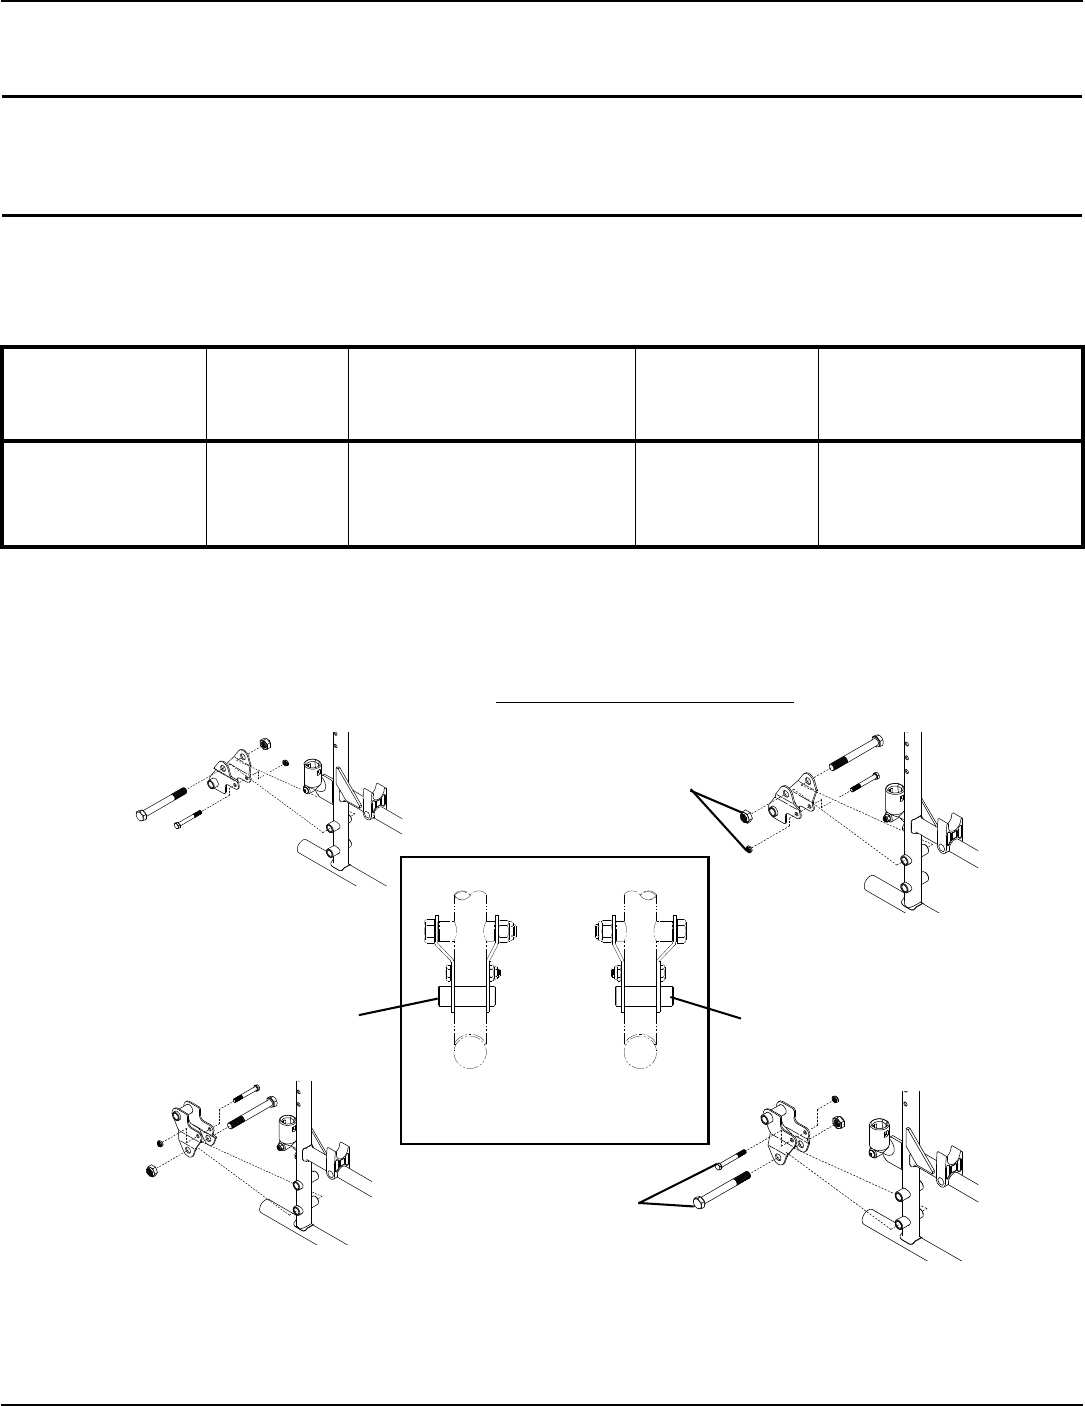
NOTE:Forthisprocedure,refertoFIGURE 11.1onpage38.
1. RefertothefollowingchartorFIGURE 11.1todeterminethemountingpositionoftheamputeebracket:
*NOTE:ʺAʺandʺBʺarestampedonthesidesoftheamputeebracket.
2. Installtheamputeebra cketonthewheelchairframetothepositio ndeterminedin
STEP1.
NOTE:Makesuretheaxlespacerispointingtowardstheoutsideofthewheelchair.
3. Installthetwohexscrewsand locknutsthatsecuretheamputeebrackettothewheelchair.
4. Installtherearwheelsontothewheelchair.RefertoRemoving/InstallingRearWheels
onpage 30.
FIGURE 11.1 Installing Amputee Bracket
SEAT-TO-FLOOR *BRACKET AXLE SPACER POSITION
(ON BRACKET)
SIDE OF
WHEELCHAIR
AXLE MOUNTING
POSITION
(ON WHEELCHAIR)
ADULT
ADULT
HEMI
HEMI
A
B
B
A
DOWN
DOWN
UP
UP
RIGHT
LEFT
RIGHT
LEFT
TOP
TOP
BOTTOM
BOTTOM
Bracket “A”
Bracket “B”
Locknuts
Hemi Right
Hemi Left
Rear View of
Amputee Bracket
Right
Left
Adult Right
Axle Spacer Toward Outside
of Wheelchair
Adult Left
Axle Spacer Toward Outside
of Wheelchair
Hex Screws


