


SECTION 7—REAR WHEELS
Tracer® EX2 30 Part No. 1110546
SECTION 7—REAR WHEELS
ƽ WARNING
After any adjustments, repair or service and before use, make sure all attaching hardware is
tightened securely. Otherwise injury or damage may occur.
Removing/Installing Rear Wheels
ƽ WARNING
Only a qualified technician may change the size of the rear wheel or the seat-to-floor height.
If changing the size of the rear wheel or a change in the Seat-to-Floor Height is desired, this
procedure MUST be performed by a qualified technician.
Make sure both rear wheels are the same size and are installed into the same respective mounting
hole BEFORE using the wheelchair, otherwise injury may occur.
Permanent Axles
ƽ WARNING
This procedure MUST be performed by a qualified technician.
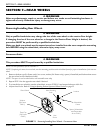
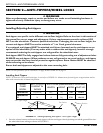
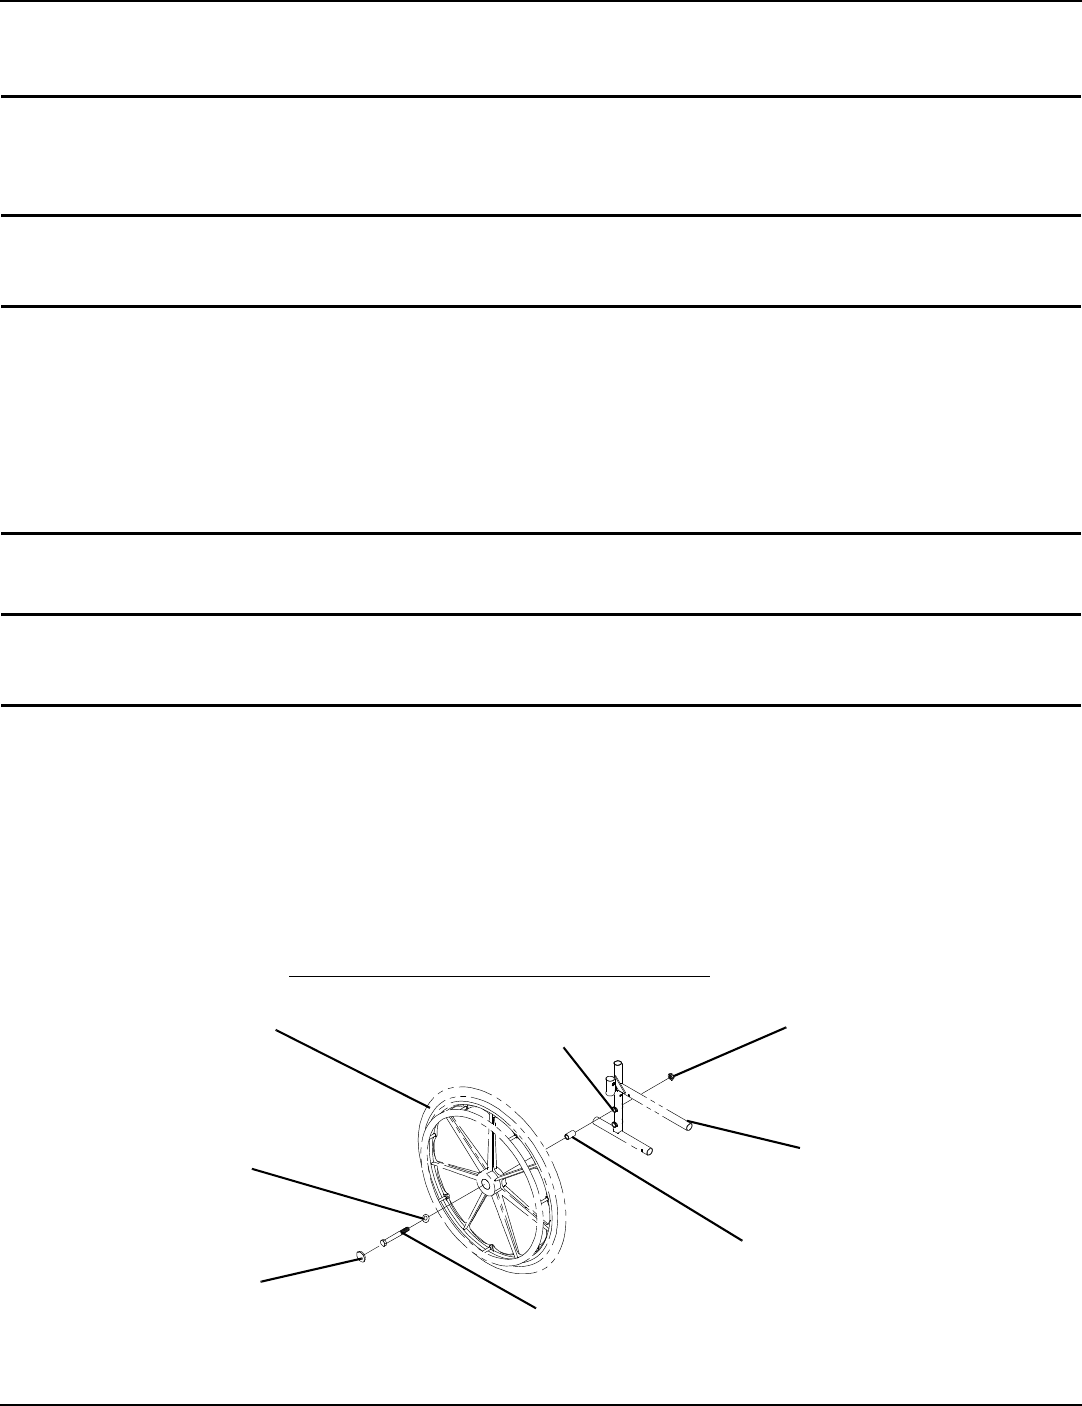
NOTE:Forthisprocedure,refertoFIGURE 7.1.
NOTE:Ifreplacingthesamesizerearwheel,notethemountingpositiononthewheelchairframeforproperreinstallationofthenewrear
wheel.
1. Removethedustcap(SAFrameonly),hexscrew,washer(SAFrameonly),spacer(ifinstalled)andlocknutthatsecure
the
rearwheeltothewheelchairframe.
NOTE:Thespacerisusedonwheelchairswithremovablearmsonly.
2. RepeatSTEP1for theoppositerearwheelifdesired.
3. Toreinstalltherearwheel(s)ontothewheelchair,reverseSTEPS1‐2andtorquelocknutto40ft.‐lbs.
4. Adjustwheellocks.RefertoUsing/Adjusting
PatientOperatedWheelLocksonpage 35.
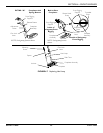
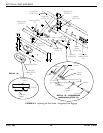
FIGURE 7.1 Removing/Installing Rear Wheels - Permanent Axles
Rear Wheel
Washer
(SA Frame
ONLY)
Dust Cap
(SA Frame
ONLY)
Hex
Screw
Spacer (Wheelchairs
with Removable
Arms ONLY)
Wheelchair
Frame
Locknut
Axle Mounting
Axle