8
R
E
A
R
W
H
E
E
L
PROCEDURE 3 REAR WHEEL/TRANSMISSION
T
R
A
N
S
M
I
S
S
I
O
N
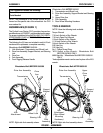
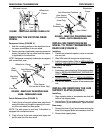
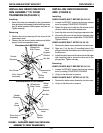
REMOVING EXISTING WHEEL LOCK
(FIGURE 1)
1. Remove the locknut and bolt securing the wheel lock
to the wheelchair frame.
2. Remove the wheel lock from the wheelchair frame.
INSTALLING CLD ON EXISTING
WHEELCHAIR
1. Remove the EXISTING wheel lock. Refer to REMOV-
ING EXISTING WHEEL LOCK in this procedure of
the manual.
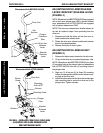
2. Remove the EXISTING rear wheel. Refer to
REMOV-
ING THE EXISTING REAR WHEEL in this proce-
dure of the manual.
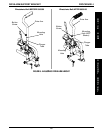
3. Install the EXISTING rear wheel onto the transmis-
sion rear hub. Refer to
INSTALLING/REMOVING
REAR WHEEL TO/FROM THE TRANSMISSION
REAR HUB in this procedure of the manual.
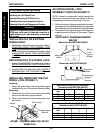
4. Install the hub support plates onto the EXISTING
rear wheel/transmission rear hub. Refer to
INSTALL-
ING/REMOVING THE HUB SUPPORT PLATES in
this procedure of the manual.
5. Install the EXISTING rear wheel/transmission rear
hub BACK onto the wheelchair. Refer to
INSTALL-
ING/REMOVING THE AXLE BOLT in this procedure
of the manual.
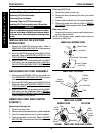
REPLACING THE HUB ATTACHMENT
NOTE: The hub attachment consists of the hub support
plates and the axle bolt.
1. Remove the EXISTING hub support plates. Refer to
INSTALLING/REMOVING THE HUB SUPPORT
PLATES in this procedure of the manual.
2. Remove the EXISTING axle bolt. Refer to
INSTALL-
ING/REMOVING THE AXLE BOLT in this procedure
of the manual.
3. Install the NEW axle bolt. Refer to
INSTALLING/REMOV-
ING THE AXLE BOLT in this procedure of the manual.
4. Install the NEW hub support plates.
Refer to IN-
STALLING/REMOVING THE HUB SUPPORT
PLATES in this procedure of the manual.
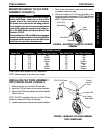
REPLACING THE TRANSMISSION
1. Remove the EXISTING drive arm assembly from the
transmission rear hub. Refer to
INSTALLING/REMOV-
ING DRIVE ARM ASSEMBLY TO/FROM TRANS-
MISSION LEVER in PROCEDURE 4 of the manual.
2. Remove the EXISTING hub support plates. Refer to
INSTALLING/REMOVING THE HUB SUPPORT
PLATES in this procedure of the manual.
3. Remove the EXISTING axle bolt. Refer to
INSTALL-
ING/REMOVING THE AXLE BOLT in this procedure
of the manual.
4. Remove the EXISTING rear wheel from the trans-
mission rear hub. Refer to I
NSTALLING/REMOV-
ING REAR WHEEL TO/FROM THE TRANSMIS-
SION REAR HUB in this procedure of the manual.
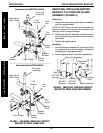
5. Remove the EXISTING wheel lock. Refer to
INSTALL-
ING/REMOVING CLD WHEEL LOCK TO/FROM
TRANSMISSION in this procedure of the manual.
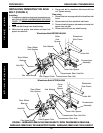
6. Install EXISTING or NEW wheel lock onto NEW rear
transmission hub. Refer to
INSTALLING/REMOVING
CLD WHEEL LOCK TO/FROM TRANSMISSION
in this procedure of the manual.
7. Reinstall the EXISTING rear wheel onto the NEW
transmission rear hub. Refer to I
NSTALLING/REMOV-
ING REAR WHEEL TO/FROM THE TRANSMIS-
SION REAR HUB in this procedure of the manual.
8. Reinstall the EXISTING hub support plates. Refer to
INSTALLING/REMOVING THE HUB SUPPORT
PLATES in this procedure of the manual.
9. Reinstall the EXISTING axle bolt. Refer to
INSTALL-
ING/REMOVING THE AXLE BOLT in this procedure
of the manual.
10. Reinstall the EXISTING drive arm assembly onto the
NEW transmission lever. Refer to
INSTALLING/REMOV-
ING DRIVE ARM ASSEMBLY TO/FROM TRANSMIS-
SION LEVER in PROCEDURE 4 of the manual.
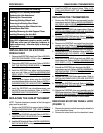
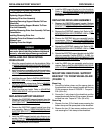
This procedure includes the following:
Installing CLD on Existing Wheelchair
Replacing the Hub Attachment
Replacing the Transmission
Removing Existing Wheel Lock
Removing the Existing Rear Wheel
Installing/Removing Rear Wheel to/from
Transmission Rear Hub
Installing/Removing the Hub Support Plates
Installing/Removing the Axle Bolt
WARNING
After ANY adjustments, repair or service and BE-
FORE use, make sure all attaching hardware is
tightened securely - otherwise injury or damage
may result.


