Introduction
WARNING
See the Important Safety and Product Information guide in the
product box for product warnings and other important
information.
Always consult your physician before you begin or modify any
exercise program.
Keys
À
Select to turn the backlight on and off.
Hold to turn the device on and off.
Á
Select to scroll through activity profiles, menus, details,
and settings.
Hold to scroll quickly through the settings.
Select to scroll through data screens during an activity.
Â
ENTER
Select to start and stop the timer.
Select to choose an option and to acknowledge a
message.
Ã
BACK
Select to mark a new lap.
Select to mark a transition during a multi-sport activity.
Select to mark a rest period during a swim.
Select to return to the previous screen.
Select multiple times to return to the time of day screen
and lock the device.
Ä
Select to unlock the device.
Select to switch between the activity profile screen, main
menu, and timer screen.
Hold to send your activity to your Garmin Connect™
account.
Status Icons
Icons appear at the top of the activity profile and data screens. A
flashing icon means the device is searching for a signal. A solid
icon means the signal was found or the sensor is connected.
GPS status
Bluetooth
®
technology status
Wi‑Fi
®
technology status
Heart rate status
Foot pod status
Speed and cadence status
Power status
VIRB™ camera status
Going for a Run
The first fitness activity you record on your device can be a run,
ride, or any outdoor activity. The device comes partially
charged. You may need to charge the device (Charging the
Device) before starting the activity.
1
Hold to turn on the device.
2
Select and to view the activity profiles.
3
Select ENTER.
The timer screen for the selected activity profile appears.
4
Go outside, and wait while the device locates satellites.
It may take a few minutes. The satellite bars turn green when
the device is ready.
5
Select to start the timer.
6
Start your activity.
7
After you complete your activity, select to stop the timer.
8
Select Save to save the activity and reset the timer.
A summary appears. You can upload your activity to your
Garmin Connect account (Garmin Connect).
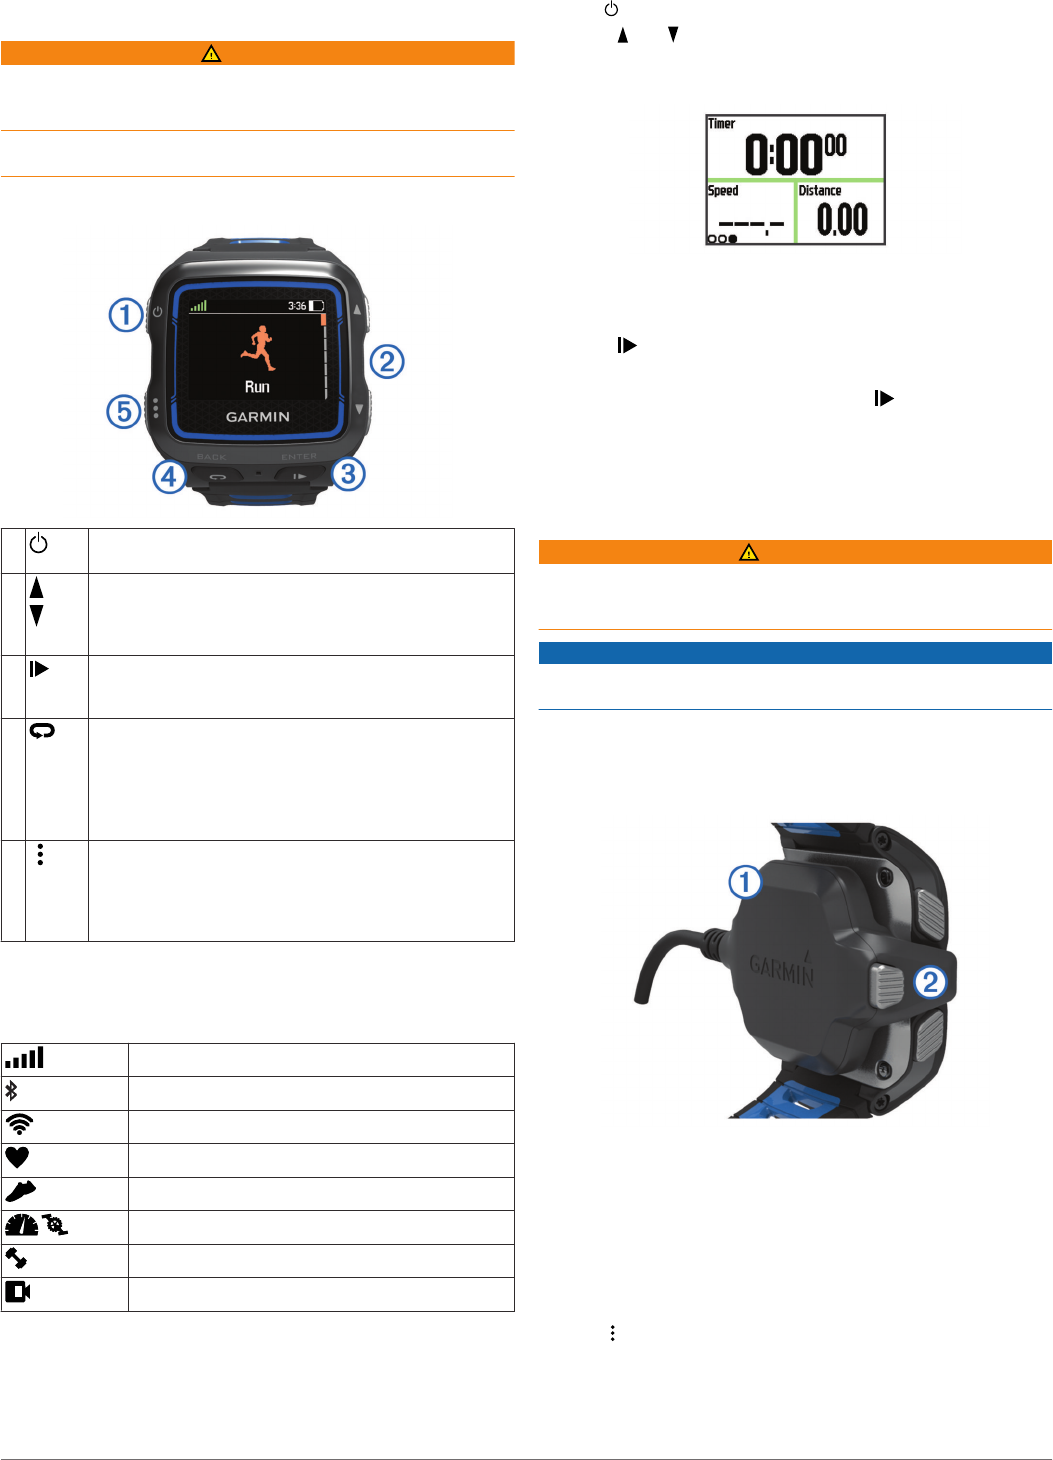
Charging the Device
WARNING
This device contains a lithium-ion battery. See the Important
Safety and Product Information guide in the product box for
product warnings and other important information.
NOTICE
To prevent corrosion, thoroughly dry the contacts and the
surrounding area before charging or connecting to a computer.
1
Plug the USB cable into a USB port on your computer.
2
Align the charger posts with the contacts on the back of the
device, and connect the charging clip
À
securely to the
device.
3
Charge the device completely.
4
Press
Á
to remove the charger.
Saving Time with the Shortcut Menu
The device has shortcut menu options available for various data
screens and accessory features.
NOTE: Some shortcut menu options require optional
accessories.
1
Hold to view the shortcut menu options.
2
Select an option:
Introduction 1


