


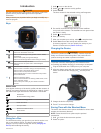


7
Select a course.
8
Select Do Course.
9
Select to start the timer.
The map displays the course and status information at the
top of the screen.
10
If necessary, select to view additional data screens.
Viewing Course Details
1
Select > Navigation > Courses.
2
Select a course.
3
Select an option:
• Select Map to view the course on the map.
• Select Elevation Profile to view an elevation plot of the
course.
• Select Name to view and edit the name of the course.
Deleting a Course
1
Select > Navigation > Courses.
2
Select a course.
3
SelectDelete > Yes .
Stopping Navigation
1
During the activity, select to view the compass or map.
2
Hold .
3
Select Stop Navigation > Yes.
ANT+ Sensors
Your device can be used with wireless ANT+ sensors. For more
information about compatibility and purchasing optional sensors,
go to http://buy.garmin.com.
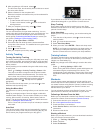
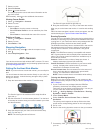
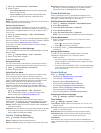
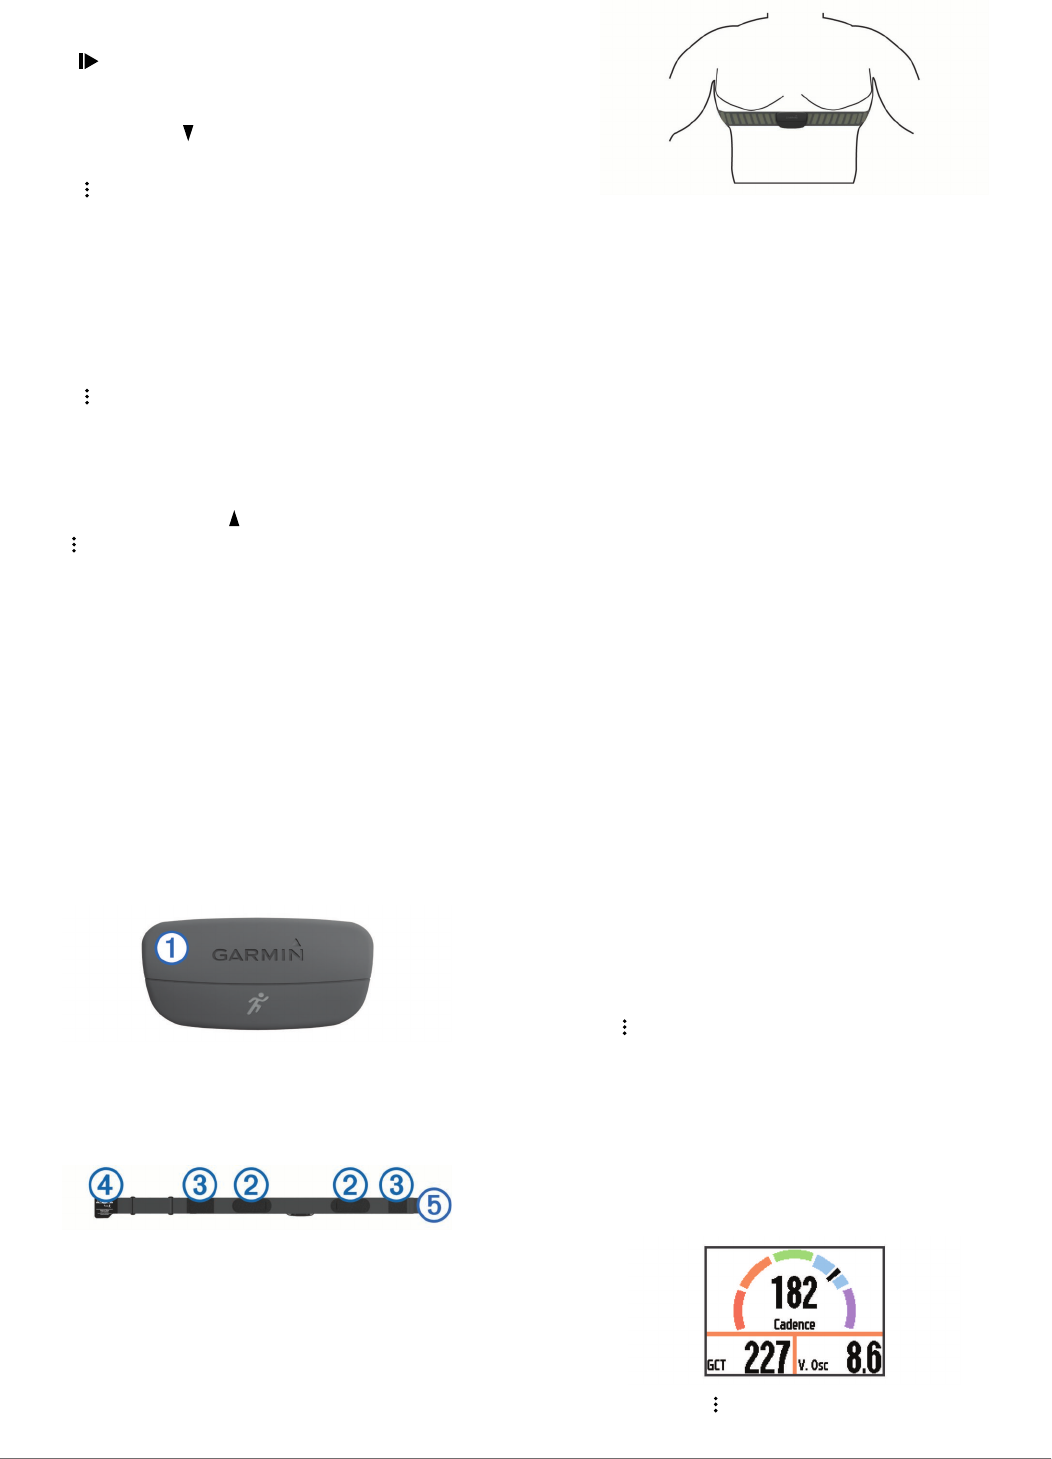
Putting On the Heart Rate Monitor
NOTE: If you do not have a heart rate monitor, you can skip this
task.
You should wear the heart rate monitor directly on your skin, just
below your sternum. It should be snug enough to stay in place
during your activity.
1
Snap the heart rate monitor module
À
onto the strap.
The Garmin logos on the module and the strap should be
right-side up.
2
Wet the electrodes
Á
and the contact patches
Â
on the back
of the strap to create a strong connection between your chest
and the transmitter.
3
Wrap the strap around your chest, and connect the strap
hook
Ã
to the loop
Ä
.
NOTE: The care tag should not fold over.
The
Garmin logos should be right-side up.
4
Bring the device within 3 m (10 ft.) of the heart rate monitor.
After you put on the heart rate monitor, it is active and sending
data.
TIP: If the heart rate data is erratic or does not appear, see the
troubleshooting tips (Tips for Erratic Heart Rate Data).
Running Dynamics
You can use your compatible Forerunner device paired with the
HRM-Run™ accessory to provide real-time feedback about your
running form. If your Forerunner device was packaged with the
HRM-Run accessory, the devices are already paired.
The HRM-Run accessory has an accelerometer in the module
that measures torso movement in order to calculate three
running metrics: cadence, vertical oscillation, and ground
contact time.
NOTE: The HRM-Run accessory is compatible with several
ANT+ fitness products and can display heart rate data when
paired. The running dynamics features are available only on
some Garmin devices.
Cadence: Cadence is the number of steps per minute. It
displays total steps (right and left combined).
Vertical oscillation: Vertical oscillation is your bounce while
running. It displays the vertical motion of your torso,
measured in centimeters for each step.
Ground contact time: Ground contact time is the amount of
time in each step that you spend on the ground while
running. It is measured in milliseconds.
NOTE: Ground contact time is not available while walking.
Training with Running Dynamics
Before you can view running dynamics, you must put on the
HRM-Run accessory and pair it with your device (Pairing Your
ANT+ Sensors).
1
If your Forerunner was packaged with the HRM-Run
accessory, the devices are already paired, and the
Forerunner is set to display running dynamics. You can put
on your heart rate monitor and skip to step 4.
2
Select > Activity Settings > Data Screens > Running
Dynamics > Status > Enable.
3
Select Primary Metric.
4
Select Cadence, Ground Contact Time, or Vertical
Oscillation.
The primary metric appears as the top field on the data
screen with a corresponding position on the color gauge.
5
Go for a run.
6
Scroll to the running dynamics screen to view your metrics.
7
If necessary, hold to change the primary metric during
your run.
8 ANT+ Sensors