45
PROCEDURE 11BATTERIES
B
A
T
T
E
R
I
E
S
REPLACING BATTERIES
WARNING
Most batteries are not sold with instructions. How-
ever, warnings are frequently noted on the cell
caps. Read them carefully, otherwise injury or
damage can occur.
NOTE: Invacare recommends that both batteries be re-
placed if one (1) battery is defective.
Recommended Battery Types
WARNING
The warranty and performance specifications con-
tained in this manual are based on the use of deep
cycle gel cell or sealed lead acid batteries.
Invacare strongly recommends their use as the
power source for this unit.
CAUTION
Failure to use the correct battery size and/or volt-
age may cause damage to your wheelchair and
give you unsatisfactory performance.
NOTE: The recommended battery type is 22NF deep
cycle.
1. Remove the battery boxes from the wheelchair. Refer
to
REMOVING/INSTALLING BATTERY BOXES in
this procedure of the manual.
2. Remove existing batteries from the battery boxes. Refer
to
INSTALLING/REMOVING BATTERIES INTO/
FROM BATTERY BOXES in this procedure of the
manual.
3. Clean the new battery terminals.
4. Install the new batteries into the battery boxes. Refer
to
INSTALLING/REMOVING BATTERIES INTO/
FROM BATTERY BOXES in this procedure of the
manual.
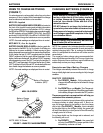
Cleaning Battery Terminals
WARNING
DO NOT allow the liquid in the battery to come in
contact with skin, clothes or other possessions. It is
a form of acid and harmful or damaging burns
may result. Should the liquid touch your skin, wash
the area immediately and thoroughly with cool
water. In serious cases or if eye contact is made,
seek medical attention IMMEDIATELY.
NEVER smoke or strike a match near batteries. If
the caps of the battery cells are removed, NEVER
look directly into them while charging batteries.
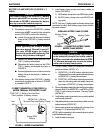
1. Examine battery clamps and terminals for corrosion.
2. If applicable, verify that the plastic caps are in place
over the battery cell holes.
3. Cut the tie wraps around the terminal caps/covers.
4. Slide the terminal cap/cover up the wire to expose
the battery terminal.
5. Clean the terminals and inside the battery clamps by
using a battery cleaning tool, wire brush, or medium
grade sand paper.
NOTE: When done, these areas should be shiny, not dull.
6. Carefully dust off all metal particles.
7. Slide the terminal cap/cover back down the wire
to cover the battery terminal.
8. Secure the terminal cap/cover using NEW tie
wraps.
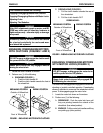
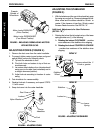
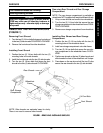
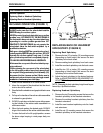
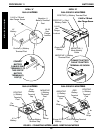
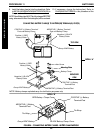
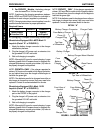
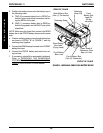
INSTALLING/REMOVING BATTERY
BOXES (FIGURE 9)
NOTE: To remove the battery boxes from the wheelchair,
reverse the following procedure.
WARNING
If the wheelchair is equipped with the removable
footboard AND it is installed in the heighest posi-
tion, it is necessary to remove the footboard plate
BEFORE removing the battery boxes. Otherwise,
injury can occur.
To remove the removable footboard, refer to REMOV-
ING THE REMOVABLE FOOTBOARD ASSEMBLY
FROM THE WHEELCHAIR in PROCEDURE 3 of this
manual.
NOTE: Motors should be in the engaged position when
removing/installing batteries. Refer to
ENGAGING/DISEN-
GAGING MOTORS in PROCEDURE 8 of this manual.
1. Verify that the ON/OFF switch on the joystick is in the
OFF position.
2. If necessary, remove the front and rear shrouds. Refer
to
REMOVING/INSTALLING SHROUDS in PROCE-
DURE 9 of this manual.
WARNING
Use extreme care when installing/removing the
battery boxes.
NEVER unplug the battery cables by pulling on
the wires. Unplug the battery cables by pull-
ing on the connector ONLY. Otherwise injury
or damage may result.
When removing the battery boxes from the
wheelchair, remove the rear battery box first.
NOTE: RIGHT and LEFT are determined by sitting in
the wheelchair..


