


16
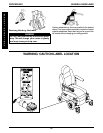
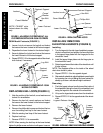
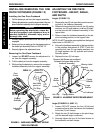
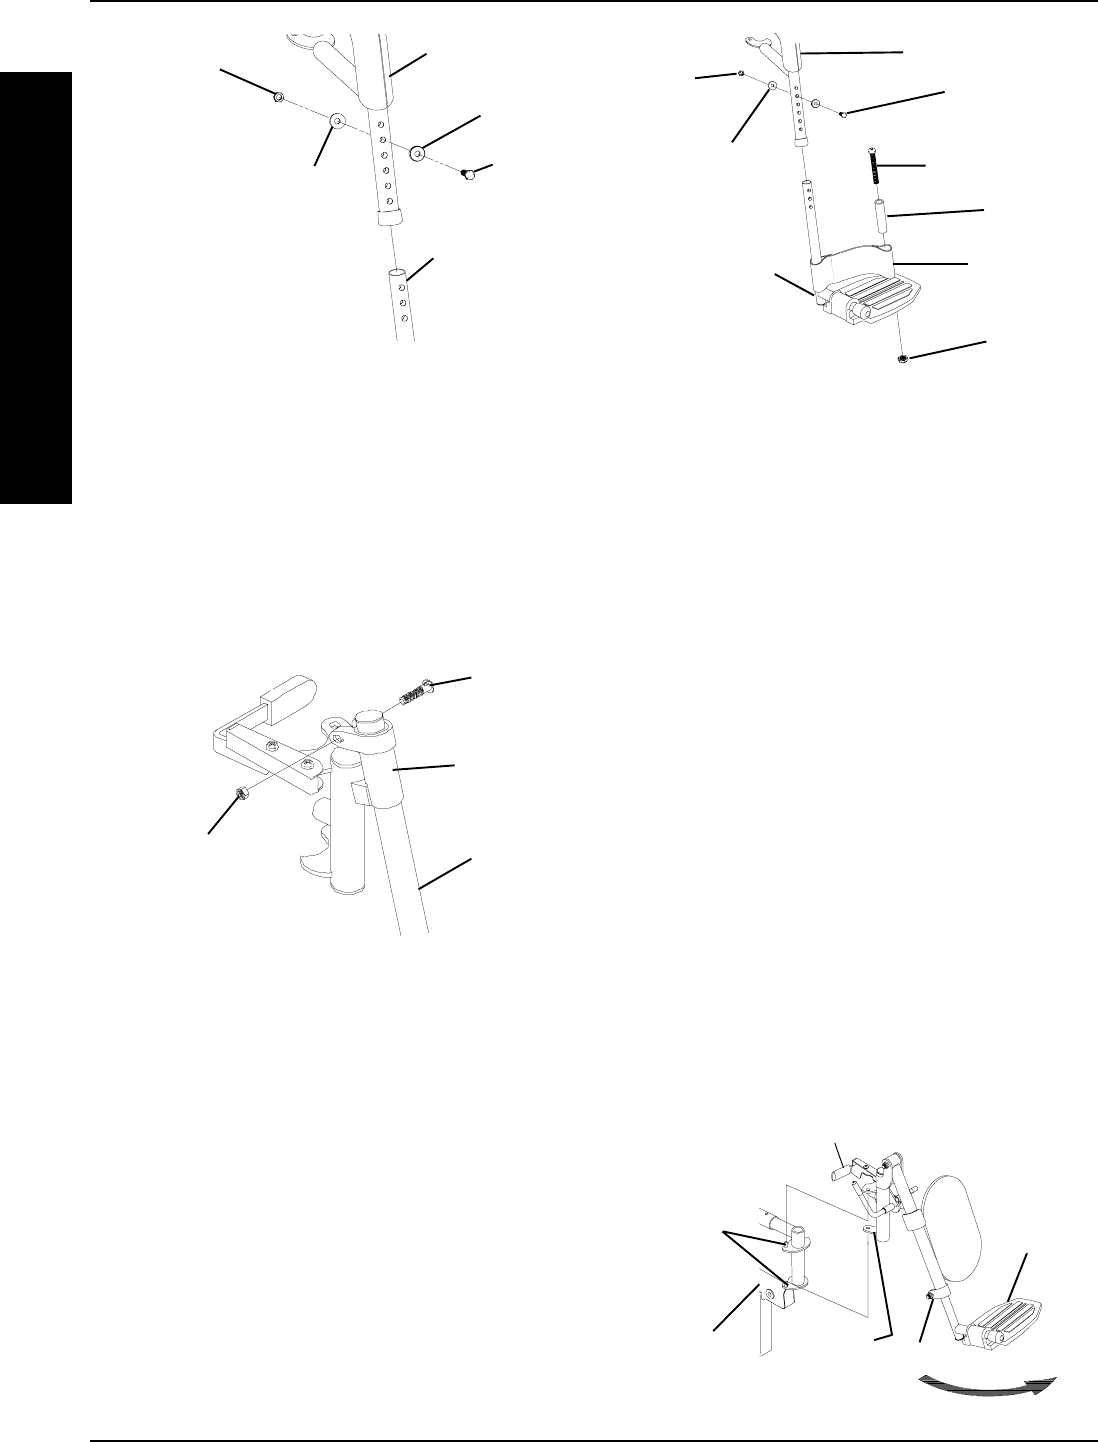
FIGURE 5- INSTALLING/REMOVING ELEVATING LEGRESTS
INSTALLING/REMOVING
ELEVATING LEGRESTS (FIGURE 5)
Installing
1. Turn the legrest to the side (open footplate is perpen-
dicular to wheelchair) and position the mounting holes
in the legrest hinge plates with the hinge pins on the
wheelchair frame.
2. Install the legrest hinge plates onto the hinge pins on
the wheelchair frame.
3. Rotate legrest toward the inside of the wheelchair until
it locks in place.
NOTE: The footplate will be on the inside of the wheel-
chair when locked in place.
4. Repeat STEPS 1-3 for the opposite legrest.
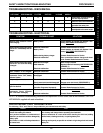
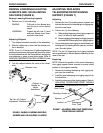
5. After seated in wheelchair, adjust footplate to correct height
by loosening the nut and sliding the lower footrest as-
sembly up or down until desired height is achieved.
Removing
1. Push the legrest release handle toward the inside of
the wheelchair (facing the front of the wheelchair) and
swing the legrest to the outside of the wheelchair.
2. Lift up on the legrest and remove from the wheelchair.
3. Repeat STEPS 1-2 for the opposite side of the wheel-
chair.
Hinge
Pins
Legrest
Hinge
Plates
Legrest Release Handle
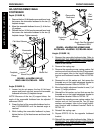
P93M Model Footrests (FIGURE 3)
1. Loosen, but do not remove the lug bolt and locknut
that secure the lower footrest to the footrest support.
2. Reposition the lower footrest to the desired height.
3. Securely tighten the lug bolt and locknut that secure
the lower footrest to the footrest support.
4. Repeat STEPS 1-3 for the opposite side of the wheel-
chair footrest, if necessary.
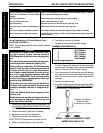
FIGURE 3 - ADJUSTING FOOTREST HEIGHT - P93M
MODEL FOOTRESTS
Phillips Bolt
Spacer
Locknut
Locknut
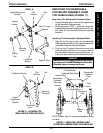
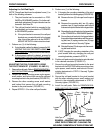
Heel Loop
FIGURE 4 - REPLACING HEEL LOOPS
Hex Bolt
Cover Washers
Lower Footrest
Lug Bolt
Locknut
Footrest
Support
Lower
Footrest
REPLACING HEEL LOOPS (FIGURE 4)
1. Note the position of the hex bolt, coved washers and
locknut for reinstallation.
2. Remove the hex bolt, coved washers and locknut
that secure the lower footrest to the footrest support.
3. Remove the lower footrest.
4. Remove the phillips bolt, spacer and locknut that se-
cure the existing heel loop to the lower footrest.
5. Slide the existing heel loop off the lower footrest.
6. Replace heel loop.
7. Reverse STEPS 1-6 to reassemble.
NOTE: When securing the heel loop to the lower footrest,
tighten the phillips screw and locknut until spacer is secure.
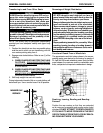
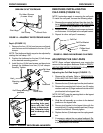
Nut
Lower
Footrest
Assem-
bly
Footrest Support
Wheelchair
Frame
F
R
O
N
T
R
I
G
G
I
N
G
S
FRONT RIGGINGSPROCEDURE 3
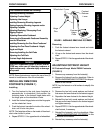
FIGURE 2 - ADJUSTING FOOTREST HEIGHT - ALL
FOOTRESTS EXCEPT MODEL P93M FOOTRESTS
NOTE: PW93ST style
footrest shown for clarity
only.
Footrest Support
Hex Bolt
Coved
Washer
Coved Washer
Locknut
Lower Footrest