


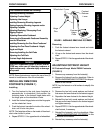
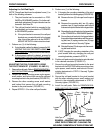
23
Adjusting the Calf-Pad Depth
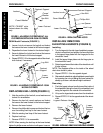
NOTE: The calf-pad depth can be adjusted in one (1) or
both of the following manners:
1. The pivot bracket can be mounted in a FOR-
WARD or REARWARD position. For further calf-
pad depth adjustment, the pivot bracket can be
removed. See Note 2A.
2. The calf-pad bracket (which is mounted to the
pivot bracket) can be mounted in a FORWARD
or REARWARD position.
A. If the pivot bracket is removed, the calf-pad
brackets are mounted directly to the legrest
tube, this will be referred to as the DIRECT
MOUNT METHOD in this instruction sheet.
1. Perform one (1) of the following:
A. If pivot bracket method is desired, proceed to
AD-
JUSTING THE CALF-PAD DEPTH USING THE
PIVOT BRACKET in this procedure of the manual.
B. If direct mount method is desired, proceed to
ADJUSTING THE CALF-PAD DEPTH USING
THE DIRECT MOUNT METHOD in this proce-
dure of the manual.
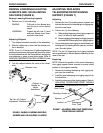
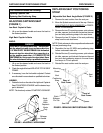
ADJUSTING THE CALF-PAD DEPTH USING
THE PIVOT BRACKET (FIGURES 20 AND 21).
1. Remove the calf-pads. Refer to
REMOVING/INSTALL-
ING THE CALF PADS in this procedure of the manual.
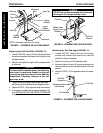
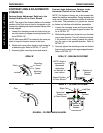
2. Remove the center mounting screw, nylon spacer,
small washer, and locknut that secure the calf-pad
mounting bracket to the pivot bracket (FIGURE 21).
3. Remove the other mounting screw, small washer
and locknut that secure the calf-pad mounting
bracket to the pivot bracket (FIGURE 21).
4. Repeat STEPS 1-3 for other calf-pad bracket.
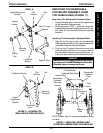
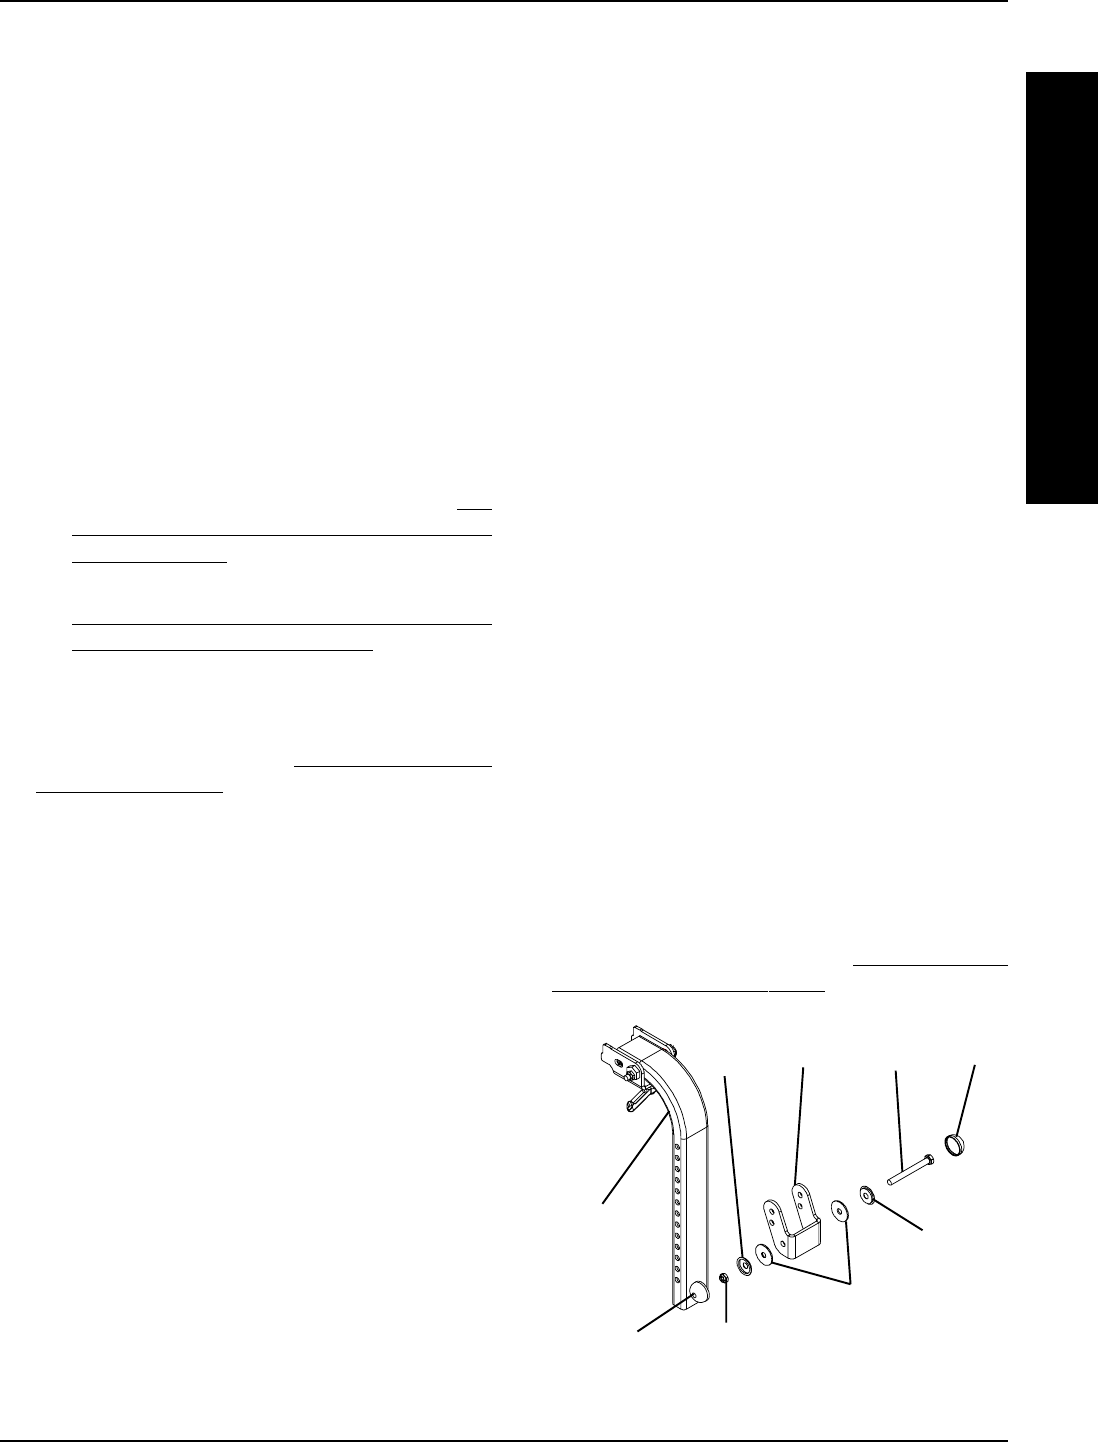
Legrest
Tube
Large
Washers
Caplug
Washer
Mounting
Bolt
Hub
Cap
Caplug
Washer
Locknut
Hub Cap
Pivot
Bracket
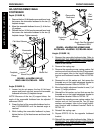
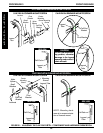
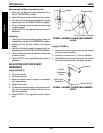
5. Perform one (1) of the following:
A. If changing the mounting orientation of the pivot
bracket, perform the following steps (FIGURE 20):
l Remove the two (2) hub caps from the pivot
bracket.
l Remove the mounting bolt, two (2) caplug
washers, two (2) large washers and locknut
that secure the pivot bracket to the legrest tube.
l Reposition the pivot bracket on the legrest tube
in the FORWARD or REARWARD position.
l Secure the pivot bracket to the legrest tube in
the position determined above with the mount-
ing bolt, two (2) caplug washer, two (2) large
washers and locknut. Securely Tighten.
l Reinstall the two (2) hub caps onto the mount-
ing bolt and locknut.
B. If NOT changing the mounting orientation of the
pivot bracket and only changing the calf pad
mounting brackets, proceed to STEP 6.
6. Position calf-pad mounting bracket on pivot bracket
in the desired orientation (FIGURE 21).
7. Secure the calf-pad mounting bracket to the pivot
bracket with the EXISTING center mounting screw,
nylon spacer, small washer, and locknut in the ori-
entation determined in STEP 6. Securely Tighten
(FIGURE 21).
8. Secure the calf-pad bracket to the pivot bracket
with the other mounting screw, small washer and
locknut in the orientation determined in STEP 6.
Securely tighten (FIGURE 21).
9. Install the calf-pads. Refer to
REMOVING/IN-
STALLING THE CALF-PADS in this procedure of
the manual.
FIGURE 20 - ADJUSTING THE CALF-PAD DEPTH
USING THE PIVOT BRACKET - CHANGING THE
MOUNTING ORIENTATION OF THE PIVOT BRACKET
F
R
O
N
T
R
I
G
G
I
N
G
S
FRONT RIGGINGS PROCEDURE 3