


35
B
A
C
K
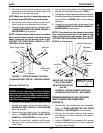
BACK PROCEDURE 3
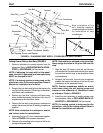
5. Reinstall the hex bolts that secure the back
angle plates to the wheelchair frame. Make sure
the back is at the desired angle.
NOTE: Make sure the four (4) back angle plates are
at the same angle BEFORE using the wheelchair
6. Secure the back angle brackets to the wheel-
chair frame with the washers and locknuts.
7. Reinstall the rear wheels onto the wheelchair. Refer
to REMOVING/INSTALLING REAR WHEELS in
PROCEDURE 6 of this manual.
NOTE: If the wheelchair has become less stable
after repositioning the back to the desired seat
depth, reposition the rear wheels. Refer to AD-
JUSTING THE WHEELBASE LENGTH in PRO-
CEDURE 6 of this manual.
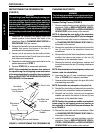
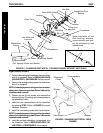
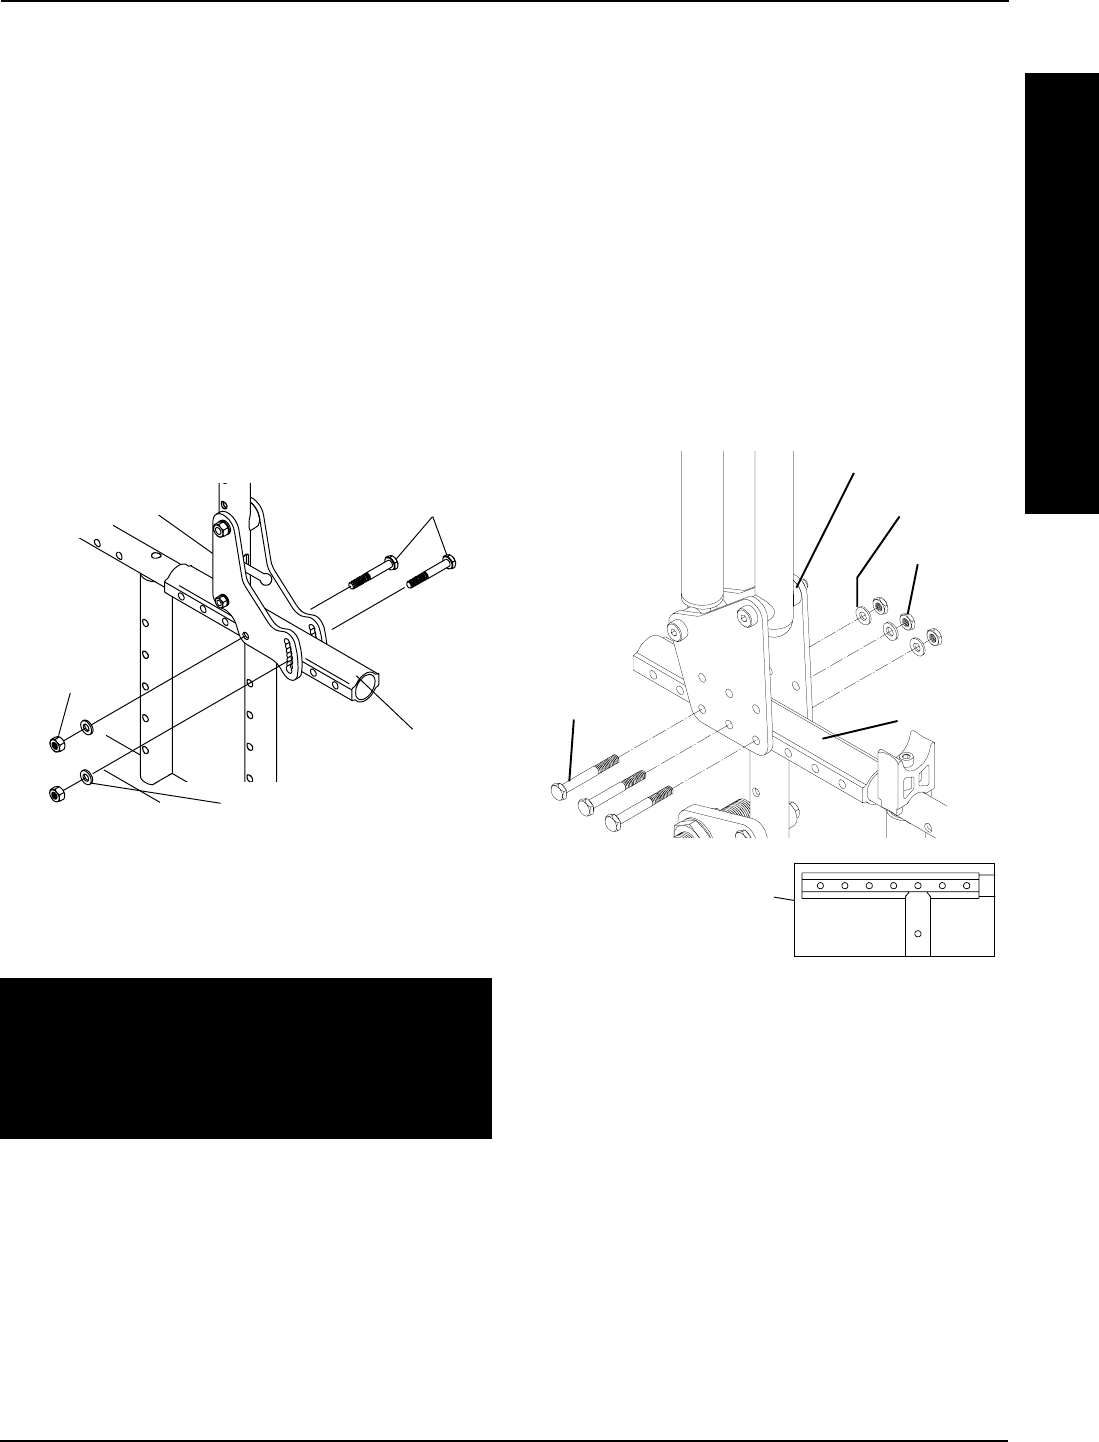
4. Line up the mounting holes in the recliner brackets
with the mounting holes determined in STEP 1.
5. Reinstall the hex bolts, washers and locknuts through
the recliner brackets and wheelchair frame and tighten
securely. Refer to FIGURE 18 for correct hardware
orientation.
6. Reinstall the rear wheels onto the wheelchair. Refer
to REMOVING/INSTALLING REAR WHEELS in
PROCEDURE 6 of this manual.
NOTE: If the wheelchair has become less stable
after repositioning the back to the desired seat
depth, reposition the rear wheels. Refer to AD-
JUSTING THE WHEELBASE LENGTH in PROCE-
DURE 6 of this manual.
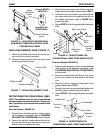
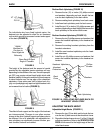
Locknut
Back Angle Plate
Wheelchair
Frame
Washer
Hex Bolt
FIGURE 17 - REPOSITIONING THE BACK
(CHANGING SEAT DEPTH) - NON-RECLINERS
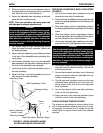
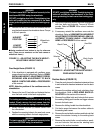
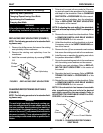
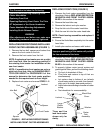
Recliners (FIGURE 18)
WARNING
NEVER use the rear two (2) recliner bracket
mounting holes when using the recliner option.
Using the rear two (2) recliner bracket mount-
ing holes WILL make the wheelchair less stable,
possibly causing injury.
1. Determine the necessary back position for the
desired seat depth of the wheelchair. Refer to
CHANGING SEAT DEPTHS in PROCEDURE
10 of this manual.
2. Remove the rear wheels from the wheelchair.
Refer to REMOVING/INSTALLING REAR
WHEELS in PROCEDURE 6 of this manual.
3. Remove the hex bolts, washers and locknuts
that secure the recliner brackets to the wheel-
chair frame.
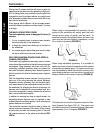
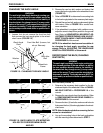
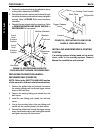
REPOSITIONING BACK FOR 2 OR 3-INCH
SEAT CUSHION - RECLINERS ONLY
(FIGURE 19)
1. Remove the rear wheels from the wheelchair.
Refer to REMOVING/INSTALLING REAR
WHEELS in PROCEDURE 6 of this manual.
2. Remove the hex bolts, washers and locknuts
that secure the recliner brackets to the wheel-
chair frame.
3. Refer to FIGURE 19 to determine the recliner
bracket mounting position for the correspond-
ing seat cushion height.
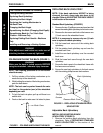
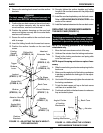
Hex Bolts
Locknuts
Washers
Wheelchair
Frame
Recliner Brackets
FIGURE 18 - REPOSITIONING THE BACK
(CHANGING SEAT DEPTH) - RECLINERS
X
X
NEVER USE THE REAR
TWO (2) RECLINER
BRACKET MOUNTING
HOLES