


3
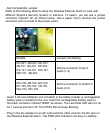
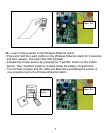
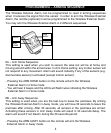
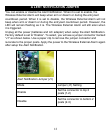
- Set Compatibility Jumper:
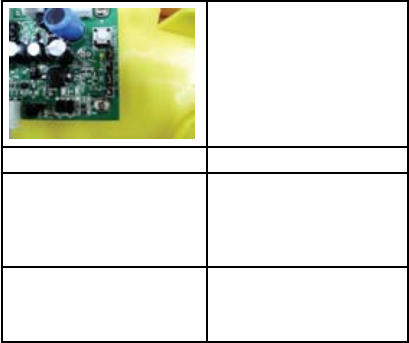
Refer to the following table to setup the Wireless External Alarm to work with
different Skylink’s Security System or Sensors. To select, you will see a jumper
connector marked “J2” as shown below. Use a paper clip to remove the jumper
connector and re-locate to the proper posts.
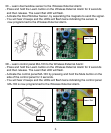
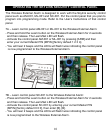
- Insert 3 AA-size batteries (not included) to the battery holder or rechargeable
battery pack (included) to the unit. Insert the rechargeable battery pack to
the black connector marked “NiMH” as shown. The Learn/Set LED will turn on
for 1 second and then off. The PWR LED will keep flashing.
- Plug in the AC adapter to an AC outlet and the other end into the DC jack on
the Wireless External Alarm. The PWR LED indication will stay on steadily.
Models Jumper (J2) Setting
SC-001, AM-001, ML-001,
4B-101, GS-101, KP-434,
PS-101, VS-101, WA-101,
WD-101, 4B-434
Set the connector to top 2
posts (1-2)
MA-103, 4B-103, GS-103,
KP-103, PS-103, VS-103,
WA-103, WD-103
Set the connector to bottom 2
posts (2-3)