


Part No. 1110547 37 Tracer® EXI
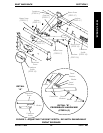
SECTION 8ANTI-TIPPERS/WHEEL LOCKS
ANTI-TIPPERS/WHEEL LOCKS
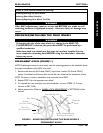
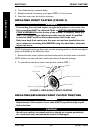
USING/ADJUSTING THE DISK WHEEL LOCKS
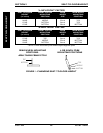
USING THE PATIENT OPERATED DISK WHEEL LOCKS
(FIGURE 3)
WARNING
DO NOT attempt to stop a moving wheelchair with the wheel locks.
WHEEL LOCKS ARE NOT BRAKES - otherwise injury or damage may
occur.
NOTE: Position wheelchair on a flat, level surface to perform this procedure.
1. Ensure the wheelchair is not moving before engaging the wheel locks.
2. Perform one (1) of the following:
A. Push-to-Lock - To engage, push the wheel lock handle foward.
B. Pull-to-Lock - To engage, pull the wheel lock handle backward.
3. Disengage the wheel locks by reversing STEP 2.
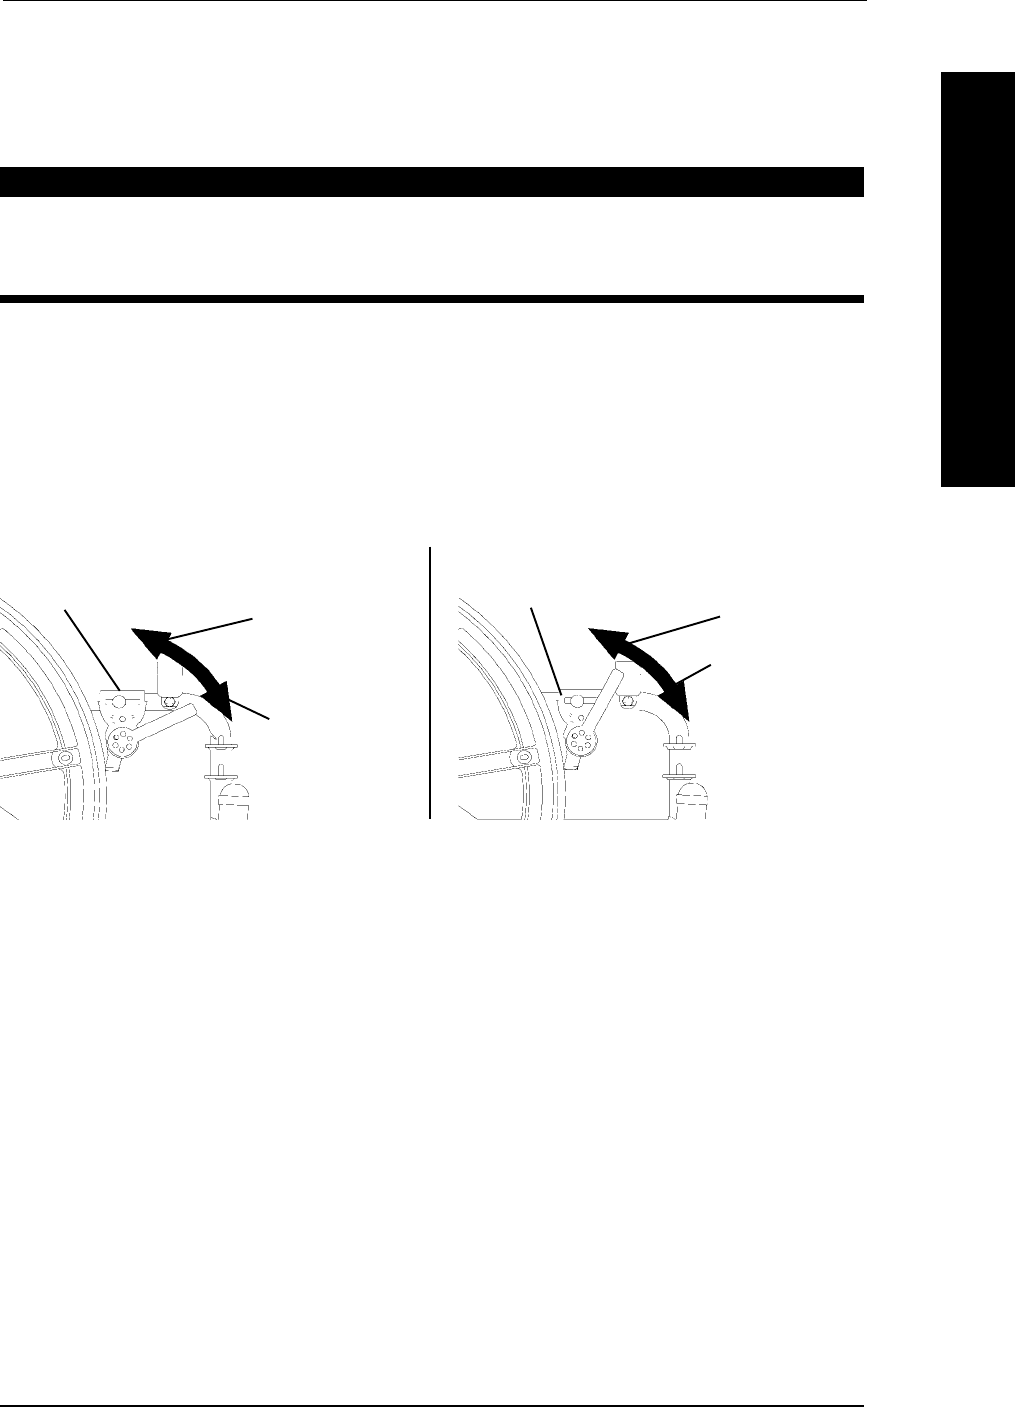
FIGURE 3 - USING THE DISK WHEEL LOCKS
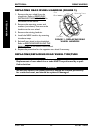
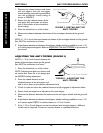
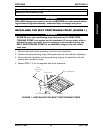
ADJUSTING THE DISK WHEEL LOCKS (FIGURE 4)
NOTE: If wheels are pneumatic, before adjusting or replacing the wheel lock assemblies, ensure
that the tires are inflated to the recommended psi on the side wall of tire. The recommended tire
pressure is located on the side wall of the tire.
1. Disengage the wheel locks.
2. Loosen the bolt and locknut that secure the wheel lock to the wheelchair frame.
3. Reposition the wheel lock so that when engaged, the wheel lock shoe embeds the
tire 1/8-inch (3/16-inch for pneumatic tires) and HOLDS the occupied wheelchair in
place when pushed.
4. Securely tighten the bolt and locknut attaching the wheel lock to the wheelchair
frame.
5. Engage the wheel lock.
6. Measure the distance the wheel lock is embedded into the tire as shown in DETAIL
"A" of FIGURE 4.
PULL TO LOCK
UNLOCKED
POSITION
LOCKED
POSITION
Wheel Lock
PUSH TO LOCK
UNLOCKED
POSITION
LOCKED
POSITION
Wheel Lock