


3G Storm Series
®
Wheelchairs 100 Part No. 1104849
SECTION 13 ELECTRONICS
This Section Includes the Following:
Repositioning MKIV Joystick - Van Seat Models
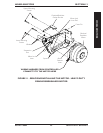
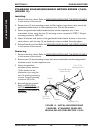
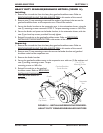
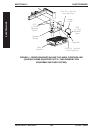
Removing/Installing the MKIV Controller
WARNING
After ANY adjustments, repair or service and BEFORE use, make sure
that all attaching hardware is tightened securely - otherwise injury or
damage may result.
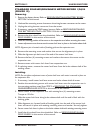
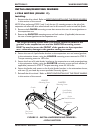
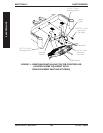
REPOSITIONING MKIV JOYSTICK - VAN SEAT MODELS
(FIGURE 1)
1. Turn the lever on the adjustment lock to release the adjustment lock from joystick
mounting tube.
2. Remove the joystick mounting tube from wheelchair.
3. Remove the three (3) hex bolts, spacers and locknuts that secure joystick mounting
bracket to armrest plate.
4. Remove the phillips screws that secures the front of the armrest pad to the armrest plate.
5. Remove the phillips screw that secures the rear of the armrest pad and armrest
insert to the armrest plate.
6. Remove the armrest pad from the armrest plate.
7. Remove the lug bolt, washers and locknut that secure the existing armrest plate to
the armrest weldment.
8. Repeat STEPS 4-7 for opposite
side of the wheelchair.
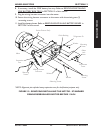
9. Position armrest plate with
joystick mounting holes on
desired side of armrest weldment
and secure with lug bolt, washers
and locknut. Refer to FIGURE 1
for correct hardware orientation.
10. Position armrest plate without
joystick mounting holes on
opposite side of the armrest
weldment and secure with lug
bolt, washers and locknut.
Refer to FIGURE 1 for correct
hardware orientation.
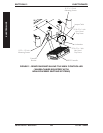
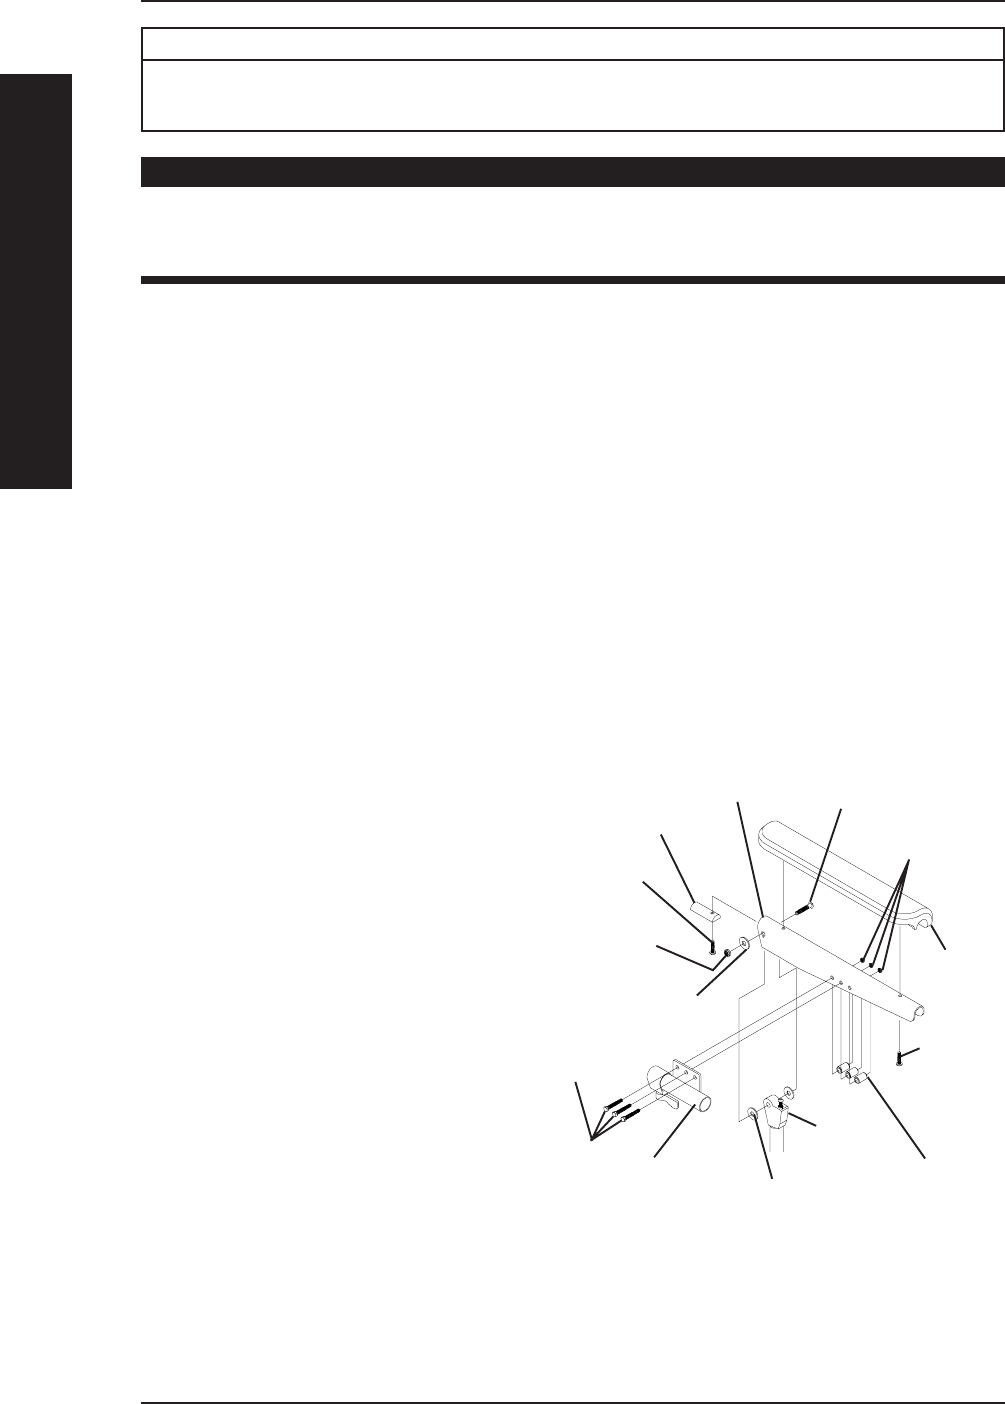
FIGURE 1 - REPOSITIONING MKIV
JOYSTICK - VAN SEAT MODELS
Locknuts
(STEPS 3,16)
Phillips
Screws
(STEPS 4,
14)
Lug Bolt (STEPS 7, 9)
Joystick Mounting
Bracket
(STEPS 3, 16)
Hex Bolts
(STEPS 3, 16)
Spacers
(STEPS 3, 16)
Armrest Insert
Phillips Screw
(STEPS 5, 13)
Armrest Pad
Armrest Plate
Washer
(STEPS 7, 9)
Locknut
(STEPS 7, 9)
Washers
(STEPS 7, 9)
Armrest
Weldment
ELECTRONICS