Install Electronics Box and LCM
Early XP carts have two mounting holes and new XP
carts have three mounting holes. Complete steps 1
and 2 to drill a third mounting hole for the pressure
monitor kit. Complete step 2 if you have a new XP
cart.
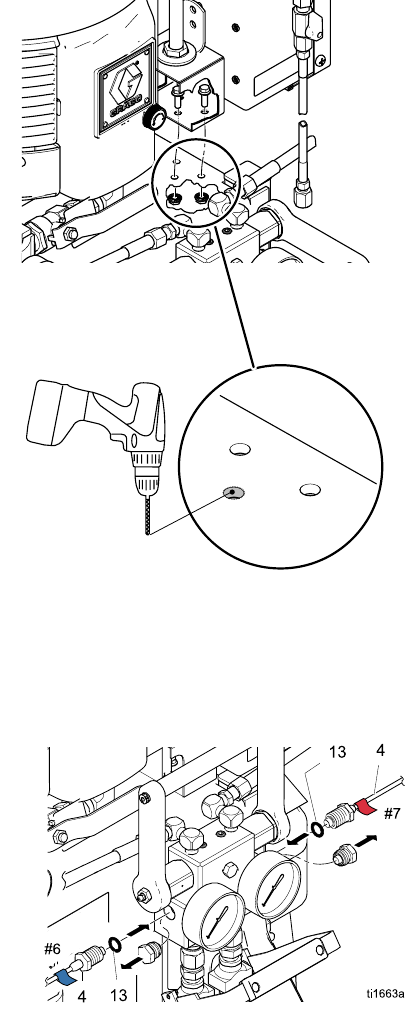
1. Early XP carts with two mounting holes
a. Use two screws (61) and two nuts (62) to
mount the electronics box to the top of the
cart.
b. Use a marker to mark the bracket’s third
mounting hole.
c. Loosen the nuts (62) below the cart shelf and
remove the screws (61), and box bracket.
Center punch and drill a 5/16 in. hole in the
top of the cart.
2. New XP carts with three mounting holes.
a. Use three screws (61) and three nuts (62) to
mount the box bracket to the cart.
b. For power supply kits, install the appropriate
power supply cord(s). US, European, and
Australia/Asia cord adapters are supplied.
See Technical Data, page 29.
Early XP Cart Installation
Figure 9
Insta
ll Pressure Transducers
1. Remove plugs from the circulation manifold.
Note
Keep plugs if you will ever remove the
pressure monitor kit.
2. Connect pressure transducer (4), with blue
#6 label, with black o-ring (13) to the A side
of the circulation manifold. Connect pressure
transducer (4), with red #7 label, with black o-ring
(13) to the B side of the circulation manifold.
Tighten to 40–50 ft-lb (54–67 N•m) before
applying fluid pressure.
Pre
ssure Transducers
Fig
ure 10
3A1331C 9


