


Steps Do This
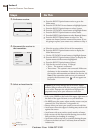
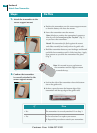
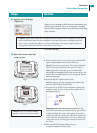
14. Check the sensor support
mount.
a. Conrm the sensor support mount remains tightly
adhered to your skin by sliding your nger along the
edges of the adhesive pad and examine for any gaps
in adhesion.
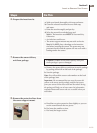
b. Examine the area for a drop of blood. You may
see some blood from the insertion site. If there is
continuous bleeding that does not stop in a few
minutes even aer blotting with a clean cloth or
swab, repeat the procedure from Step 2 to remove the
sensor support mount, select a new site and insert a
NEW sensor.
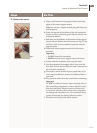
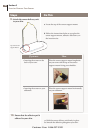
c. Use a mirror to check that sensor is correctly placed.
Sensor is correctly placed. You will see the
tip of the sensor is inserted under the skin
and the sensor is ush against the top edge
of the sensor support mount.
Sensor is missing.
1. Remove sensor support mount.
2. Go to Step 1 to insert a new sensor.
If en
Customer Care: 1-866-597-5520
42 Section 5
Insert or Remove Your Sensor