53
ENGLISH DEUTSCH
Weiterführende FunktionenAdvanced Recording
●
DATE/TIME
✤ The DATE/TIME function works in CAMERA and PLAYER modes.
✤ The date and time are automatically recorded on a special data area of
the tape.
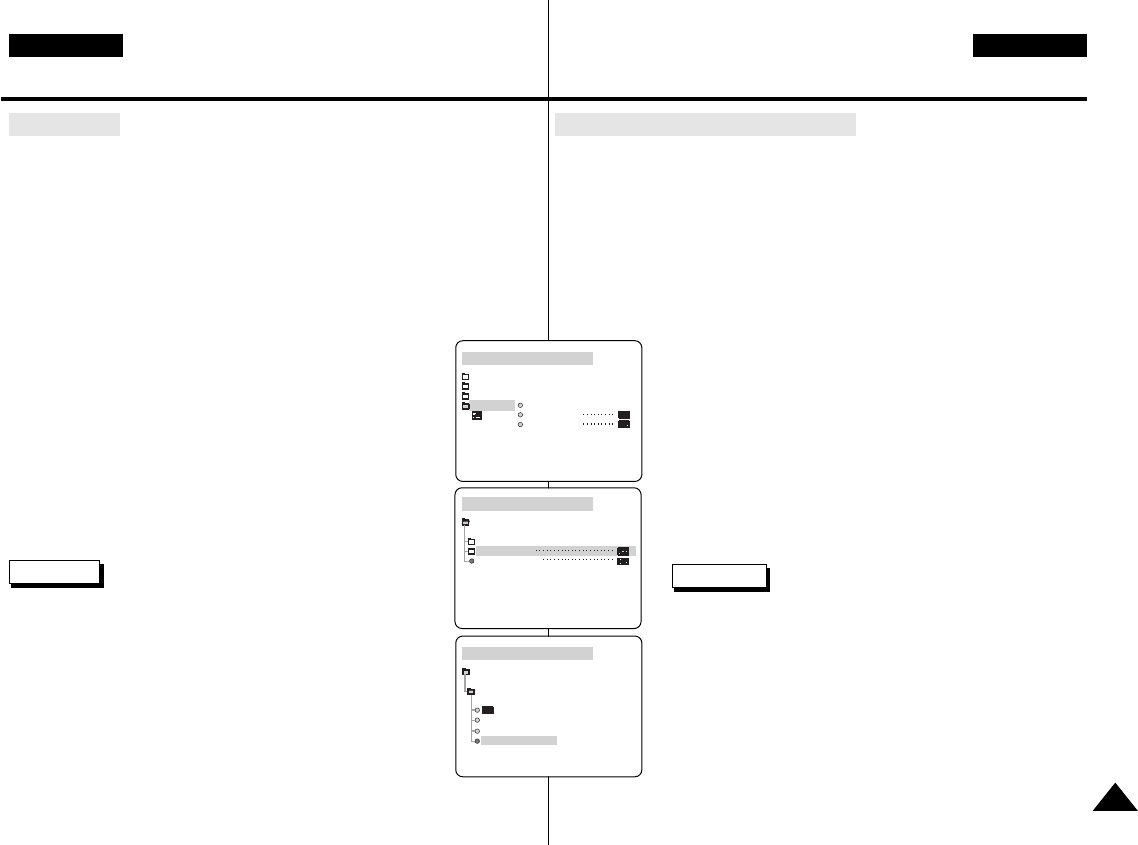
1. Press the MENU button.
■
The menu list will appear.
2. Turn the MENU DIAL to highlight VIEWER and press the ENTER button.
3. Turn the MENU DIAL to highlight DATE/TIME.
4. Press the ENTER button to select the sub-menu.
5. Using the MENU DIAL, select the DATE/TIME mode.
■
You can choose to display - the OFF, DATE, TIME,
DATE/TIME.
–
OFF only
–
DATE only
–
TIME only
–
DATE & TIME
■
To return to the previous menu, highlight the DATE/TIME
in the middle of the menu and press the ENTER button.
6. To exit, press the MENU button.
Reference
■
The DATE/TIME is not affected by the OSD ON/OFF
(DISPLAY) button.
■
The DATE/TIME will read “- - -” in the following conditions.
- During playback of a blank section of a tape.
- If the tape was recorded before setting the DATE/TIME in
the Camera’s memory.
- When the battery becomes weak or dead.
■
Before you can use the DATE/TIME function, you must set
the clock. See CLOCK SET on page 37.
CAM MODE
VIEWER SET
LCD ADJUST
DATE / TIME
TV DISPLAY
CAM MODE
INITIAL
LCD ADJUST
DATE / TIME
TV DISPLAY
CAMERA
A/V
VIEWER
CAM MODE
DATE / TIME
VIEWER SET
DATE
TIME
DATE&TIME
●
DATE/TIME (Datum und Uhrzeit)
✤ Die Funktion DATE/TIME ist im CAMERA- und PLAYER-Modus
verfügbar.
✤ Datum und Uhrzeit werden automatisch auf einem speziellen
Datenbereich des Bands aufgezeichnet.
1. Drücken Sie die Taste MENU.
■
Das Menü erscheint.
2. Wählen Sie mit dem Menü-Einstellrad die Option VIEWER und drücken Sie
dann die Taste ENTER.
3. Wählen Sie mit dem Menü-Einstellrad dir Option DATE/TIME.
4. Drücken Sie ENTER, um das Untermenü aufzurufen.
5. Wählen Sie mit dem Menü-Einstellrad den gewünschten
Anzeigemodus für Datum und Zeit.
■
Sie können einstellen, ob nur das Datum, nur die Uhrzeit
oder beides angezeigt (und aufgezeichnet) wird.
–
Keine Anzeige (OFF)
–
nur Datum (DATE)
–
nur Zeit (TIME)
–
Datum und Zeit (DATE/TIME)
■
Um zum vorherigen Menü zurückzukehren, markieren
Sie DATE/TIME in der Mitte des Menüs und drücken Sie
die Taste ENTER.
6. Um das Menü auszublenden, drücken Sie die Taste MENU.
Hinweise
■
Datum und Uhrzeit werden nicht mit den Monitoranzeigen
(über die Taste DISPLAY) ein- und ausgeblendet.
■
Wenn für Datum und Uhrzeit die Anzeige “– – –” erscheint,
– wird ein Bandbereich ohne Aufnahmen wiedergegeben;
– wurde die Aufnahme vor Einstellung von Datum/Uhrzeit
erstellt;
– ist die Lithiumbatterie des Camcorders leer.
■
Bevor Sie die Funktion DATE/TIME verwenden können,
müssen Sie die Uhr stellen. Siehe CLOCK SET auf
Seite 37.
00511F VP-D80 UK+GER (28~59) 2/10/03 11:38 AM Page 53


