59
Press to exit the pop-up menu without inserting a sound.
9. Press the
Options
soft key to complete the message text
and set message send options. The following options
appear in the display:
•
Preview
— View the picture as the recipient will see it.
•
Add Quick Text
— Add pre-computes text to your message.
•
Save As Draft
— Save the message to your Draft folder.
•
Priority
Level
— Choose
High
,
Normal
, or
Low
.
•
Validity Period
— Enter the
Date
when this message will cease to
be valid, then use the Left and Right navigation keys to choose the
Time
.
•
Delivery Ack
— Choose
On
or
Off
— Requests confirmation when
your message is received.
•
Remove Pic
— Remove the picture from your message.
•
Remove Sound
— Remove the sound file from your message.
•
Add To Contacts
— Save the recipient’s number or e-mail address
as a Contacts list entry.
Use the Up/Down navigation keys to highlight an option,
then press the key to invoke the option.
10. Press the key to send the message. “
Pic Msg Sending
”
appears in the display and a progress bar indicates the
send status.
Send Picture Messages in Standby Mode
Send Picture messages to recipients with a compatible phone or
other device, and accompany the Picture message with a voice
memo, ring tone, or downloaded melody.
Tip:
You can send a Picture message to up to ten recipients. Enter each
recipient’s address or phone number in a separate
Send To
field of the
Picture message composer.
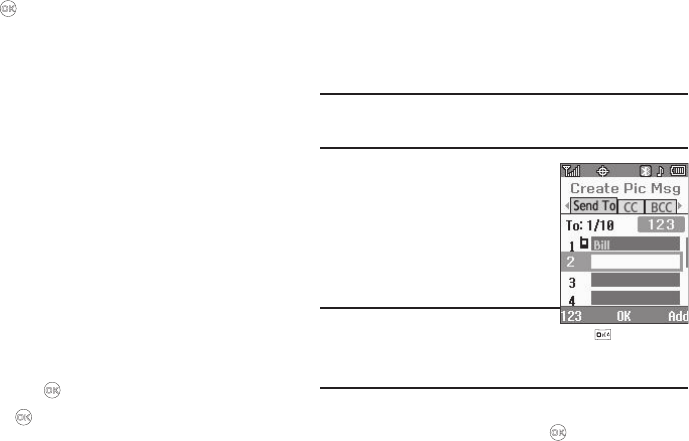
1. In standby mode, select
MENU
➔
Messages
➔
Send Message
➔
Picture Message
.
The
Create Pic Msg
screen then
appears in the display showing the
To:
list.
Tip:
To launch the
Create Pic Msg
screen using a
voice command — In standby mode, press and hold until the phone
prompts, “
Say a command.
” Say “
Send Picture
” into the microphone.
You are then prompted to say a Contact name or a number for the first
recipient of the message.
2. Enter the phone number or e-mail address of the recipient
using the keypad, then press the key.
