


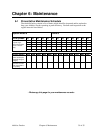
Additive Feeders Chapter 6: Maintenance 41 of 55
6-3 Corrective Maintenance
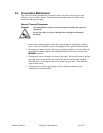
This section provides you with the information necessary to correct or repair any issues
which might appear during the normal operation of your additive feeder. Although we have
listed how to perform these procedures, it is recommended that you call the Service
Department to have any in-depth maintenance performed.
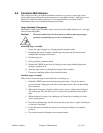
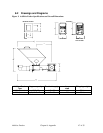
Auger Assembly Changeover
Our additive feeder auger assemblies may be removed and installed without tools. All auger
sizes are interchangeable.
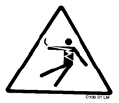
Caution! Disconnect and/or lock out electrical power before removing an auger
assembly or performing any service or maintenance.
Removing Auger Assembly
1. Empty the supply hopper by swinging open the cleanout hatch.
2. Disengage the motor assembly from the auger by removing the motor mount
linchpin and swinging out the motor.
3. Pull the auger out.
4. Swing open the calibration hatch.
5. Release the UHMW auger insert by pulling out the spring loaded plunger and
turning it a quarter turn.
6. Slide the auger insert out through the transport tube assembly.
7. Clean any remaining additive from inside the feeder.
Installing Auger Assembly
Make sure the insert and auger to be installed are a matching set.
1. Slide the UHMW insert into the material transport tube. Line up the insert’s
groove with the locking pin in the side of the transport tube. Be sure the locking
pin is retracted.
2. When the locking pin is aligned with the insert’s groove, release the locking pin.
The locking pin will ride in the groove as the insert is pushed into the transport
tube.
3. When the insert is in place, the locking pin will snap into a retaining slot in the
insert’s guide groove.
4. Insert the matching auger into the insert and line up the motor coupler with the pin
on the end of the auger.
5. Fasten the motor assembly into place by restoring the linchpin to its original
position.
6. Close and secure the calibration and cleanout hatches.