


Kids UP Series www.pridemobility.com 33
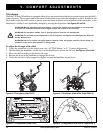
BOLTS
BOLTS
WARNING! Avoid serious injury. Do not
place items with strings around your
child’s neck, suspend strings from the
wheelchair, or attach strings to toys.
WARNING! Positioning belts should
never be used for securement in motor
vehicles. An additional automotive-
rated seat belt is required.
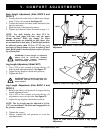
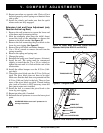
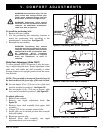
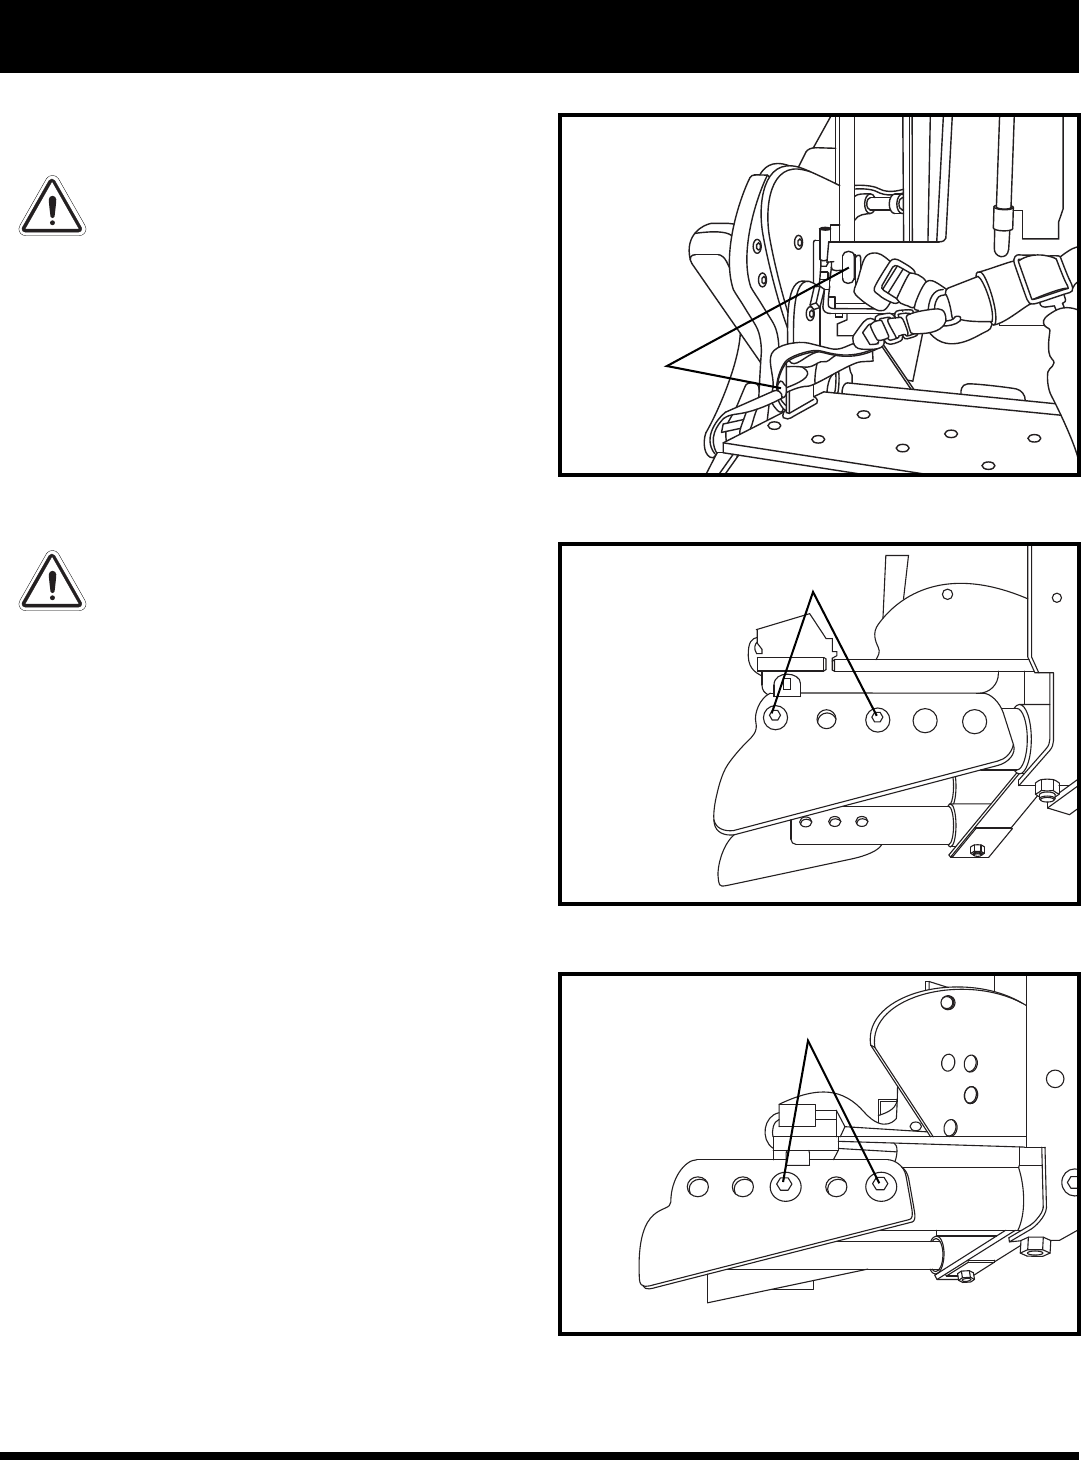
To install the positioning belt:
1. Remove the seat cushion.
2. Use the positioning belt anchoring locations to
attach the positioning belt, according to the
manufacturer’s instructions. See figure 53.
3. Reinstall the seat cushion.
WARNING! Positioning belt should
never be used for securement in motor
vehicles. The wheelchair does not ship
equipped with a WC-19 compliant belt.
An additional WC-19 compliant
automotive-type seat belt is required
when the wheelchair is used in
vehicles.
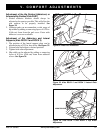
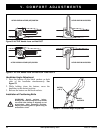
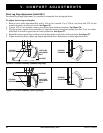
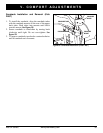
Glide Rest Adjustment (Kids FAST)
To allow optimal ACTIVE function, it may be neces-
sary to adjust the glide rests. Proper adjustment of the
glide rests will enable the shell assembly to make
stronger returns to an upright position from the exten-
sion position.
NOTE: The seat depth is measured from the front of
the back cushion to the front edge of the seat cushion.
For seat depths 10 in. (25.4 cm) or less, glide rests
must be installed in position 1. See figure 54.
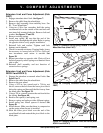
For seat depths 10 in. (25.4 cm) or greater, glide
rests can be installed in position 2. See figure 55.
To adjust glide rests:
1. Remove seat cushion.
2. Remove seat depth adjustment knob. See
figure 28.
3. Remove lower shell assembly from upper shell
assembly.
4. Using a 5/32-in. hex wrench, remove bolts.
5. Install glide rest in desired position then reinstall
bolts and tighten.
6. Repeat on opposite side.
7. Reinstall lower shell assembly, seat depth
adjustment knob, and seat cushion.
V. COMFORT ADJUSTMENTS
Figure 53. Positioning Belt Anchor Locations
Figure 54. Kids FAST Glide Rest in Postion 1
Figure 55. Kids FAST Glide Rest in Position 2
POSITIONING BELT
ANCHORING
LOCATIONS