


26 www.pridemobility.com Kids UP Series
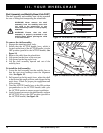
BOLTS
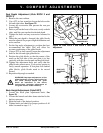
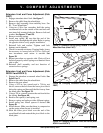
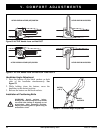
Back Height Adjustment (Kids ROCK 2 and
ROCK 3)
1. Loosen the bolts on the four (4) back cane clamps,
using 7/16-in. hex wrench. See figure 31.
2. Loosen the laterals and other items attached to the
back as necessary.
3. Slide the back to the desired position.
4. Tighten and check all items loosened in steps 1-3.
NOTE: For back heights less than 22.5 in.
(57.15 cm), back plates will have only the upper
clamps attached. While the clamps for lower
attachment points are installed on back canes, they
are not attached to back plate. If back height needs to
be adjusted greater than 22.5 in. (57.15 cm), it is
necessary to attach clamps to lower crossbar of back
plate. Back height is measured from surface of seat to
top of back plate.
WARNING! If back height is adjusted
above 22.5 in. (57.15 cm) without
installing lower clamps, instability
and/or breakage will occur.
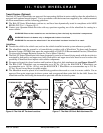
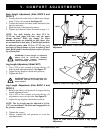
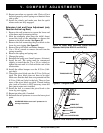
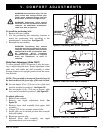
Leg Length Adjustment (Kids FAST)
1. Use a 5/32-in. hex wrench to loosen the two (2)
bolts in each adjustment block. See figure 32.
2. Adjust the leg length to the desired position.
3. Tighten the bolts.
WARNING! Some footrest settings can
cause the footrest to collide with the
front casters.
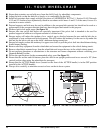
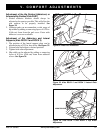
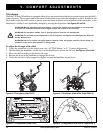
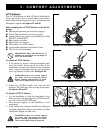
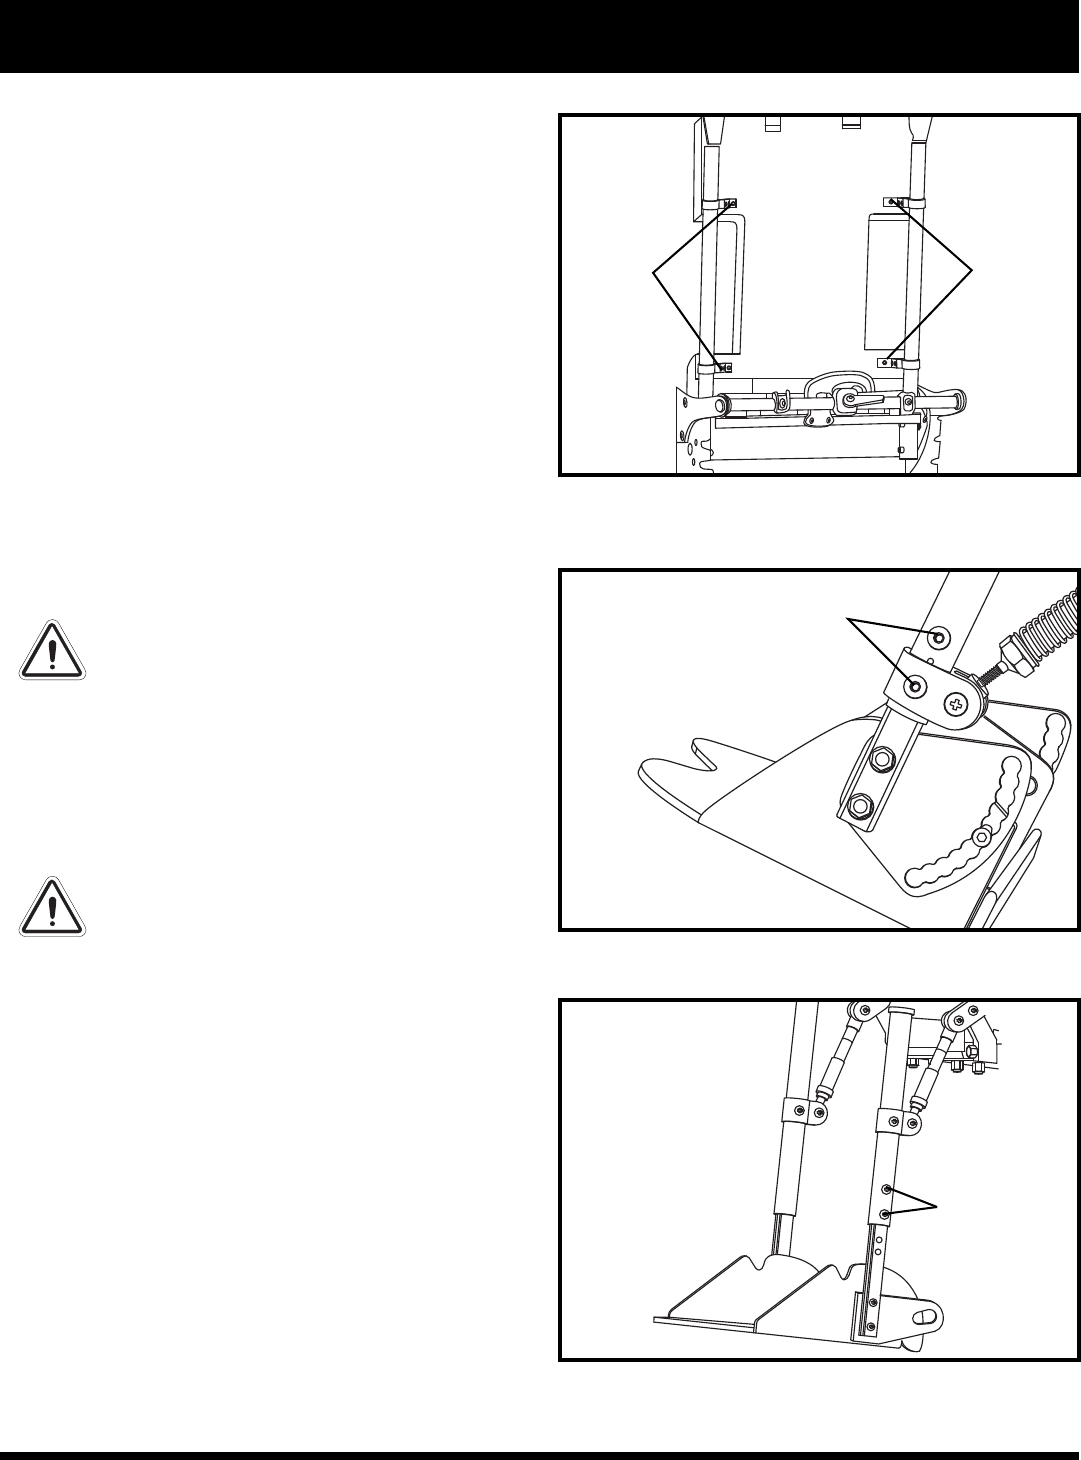
Leg Length Adjustment (Kids ROCK 2 and
ROCK 3)
1. Remove the fabric calf protector to expose the leg
length adjustment bolts.
2. Use a 5/32-in. hex wrench to loosen the two (2)
adjustment screws on each side. See figure 33.
3. Adjust the leg length to the desired position.
NOTE: The leg length must be adjusted in 0.5-in.
(1.27-cm) increments. The bolts must engage holes in
the footrest extensions.
4. Tighten the screws.
5. Always reinstall the calf protector to cover the
adjustment bolts.
V. COMFORT ADJUSTMENTS
Figure 31. Kids ROCK 2 and ROCK 3 Back Height
Adjustment
Figure 32. Kids FAST Leg Length Adjustment
Figure 33. Kids ROCK 2 and ROCK 3 Leg Length
Adjustment
BOLTS
BOLTS
ADJUSTMENT
SCREWS